40
Connected Lighting
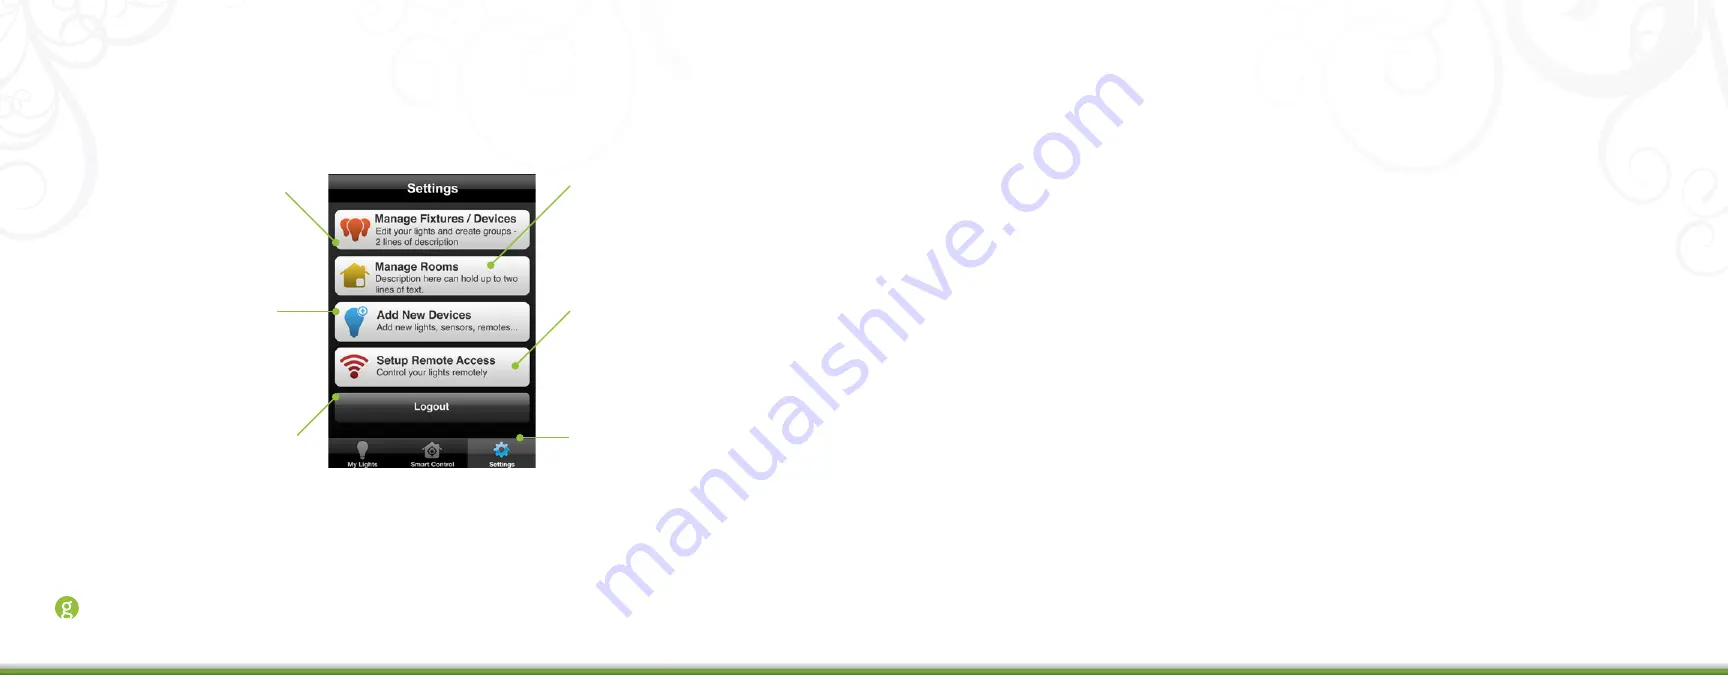
You can also access this page if you want to set up your online account for remote access to your lighting
network (discussed in the Installation and Setup chapter) or to log out of the application.
Creating a New Room
You can create rooms to represent the physical rooms in your home and group their corresponding lights.
Manage rooms -
Tap to
perform such tasks as create
a new room, rename a room,
change a room color, and
organize lights into a room.
Set up remote access -
Tap
to set up your online account
to access your lighting network
remotely (discussed in the
Installation and Setup chapter).
Settings menu -
Tap to
access this page.
Your lights and fixtures -
Tap
to view the list of all lights
and fixtures on your network,
create a new fixture, or edit
settings for a light or fixture.
Add new lights -
Tap if you
have added a new light bulb
to your network and need to
have the application connect
it to the Gateway.
Log out -
Tap to log out of the
application.
To create a room:
1. Tap the
Settings
menu at the bottom of the page.
2. When the
Settings
page opens, tap
Manage Rooms
.
3. When the
Manage Rooms
page opens, tap
Create New Room
.
4. On the
Create New Room
page:
a.
Tap
Enter Room Name
to type a name for your new room.
b.
Tap
Edit Color
to select a color to represent the room.
c.
Under
Lights
, select the lights and fixtures located in the room you are creating, or tap
Add More Lights
if you added new light bulbs that have not yet been assigned to a room.
d. When you finished setting the room properties, tap
Save
.
Editing a Room
To edit a room, including the lights and fixtures assigned to the room:
1. Tap the
Settings
menu at the bottom of the page.


