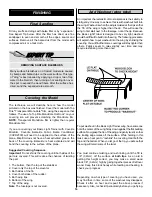
Fill any scuffs and dings with balsa filler or by “expansion.”
See Expert Tip below. After the filler has dried, use fine
sandpaper to even and smooth all the edges, seams and
surfaces. Remove all the balsa dust from the model with
compressed air or a tack cloth.
The technique we will describe here is how the model
pictured on the box was finished. Cover the model with Top
Flite
®
Transparent MonoKote
®
film, using the sequence that
follows. The use of a Top Flite MonoKote Hot Sock
™
on your
covering iron will prevent scratching the MonoKote film.
NOTE
: Transparent MonoKote film is lighter than regular
MonoKote film.
If you are covering your Basic Light Trainer with Coverite
Micafilm, Coverite Balsarite Fabric Balsa Conditioner
(COVR2500) will need to be applied to the surface of the
plane. Micafilm does not have a heat activated glue on the
back of the covering. Balsarite is heat activated and will
bond the covering to the surface of the plane.
Suggested Covering Sequence
Important:
Do not shrink the covering until both sides of the
part are covered. This will reduce the chances of twisting
the part.
1. The bottom, then the top of the stabilizer
2. Cover only the top of the elevator
3. Both sides of the fin
4. Cover both sides of the rudder
5. Both wing tips
6. Bottom of the wing
7. Top of the wing
Note
: The fuselage is not covered.
An important characteristic of most airplanes is their ability to
stall gently. One way to achieve this is with washout built into
the wing. Washout is when the wing is twisted at the tips so that
the TE of the wing is higher than the LE. This will cause the
wing to first stall next to the fuselage, not at the tip. Because
the Basic Light Trainer is designed to be very light, washout
would be difficult to build into the wing. The following procedure
will explain how to put washout into the wing by shrinking the
covering. You will find that some coverings will stay tighter than
others. Fabrics seem to relax slightly over time and may
require reshrinking more than once.
To put washout in the Basic Light Trainer wing, have someone
hold the center of the wing firmly down against the flat building
surface. Now grasp the tip of the wing and gently twist it so that
the trailing edge raises off the surface. While holding in this
twist, use a heat gun to “reshrink” the covering. Heat both the
top and the bottom. When you let go of the tip, you will see that
the wing will retain some of the twist.
You must continue twisting and re-shrinking until the TE is
1/8" (3.2mm) off the surface
at both tips
. As an aid in
getting this height correct, you may make a small wood
block 1/8" (3.2mm) high by gluing together pieces of leftover
wood. Keep this block handy while twisting and heating, to
check your progress.
Depending on what type of covering you have used, you
may find that, in time, some of the washout may disappear.
Check it after an hour and repeat the above process if
necessary. Also, recheck it periodically before you go flying.
Add Washout (wing twist)
Covering the Model
Many surface blemishes on a framed model are caused
by bumps and balsa chips on the work surface. This type
of “ding” is best repaired by applying a drop or two of tap
water to the blemish, then running a hot sealing iron over
the spot to expand the wood fibers. After the surface has
dried, sand the expanded area smooth.
REMOVING SURFACE BLEMISHES
Final Sanding
FINISHING
14
Содержание BLT
Страница 24: ...TWO VIEW...

