161
set
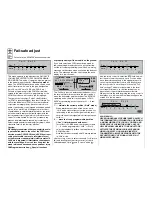
” line you can set “yes” or “no” to determine whe-
ther all the timers – with the exception of the “Model
timer” and the “Battery timer” – are to be reset auto-
matically when the transmitter is switched on.
The “
Auto trim
” option provides a fast, straightfor-
ward method of trimming a model … and also to
knock it out of trim again if you accidentally move the
selected Auto-Trim switch. For this reason you should
only assign a switch to this function just before the
fi rst fl ight of a new model – the most suitable one is
the momentary switch SW 8 – and then erase the as-
signment again immediately after the trimming fl ight.
When assigning the switch please ensure that the
sticks for functions 2 … 4 are at their neutral position.
Regardless of this, the “Auto-trim” function can be
set to apply to all fl ight phases, or separately in each
fl ight phase. This depends on your settings in the
»
Stick mode
« menu (“global / “phase”).
You would then operate the auto-trim switch in fl ight
once you have brought the model to the desired fl ight
attitude using the two dual-axis sticks. At the moment
the switch is operated, the software records the devi-
ations of the sticks 2 … 4 (aileron*, elevator and rud-
der) from the neutral position, and adopts them as
the new trim values. However, the change takes place
over a period of about one second, rather than in-
stantly, giving you plenty of time to return the sticks to
the normal position.
* Please read the note relating to this on page 65.
The next menu is ...
»Model type« (page 70)
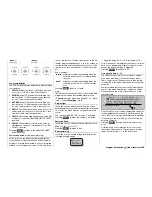
M O D E L T Y P E
Tail type
Aileron/camber flaps
Brake
SEL
Offset
+100%
Input 1
Normal
1 AIL
Motor on C1
None
... in which you select the basic arrangement of the
servos in the model, and inform the transmitter of
your choice.
The following options are available:
Motor on C1
: • “None”: trim works in all positions of
the stick, and the “Brake settings”
sub-menu of the »
Wing mixers
«
menu (see section starting on page
110) is available without restriction.
• “Throttle min. forward or back”: the C1
trim works over the idle range only.
If the throttle stick is too far in the di-
rection of full-throttle when you switch
the transmitter on, you are alerted to
the danger with the warning message
“Throttle too high”; see page 22.
In parallel with this, the “Brake set-
tings” sub-menu of the »
Wing mi-
xers
« menu (see section starting
on page 110) is only available if you
have entered “none” for the currently
active fl ight phase in the “Motor” line
of the »
Phase settings
« menu; see
page 100.
Tail
:
“Normal”, “V-tail”, “Delt/fl .wing” or “2
EL Sv 3 + 8”
(If you select a V-tail, but the control
surfaces move incorrectly when you
apply elevator and rudder commands,
please refer to the notes in the ta-
ble in the right-hand column of page
40. The same applies if ailerons and
fl aps work incorrectly.)
Aileron/camber fl aps:
1 or 2 aileron servos and 0, 1,
2 or 4 fl ap servos
Brake
:
Airbrake servo controlled by the C1
stick or by a control connected to In-
put 7, 8 or 9 (»
Transmitter control
adjust
« menu). An associated Offset
value can be entered.
Since we wish to use the C1 stick to operate the bra-
king system, as set up in the “Brake settings” sub-
menu of the »
Wing mixers
« menu, we leave the set-
ting under “Brake” at “Input 1”. At the “Offset” point
you should defi ne the mixer neutral point at the set-
ting at which the braking system is retracted (i. e. in-
active). If the offset is not right at the end of the trans-
mitter travel, the remainder of the travel is a “dead
zone”, i. e. this range of the stick travel has no effect
on any mixers you may have set.
At this point – if not before – you should check that
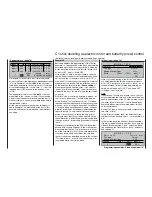
the servos are connected to the receiver in the stan-
dard
Graupner
sequence:
The following settings apply to a model with a “nor-
mal” tail; however, if your model has a V-tail, the set-
tings can be adopted virtually unchanged. If the mo-
del is a delta or fl ying wing the situation is not quite
so simple. A special programming example covering
this model type will be found on page 188.
Programming examples: Fixed-wing model
Battery
Free, or auxiliary function
Free, or auxiliary function, or right fl ap
Free, or auxiliary function, or fl ap, or left fl ap
Right aileron
Rudder
Elevator
Aileron or left aileron
Airbrakes or throttle / speed controller
Batt
9
8
7
6
5
4
3
2
1
10
Free, or auxiliary function
Free, or auxiliary function
Receiv
er
Содержание mx-24s
Страница 1: ...1...
Страница 19: ...19 For your notes...
Страница 35: ...35 For your notes...
Страница 41: ...41 41 For your notes...
Страница 57: ...57 For your notes...
Страница 63: ...63 63 For your notes...
Страница 69: ...69 69 For your notes...
Страница 85: ...85 85 For your notes...
Страница 99: ...99 For your notes...
Страница 143: ...143 For your notes...
Страница 191: ...191 For your notes...
Страница 212: ...212 212 For your notes...
Страница 213: ...213 213 For your notes...
Страница 214: ...214 For your notes...
Страница 216: ...216...


