USER'S MANUAL
56
|
P a g e
Figure
76
ITEM
1
Channel
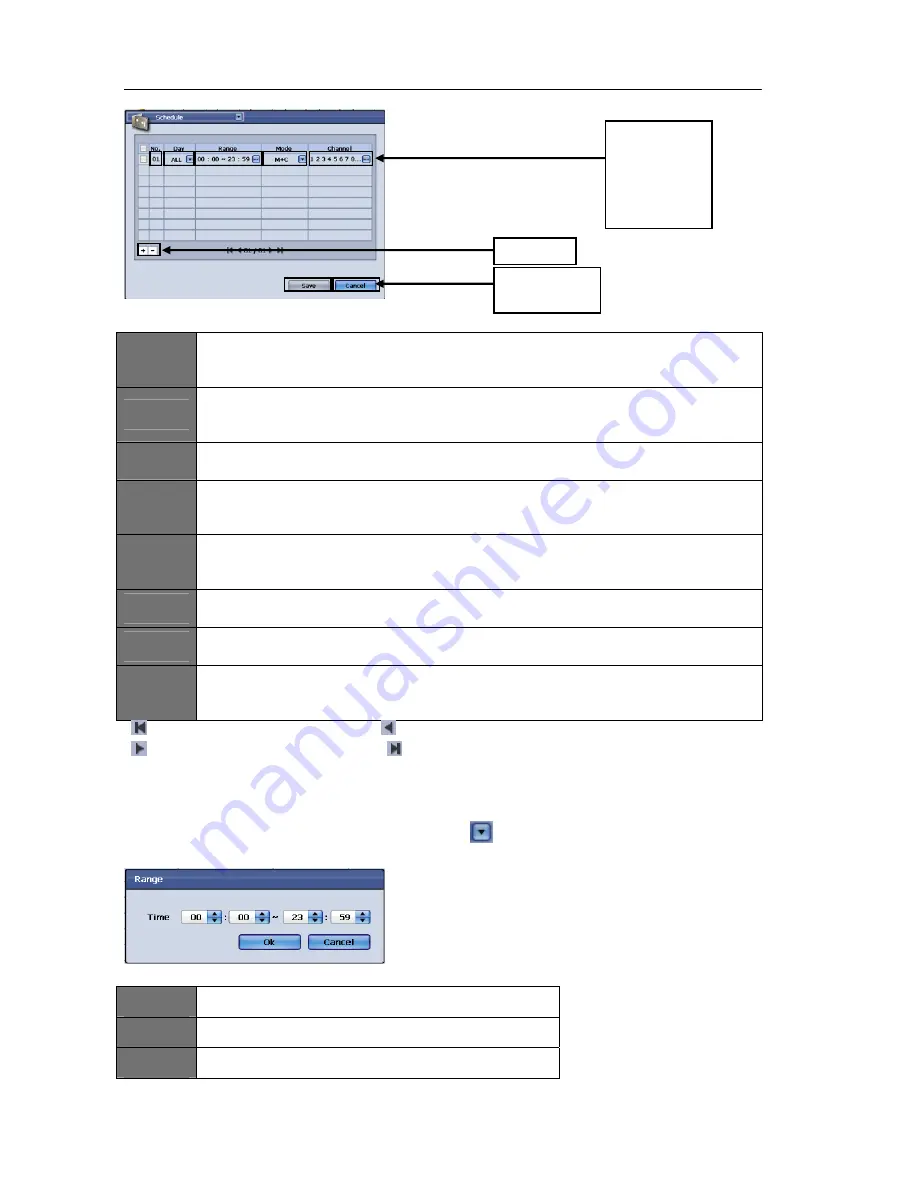
Use this option to select the desired channels for Record Schedule configuration. You may
select each individual channel, a group of channels, or all channels to apply the record settings to.
ITEM
2
Mode
There are five mode types to choose from; Alarm, Motion, Continue, A + M (Alarm + Motion), and
M + C ( Continue). This setting will determine what type of mode to enable for recording.
ITEM
3
Range
The range option is to set the desired time to enable recording.
ITEM
4
Day
The day option is to set the desired day(s) to enable recording (The “ALL” setting may be used to
configure all 7 days of the week).
ITEM
5
No.
This represents the schedule entry number. Please check the box on the left side of the No.
(number) before choosing to remove the entry.
ITEM
6
Cancel
The cancel button to discard the changes made to these settings and will close the window.
ITEM
7
Save
The save button will apply the changes made to this configuration menu.
ITEM
8
- / +
Check the desired entry(s) then press – to remove it. If you wish to add an entry(s), press the +
key to do so.
‐
:Press
this
button
to
go
to
the
first
page
:
Press
this
button
to
go
to
the
previous
page
‐
:
Press
this
button
to
go
to
the
next
page
:
Press
this
button
to
go
to
the
last
page
Once
your
desired
settings
have
been
made,
please
click
on
the
“Save”
button
to
apply
the
changes.
If
you
desire
to
discard
the
changes
made
to
this
menu,
please
click
on
the
“Cancel”
button.
To
restore
the
original
factory
settings,
please
click
on
the
“Default”
button.
You
may
navigate
to
any
other
desired
menu
by
click
on
the
button
located
on
the
top
left
side
of
the
screen.
Range:
Figure
77
ITEM
1
Time
–
You
can
specify
the
start
and
end
time
here.
ITEM
2
Ok
–
Press
this
button
to
save
the
settings.
ITEM
3
Cancel
–
Press
this
button
to
discard
the
changes
made.
Item
1
Channel
Item
2
Mode
Item
3
Range
Item
4
Day
Item
5
No.
Item
6
Cancel
Item
7
Save
Item
8
+/
‐
Содержание H.264 Digital Video Recorder
Страница 1: ......
Страница 77: ...USER S MANUAL 77 P a g e...


