USER'S MANUAL
34
|
P a g e
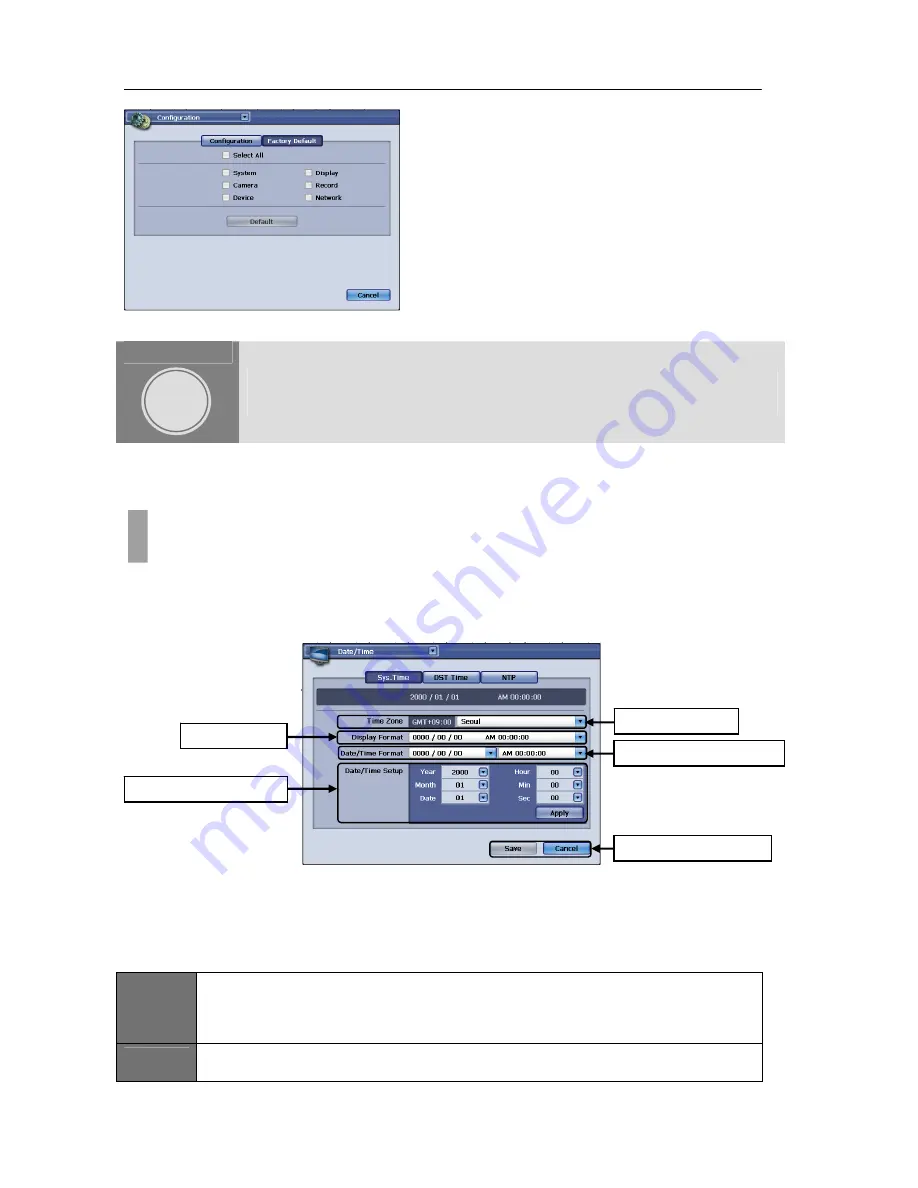
Figure 37 Configuration Window with Factory Default button pressed
DATE AND TIME
In this chapter all component of date and time configuration will be discussed. In This chapter will show
you in detail how to configure the DVR unit’s system time, apply daylight savings parameters, and to
program the DVR unit to reference time server to synchronize time settings.
All about time configuration can be changed in Date/Time window. You could access the Date/Time
window by clicking the drop down button located on the left upper corner or by accessing via Display
icon from Main menu screen. In this Date/Time window you will be able to locate three tabbed buttons
called Sys. Time, DST Time, and NTP.
Figure 38 Date/Time Window with Sys. Time Tab selected
To manually configure system time, you must do so in Date/Time window with Sys. Time tab section
(See Figure 38 Date/Time Window with Sys. Time Tab selected).
In this window there are five configurable items.
ITEM
1
Time Zone
In this section, please select appropriate time zone by clicking on the drop down icon button and
select your location. If your location can not be found please check for the nearest city and check
the GMT (Greenwich Mean Time) indicated.
ITEM
2
Display Format
In this section, toggle between date and time or time and date position
CHAPTER 10. DATE AND TIME
1. Configuring System Time Manually
To apply the factory default setting first select
the categories of settings that needs to apply
factory default to. Then simply press the
“Default” button on the center of the screen to
apply the factory default configuration.
CHAPTER
10
Item
1
Time
Zone
Item
3
Date/Time
Format
Item
5
Save
and
Cancel
Item
2
Display
Item
4
Date/Time
Setup
Содержание H.264 Digital Video Recorder
Страница 1: ......
Страница 77: ...USER S MANUAL 77 P a g e...


