Operation Manual for ZBL-R620/R630 Rebar Locator
the instrument by performing a number of tests in your home or office, prepare simple
scenarios which mimic onsite working environments.
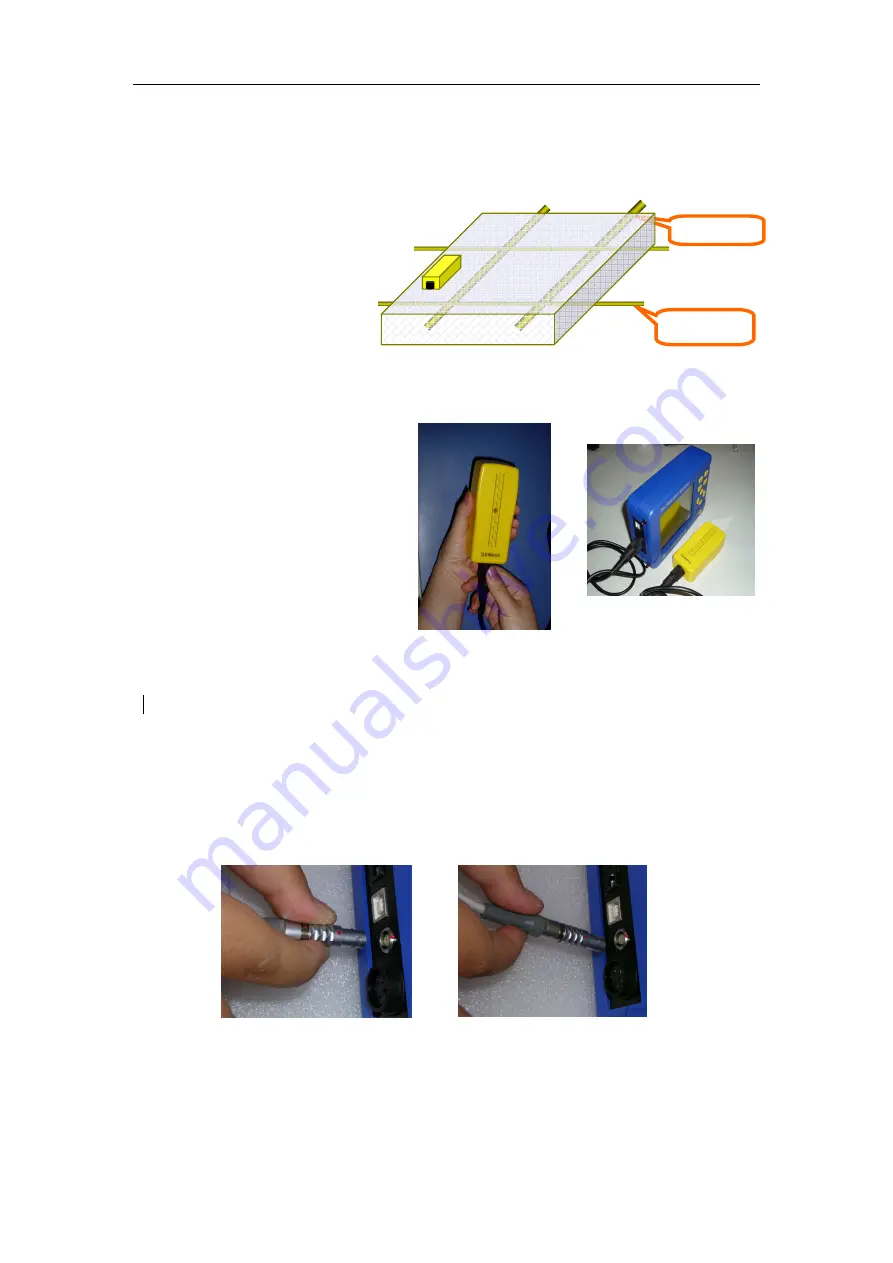
Prepare some non-tensile rebars (use the two thick rebars to imitate the main rebar,
and use the thin rebars to imitate
the top redar), plexiglass boards
(or
other
non-ferromagnetic
materials
such
as
wooden
board), the board thickness is
about 25mm
Put the rebars on a plane and
keep
them
away
from
ferromagnetic materials. Put the
plexiglass board over the rebars. (Fig. 1.4)
2.1 System Connection
Connecting the Probe (Fig. 2.1)
Insert the plug (black) of the signal
line into the socket on the left of the
rebar locator, rotate clockwise and
lock it tightly in place. Insert the
other end of the signal line into the
socket on the probe and again lock it
tightly.
Note
:
There is no directional difference
in the signal line.
Connecting the Scan Car
(
(
(
(
Fig. 2.2
)
)
)
)
(ZBL-R630 only)
When inserting the scan car plug into its socket ensure to align the red dots, one on
the apparatus with one on the signal line plug.
Caution: When inserting or removing the cable be sure to hold the grip at the plug end of
the cable, otherwise the wiring my become loose.
Note
:
There is no directional difference in the signal line.
Attach Scan Car (Fig. 2.3) (ZBL-R630 only)
Correct
Incorrect
Fig. 2.2 connect with Scan Car
Main rebar
Top rebar
Fig. 1.4
Fig. 2.1


