3 Installation
32551-IMG rev 6
GE Healthcare
31
4
Check that all cassette tunnels, bucky and magnification tunnel are
of the right type (Normal or Daylight). Available upgrade kits for
cassette holders:
Also, Daylight version can be updated to normal version. Consult factory.
The control panel should give the following indications:
CAUTION!
Do not press the exposure button until all necessary calibrations are
performed.
5
Using the
kV+
and
kV-
buttons, increase kV to 35, decrease to 23 kV,
and then return to the default kV setting.
6
Using the
and
density-
buttons, increase density to +7,
decrease to -7 and then return the setting to 0.
7
Change the filter and notice that the filter does change from
molybdenum to rhodium. Notice that the timer display changes from
no
to
rh
. Select molybdenum (
no
) filter.
8
Push the
auto exp
until the
manual mode
is entered, the auto exp
light and
density
display are switched off and the
mAs
display will
indicate
12 mAs
.
9
Select 25 kV. Using the
mAs+
and
mAs-
buttons, increase the mAs
value to 500 (300 in New York installations, 600 in G.B installations),
and then decrease the display back down to 80. Go back to
automatic exposure mode by using the
auto exp
button.
10 Push the
auto rel
button twice. The
auto rel
light should first switch
off and then back on.
NOTE!
Press the vertical drive control down and remove the assembly pin.
11 Test the
vertical drive
control switches on both sides of the unit and
verify that up and down movements of the carriage starts slowly and
then speeds up as the switch is held down.
31586-IMG Bucky 18x24 upgrade kit for daylight cassette
31587-IMG Bucky 24x30 upgrade kit for daylight cassette
31588-IMG Magnification 1.6/1.8/2.0 upgrade kit for daylight cassette
31589-IMG Cassette tunnel 24x30 upgrade kit for daylight cassette
31591-IMG Cassette tunnel 18x24 upgrade kit for daylight cassette
ready
light
ON
program
light
a
x-ray
light
OFF
auto exp
light
ON
timer
display
000
auto rel
light
ON
kV
display
25*
grid
light
OFF
mAs
display
AA
magn
light
OFF
density
display
0
*) Depends on the compression thickness
Содержание Alpha RT 32551
Страница 1: ...GE Healthcare Alpha RT Installation Instructions 32551 IMG rev 6 0459 ...
Страница 2: ......
Страница 4: ......
Страница 42: ...3 Installation 36 GE Healthcare 32551 IMG rev 6 ...
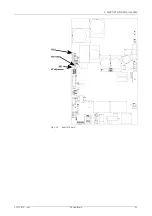
Страница 51: ...4 Alpha RT softstart procedure 32551 IMG rev 6 GE Healthcare 45 Fig 4 10 Inverter board ...
Страница 52: ...4 Alpha RT softstart procedure 46 GE Healthcare 32551 IMG rev 6 ...
Страница 71: ...5 Setups alignments and adjustments 32551 IMG rev 6 GE Healthcare 65 Fig 5 2 Magnetic brake ...
Страница 94: ...5 Setups alignments and adjustments 88 GE Healthcare 32551 IMG rev 6 ...
Страница 96: ...6 Alpha RT installation step by step 90 GE Healthcare 32551 IMG rev 6 ...
Страница 97: ......
Страница 98: ......


