Gates Underwater Products, Inc
13685 Stowe Drive • Poway, CA • 92064 • 858.391.0052 • 800.875.1052 • Fax 858.391.0053
[email protected] • www.GatesHousings.com
01/13/10
7
9
Secure the camera
in the housing by locking the latches. They will have a positive
‘snap’ into position when rotated to the rear of the tray.
9
Check controls
. With the camera turned on and installed into the housing front,
press in each control and confirm proper operation (refer to the next section for more
detail on controls). Rotate the Rec/Stdby control into position over the rec/stdby
button on the camera.
a
Tip
:
With the camera installed you can now get a good view inside the front
half of the housing and most controls. Use a flashlight if necessary to become
familiar with the operation and ‘feel’ of each control in their proper position prior to
closing the housing.
9
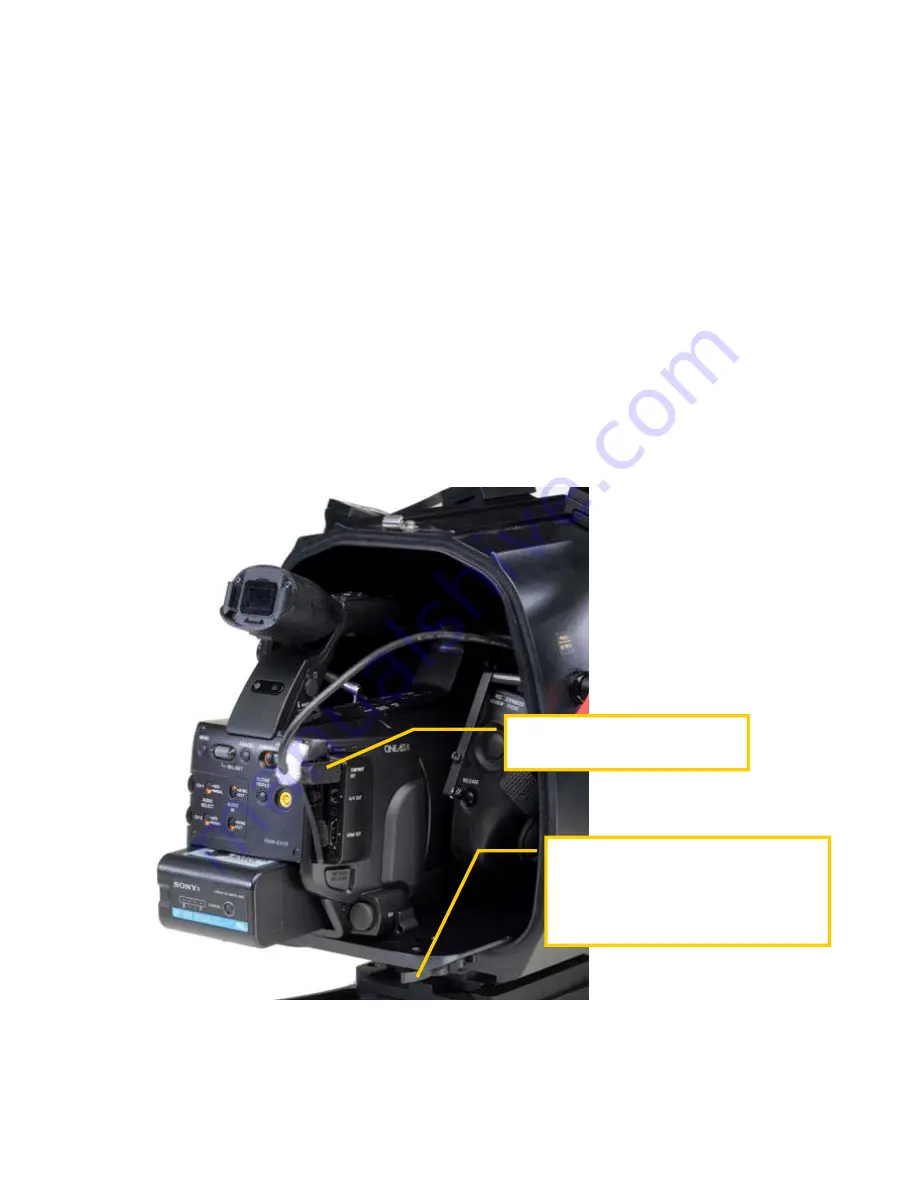
Plug in the video connector
if you are using an external monitor. The connection
is below and to the right of the viewfinder.
9
Tilt the camera viewfinder
for proper alignment with the viewfinder on the housing.
Tilt approximately 10 degrees, as shown in the photo.
Secure the camera tray by rotating the
locking latches 90 degrees to the rear.
Push in all controls and verify
operation.
Video connector plugs in here at
the rear of the camera.


