background image

190-00870-02  Rev. A

Garmin G950 Pilot’s Guide for the Pilatus PC-6

SY

STEM

O

VER
VIEW

FLIGHT

INSTRUMENTS

EIS

AUDIO P

ANEL

& CNS

FLIGHT

MANA

GEMENT

HAZARD

AV

OID
ANCE

AFCS

ADDITIONAL

FEA
TURES

APPENDICES

INDEX

461

APPENDIX B

DATABASE MANAGEMENT

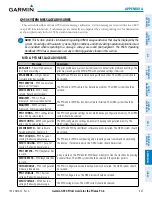
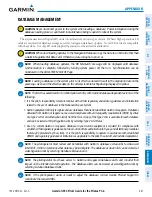
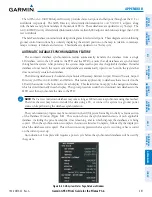
 CAUTION: 

Never disconnect power to the system when loading a database.  Power interuption during the 

database loading process could result in maintenance being required to reboot the system.

The system uses Secure Digital (SD) cards to load and store various types of data.  For basic flight operations, SD 

cards are required for database storage as well as navigation databasw updates.  Not all SD cards are compatible 
with the system.  Use only SD cards supplied by Garmin or the aircraft manufacturer.

  CAUTION:  

When downloading updates to the Navigation Database, copy the data to an SD card other than 

a Garmin Supplemental Data Card.  Otherwise, data corruption can occur.

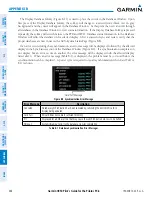
 NOTE:  

When loading database updates, the ‘DB Mismatch’ message will be displayed until database 

synchronization is complete, followed by turning system power off, then on.  Synchronization can be 
monitored on the AUX-SYSTEM STATUS Page.

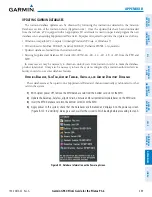
  NOTE:  

Loading a database in the system prior to its effective date will result in the expiration date on the 

power-up screen and the effective date on the AUX-System Status Page being displayed in yellow.

 NOTE

:  

The FAA has asked Garmin to remind pilots who fly with Garmin database-dependent avionics of the 

following:

• It is the pilot’s responsibility to remain familiar with all FAA regulatory and advisory guidance and information 

related to the use of databases in the National Airspace System.

•  Garmin equipment will only recognize and use databases that are obtained from Garmin or Jeppesen.  Databases 

obtained from Garmin or Jeppesen are assured compliance with all data quality requirements (DQRs) by virtue 
of a Type 2 Letter of Authorization (LOA) from the FAA.  A copy of the Type 2 LOA is available for each database 
and can be viewed at http://fly.garmin.com by selecting ‘Type 2 LOA Status.’

• Use of a current Garmin or Jeppesen database in your Garmin equipment is required for compliance with 

established FAA regulatory guidance, but does not constitute authorization to fly any and all terminal procedures 
that may be presented by the system.  It is the pilot’s responsibility to operate in accordance with established 
AFM(S) and regulatory guidance or limitations as applicable to the pilot, the aircraft, and installed equipment.

 NOTE

:  

The pilot/operator must review and be familiar with Garmin’s database exclusion list as discussed 

in SAIB CE-14-04 to determine what data may be incomplete.  The database exclusion list can be viewed at 
www.flygarmin.com by selecting ‘Database Exclusions List.’

 NOTE

:  

The pilot/operator must have access to Garmin and Jeppesen database alerts and consider their 

impact on the intended aircraft operation.  The database alerts can be viewed at www.flygarmin.com by 
selecting ‘Aviation Database Alerts.’

 NOTE

:  

If the pilot/operator wants or needs to adjust the database, contact Garmin Product Support to 

coordinate the revised DQRs.

Содержание G950

Страница 1: ...urope Ltd Liberty House Hounsdown Business Park Southampton Hampshire SO40 9LR U K p 44 0 23 8052 4000 f 44 0 23 8052 4004 Aviation Support 44 0 87 0850 1243 Garmin Corporation No 68 Jangshu 2nd Road Shijr Taipei County Taiwan p 886 02 2642 9199 f 886 02 2642 9099 www garmin com Pilatus PC 6 G950 Integrated Avionics System Pilot s Guide G950 Pilot s Guide Pilatus PC 6 190 00870 02 Revision A ...

Страница 2: ......

Страница 3: ...SYSTEM OVERVIEW FLIGHT INSTRUMENTS ENGINE INDICATION SYSTEM AUDIO PANEL CNS FLIGHT MANAGEMENT HAZARD AVOIDANCE AUTOMATIC FLIGHT CONTROL SYSTEM ADDITIONAL FEATURES APPENDICES INDEX ...

Страница 4: ...SiriusXM Weather and SiriusXM Satellite Radio are provided by SiriusXM Satellite Radio Inc S TEC is a registered trademark of S TEC AOPA Membership Publications Inc and its related organizations hereinafter collectively AOPA expressly disclaim all warranties with respect to the AOPA information included in this data express or implied including but not limited to the implied warranties of merchant...

Страница 5: ...er to ensure that the information remains current Pilots using any outdated database do so entirely at their own risk WARNING Do not use basemap land and water data information for primary navigation Basemap data is intended only to supplement other approved navigation data sources and should be considered as an aid to enhance situational awareness WARNING Do not rely solely upon the display of tr...

Страница 6: ...re continuing navigation WARNING Do not use the system to attempt to penetrate a thunderstorm The illustrations in this guide are only examples Both the FAA Advisory Circular Subject Thunderstorms and the Aeronautical Information Manual AIM recommend avoiding any thunderstorm identified as severe of giving intense radar echo by at least 20 miles WARNING Lamp s inside this product may contain mercu...

Страница 7: ...s been cleared NOTE All visual depictions contained within this document including screen images of the G950 panel and displays are subject to change and may not reflect the most current G950 system and aviation databases Depictions of equipment may differ slightly from the actual equipment NOTE This device complies with part 15 of the FCC Rules Operation is subject to the following two conditions...

Страница 8: ...esented by the system It is the pilot s responsibility to operate in accordance with established AFM S and regulatory guidance or limitations as applicable to the pilot the aircraft and installed equipment NOTE The pilot operator must review and be familiar with Garmin s database exclusion list as discussed in SAIB CE 14 04 to determine what data may be incomplete The database exclusion list can b...

Страница 9: ...to the PG Profile Display SVS Terrain SVS Aux Video FliteCharts Chartview Checklists SiriusXM Radio XM WX Satellite Weather 190 00870 02 A 10 20 14 i I 6 Initial release for 14 02 software Added AC U KWIK Airport Directory Added User Defined Holding Patterns Added Landing Field Elevation enty Added temperature compensated altitude Added import export of Pilot Profiles Added LP and LP V approach se...

Страница 10: ...tude Alerting 76 Low Altitude Annunciation 77 Minimum Descent Altitude Decision Height Alerting 77 2 4 Abnormal Operations 79 Abnormal GPS Conditions 79 Heading Failure Modes 80 Unusual Attitudes 80 SECTION 3 ENGINE INDICATION SYSTEM 3 1 Engine Display 84 3 2 System Display 86 3 3 Fuel Display 88 3 4 EIS Display in Reversionary Mode 90 EIS Softkeys 91 SECTION 4 AUDIO PANEL AND CNS 4 1 Overview 93 ...

Страница 11: ...rways to a Flight Plan 200 Adding Procedures to a Stored Flight Plan 203 Flight Plan Storage 210 Flight Plan Editing 212 Along Track Offsets 215 Parallel Track 217 Activating a Flight Plan Leg 220 Inverting a Flight Plan 221 Flight Plan Views 222 Closest Point of FPL 224 User Defined Holding Patterns 224 5 7 Vertical Navigation 229 Altitude Constraints 231 5 8 Procedures 235 Departures 236 Arrival...

Страница 12: ...rtView Cycle Number and Expiration Date 404 8 4 FliteCharts 407 FliteCharts Softkeys 408 Terminal Procedures Charts 409 Chart Options 416 Day Night View 420 FliteCharts Cycle Number and Expiration Date 422 8 5 Airport Directory 425 Airport Directory Database Cycle Number and Revision 426 8 6 Auxiliary Video Optional 428 Video Setup 429 Display Selection 429 Input Selection 430 Zoom Range 430 8 7 S...

Страница 13: ...d across the following Line Replaceable Units LRUs GDU 1040 Primary Flight Display PFD GDU 1040 Multi Function Display MFD GMA 347 Audio Panel with Integrated Marker Beacon Receiver GIA 63W Integrated Avionics Units IAU GDC 74A Air Data Computer ADC GTX 33 Mode S Transponder GRS 77 Attitude and Heading Reference System AHRS GMU 44 Magnetometer Figure 1 1 shows interactions between the LRUs Additio...

Страница 14: ...ta Bus HSDB Ethernet connection Each display is also paired with an Ethernet connection to an IAU GMA 347 1 The Audio Panel integrates navigation communication radio NAV COM digital audio intercom and marker beacon controls and is installed between the displays This unit communicates with both IAUs using an RS 232 digital interface GIA 63W 2 The Integrated Avionics Units IAU function as the main c...

Страница 15: ... The Engine Airframe Unit receives and processes signals from the engine and airframe sensors This unit communicates with both IAUs using an RS 485 digital interface GTX 33 1 The solid state Transponder provides Modes A C and S capability and communicates with both IAUs through an RS 232 digital interface GRS 77 1 The Attitude and Heading Reference System AHRS provides aircraft attitude and headin...

Страница 16: ...directly from the AHRS and communicates with it via an RS 485 digital interface GWX 68 1 optional Provides airborne weather and ground mapped radar data to the MFD through the GDL 69A via HSDB connection GDL 69 69A 1 if installed A SiriusXM satellite radio receiver that provides real time weather information to the MFD and indirectly to the inset map of the PFD as well as digital audio entertainme...

Страница 17: ...Airspeed Altitude Vertical Speed GMU 44 Magnetometer Heading GMA 347 Audio Panel G C Ve A r ed No 2 GIA 63W Integrated Avionics Unit System Integration Processors I O Processors VHF COM VHF NAV LOC GPS Glideslope GPS Output No 1 GIA 63W Integrated Avionics Unit System Inegration Processors I O Processors VHF COM VHF NAV LOC GPS Glideslope GPS Output GRS 77 AHRS Attitude Rate of Turn Slip Skid GDU ...

Страница 18: ...s Unit System Integration Processors I O Processors VHF COM VHF NAV LOC GPS Glideslope No 2 GIA 63W Integrated Avionics Unit System Integration Processors I O Processors VHF COM VHF NAV LOC GPS Glideslope GWX 68 70 Weather Radar optional Figure 1 2 G950 With Optional Additional Equipment NOTE For information on non Garmin optional additional equipment shown in Figure 1 2 consult the applicable opt...

Страница 19: ...g the aviation database The PFD and MFD data card slots use Secure Digital SD cards and are located on the upper right side of the display bezels Each display bezel is equipped with two SD card slots SD cards are used for aviation database and system software updates as well as terrain database storage Installing an SD card 1 Insert the SD card in the SD card slot the front of the card should be f...

Страница 20: ...Wings Level The AHRS should display valid attitude and heading fields typically within the first minute of power up The AHRS can align itself both while taxiing in a straight line and during level flight When the MFD powers up the Power up screen Figure 1 5 displays the following information System version Airport Terrain database name and version Copyright Obstacle database name and effective dat...

Страница 21: ...traditional flight instrument cluster see the Flight Instruments Section for more information The MFD normally displays a full color moving map with navigation information see the Flight Management Section while the left portion of the MFD is dedicated to the Engine Indication System see the EIS Section Both displays offer control for COM and NAV frequency selection Figure 1 6 G950 System Normal O...

Страница 22: ...an LRU function fails a large red X is typically displayed over the instrument experiencing failed data Figure 1 8 displays all possible flags and responsible LRUs Upon G950 power up certain instruments remain invalid as equipment begins to initialize All instruments should be operational within one minute of power up If any instrument remains flagged the G950 should be serviced by a Garmin author...

Страница 23: ...s for all detected system LRUs Active LRUs are indicated by green check marks failed by red X s Failed LRUs should be noted and a service center or Garmin authorized dealer informed Viewing LRU information 1 Use the FMS Knob to select the AUX System Status Page 2 To place the cursor in the LRU Info Box a Press the LRU Softkey Or a Press the MENU Key b With Select LRU Window highlighted press the E...

Страница 24: ...m Status Page 2 To place the cursor in the Database Box a Press the DBASE Softkey Or a Press the MENU Key b Highlight Select Dbase Window and press the ENT Key 3 Use the FMS Knob to scroll through the box to view database status information The G950 uses aural tones to convey the priority of airframe specific alerts The alerting system s annunciation tone may be tested from the System Status Page ...

Страница 25: ...Magnetic Field Variation Database The Magnetic Field Variation Database is derived from the International Geomagnetic Reference Field IGRF The IGRF is a mathematical model that describes the Earth s main magnetic field and its annual rate of change The database is updated approximately every 5 years See the Appendices for information on updating the Magnetic Field Variation Database The system wil...

Страница 26: ...over the heading readout box The system also removes directional numbers and letters from the HSI Figure 1 11 Heading Failure Displays on the HSI HSI Track Mode Heading Unavailable Track Available Heading and Track Unavailable Failure of the air data input has no effect on the AHRS output while AHRS is receiving valid GPS information Invalid unavailable airspeed data in addition to GPS failure res...

Страница 27: ... no failure message exists check the GPS Status Page and compare the information for GPS1 and GPS2 Discrepancies may indicate a problem GPS RECEIVER STATUS The GPS solution type ACQUIRING 2D NAV 2D DIFF NAV 3D NAV 3D DIFF NAV for the active GPS receiver GPS1 or GPS2 is shown in the upper right of the GPS Status Page When the receiver is in the process of acquiring enough satellite signals for navi...

Страница 28: ...at performs a consistency check on all tracked satellites RAIM ensures that the available satellite geometry allows the receiver to calculate a position within a specified RAIM protection limit 2 0 nautical miles for oceanic and enroute 1 0 nm for terminal and 0 3 nm for non precision approaches During oceanic enroute and terminal phases of flight RAIM is available nearly 100 of the time The RAIM ...

Страница 29: ...e to select the desired waypoint The G950 automatically fills in the identifier facility and city fields with the information for the selected waypoint d Press the ENT Key to accept the waypoint entry 6 Enter an arrival time and press the ENT Key 7 Enter an arrival date and press the ENT Key 8 With the cursor highlighting COMPUTE RAIM press the ENT Key Once RAIM availability is computed one of the...

Страница 30: ...iew with the appropriate satellite PRN number 01 32 or 120 138 for WAAS below each bar The progress of satellite acquisition is shown in three stages as indicated by signal bar appearance No bar Receiver is looking for the indicated satellite Hollow bar Receiver has found the satellite and is collecting data Cyan bar Receiver has collected the necessary data and the satellite signal can be used Gr...

Страница 31: ...ribed in the Audio Panel and CNS section see the Audio Panel and CNS Section for more information about NAV COM controls PFD MFD CONTROLS Figure 1 13 PFD MFD Controls 17 18 5 6 8 7 2 4 3 1 9 12 16 11 10 15 14 13 1 NAV VOL ID Knob Turn to control NAV audio volume shown in the NAV Frequency Box as a percentage Press to toggle Morse code identifier audio ON OFF 2 NAV Frequency Transfer Key Transfers ...

Страница 32: ...nction and allows the user to enter a destination waypoint and establish a direct course to the selected destination specified by identifier chosen from the active route 11 FPL Key Displays flight plan information 12 CLR Key DFLT MAP Erases information cancels entries or removes menus Press and hold to display the MFD Navigation Map Page MFD only 13 MENU Key Displays a context sensitive list of op...

Страница 33: ...ric Knob SOFTKEY FUNCTION The softkeys are located along the bottoms of the displays The softkeys shown depend on the softkey level or page being displayed The bezel keys below the softkeys can be used to select the appropriate softkey When a softkey is selected its color changes to black text on gray background and remains this way until it is turned off at which time it reverts to white text on ...

Страница 34: ...2 Traffic Only display shown TOPO Displays topographical data e g coastlines terrain rivers lakes and elevation scale on Inset Map TERRAIN Displays terrain information on Inset Map STRMSCP Displays Stormscope information on Inset Map if installed PFD Displays second level softkeys for additional PFD configurations SYN VIS Displays the softkeys for enabling or disabling Synthetic Vision features PA...

Страница 35: ...Tuning Window allowing tuning and selection of the DME optional XPDR Displays transponder mode selection softkeys STBY Selects standby mode transponder does not reply to any interrogations ON Selects Mode A transponder replies to interrogations ALT Selects Mode C altitude reporting mode transponder replies to identification and altitude interrogations GND Manually selects Ground Mode the transpond...

Страница 36: ... NAV1 VOR LOC NAV2 VOR LOC DME optional SYN VIS HPA BACK ALERTS METERS IN BACK ALERTS OPTN1 OPTN2 OPTN3 OFF BACK ALERTS 360 HSI ARC HSI TRFC 1 TRFC 2 ALERTS SYN TERR HRZN HDG PATHWAY APTSIGNS Press the BACK Softkey to return to the top level softkeys XPDR STBY ON ALT VFR IDENT BACK ALERTS CODE BACK Press the BACK Softkey to return to the top level softkeys DCLTR DCLTR 2 DCLTR 3 DCLTR 1 TOPO ALERTS...

Страница 37: ...RTS 0 1 2 3 4 5 6 7 BKSP GND BACK ALERTS OPTN1 OPTN2 OPTN3 OFF ALERTS SYN TERR HRZN HDG PATHWAY APTSIGNS Figure 1 19 XPDR Softkeys MFD SOFTKEYS MFD softkeys vary depending on the page selected EIS and Navigation Map Page default MFD page softkeys are described here Figure 1 20 MFD Softkeys EIS Navigation Map Page and Checklist DCLTR ENGINE DCLTR 2 DCLTR 3 DCLTR 1 SYSTEM FUEL ENGINE MAP BACK ENGINE...

Страница 38: ...zero BACK Returns to top level softkeys MAP Enables second level Navigation Map Page softkeys TRAFFIC Displays removes traffic information on Navigation Map Page PROFILE Displays profile view on Navigation Map Page TOPO Displays removes topographical data e g coastlines terrain rivers lakes on Navigation Map Page TERRAIN Displays removes terrain information on Navigation Map Page AIRWAYS Selects t...

Страница 39: ...ome menus provide access to additional submenus that are used to view edit select and review options Menus display NO OPTIONS when there are no options for the window page selected The main controls used in association with all window page group operations are described in Section 1 5 G950 Controls Navigating a menu 1 Press the MENU Key to display the menu 2 Turn the FMS Knob to scroll through a l...

Страница 40: ...ay AIRWAY AIRWAY available when active leg is part of an airway The G950 automatically fills in the identifier facility and city fields with the information for the selected waypoint Using the FMS Knob to enter data 1 If needed press the FMS Knob to activate the cursor 2 Use the large FMS Knob to highlight the desired field 3 Begin entering data a To quickly enter a waypoint identifier turn the sm...

Страница 41: ...irport Procedures Weather Information Procedure Loading the active title of the page changes while the page name in the list remains the same Figure 1 22 Page Title and Page Groups Page Group Active Page Title MFD Page Groups Pages in Current Group The main page groups are navigated using the FMS Knob specific pages within each group can vary depending on the configuration of optional equipment Se...

Страница 42: ...tion Map Traffic Map Weather Radar optional Stormscope optional Terrain Map Waypoint Pages WPT Airport Procedures Information Pages Airport Information INFO 1 Softkey Airport Directory Information INFO 2 Softkey Departure Information DP Softkey Arrival Information STAR Softkey Approach Information APR Softkey Intersection Information NDB Information VOR Information User Waypoint Information Figure...

Страница 43: ...S Status System Setup System Status Video Figure 1 25 Auxiliary Pages Maintenance data is continuously recorded by the Central Maintenance Computer CMC At the discretion of the Aircraft Manufacturer this data may be displayed on an OEM DIAGNOSTICS Page accessible from within the AUX Page Group Nearest Page Group NRST Nearest Airports Nearest Intersections Nearest NDB Nearest VOR Nearest User Waypo...

Страница 44: ...Knob Figure 1 27 Flight Plan Pages Flight Plan Page Group FPL Active Flight Plan Flight Plan Catalog Stored Flight Plan NEW Softkey The Procedure Loading pages may be accessed at any time on the MFD by pressing the PROC Key A menu is initialized and when a departure approach or arrival is selected the appropriate Procedure Loading page is opened These pages can also be accessed from the Stored Fli...

Страница 45: ... measurement units MFD Data Bar Navigation Status Box fields see the Flight Management Section Barometric Transition Alert see the Flight Instruments Section GPS Course Deviation Indicator CDI range see the Flight Instruments Section Airspace alerts see the Flight Management Section COM transceiver channel spacing see the Audio Panel and CNS Section Arrival alert Displayed nearest airports see the...

Страница 46: ...f the System Setup Page in the box labeled Pilot Profile From here pilot profiles may be created selected renamed or deleted Figure 1 31 Display Unit Settings System Setup Page Creating a profile 1 Select the AUX System Setup 1 Page 2 Press the FMS Knob momentarily to activate the flashing cursor 3 Turn the large FMS Knob to highlight CREATE in the Pilot Profile Box 4 Press the ENT Key A Create Pr...

Страница 47: ...1 Select the AUX System Setup 1 Page 2 Press the FMS Knob momentarily to activate the flashing cursor 3 Turn the large FMS Knob to highlight RENAME in the Pilot Profile Box 4 Press the ENT Key 5 In the Rename Profile window turn the FMS Knob to select the profile to rename 6 Press the ENT Key 7 Use the FMS Knob to enter a new profile name up to 16 characters long and press the ENT Key 8 With RENAM...

Страница 48: ...ey 5 If desired the profile name to be used after profile has been imported can be changed by turning the FMS Knob to highlight the PROFILE NAME field then use the large and small FMS Knobs to enter the name and press the ENT Key Imported profile names cannot begin with a blank space or be named DEFAULT GARMIN DEFAULTS or DEFAULT SETTINGS 6 With IMPORT highlighted press the ENT Key 7 If the import...

Страница 49: ...h EXPORT highlighted To change the profile file name turn the large FMS Knob to highlight the SELECT FILE field then enter the new name with the large and small FMS Knobs then press the ENT Key Then press the ENT Key with EXPORT highlighted 6 If the profile name to be exported is the same as an existing profile file name on the SD card the system displays an Overwrite existing file OK or CANCEL pr...

Страница 50: ...me 1 Use the FMS Knob to select the AUX System Setup Page 2 Press the FMS Knob to activate the cursor 3 Turn the large FMS Knob to highlight the Time Format field 4 Turn the small FMS Knob to select the desired format and press the ENT Key to confirm selection The Time Offset field is highlighted for local time formats 5 Use the FMS Knob to enter the desired time offset HH MM and press the ENT Key...

Страница 51: ...er distance System Setup Arrival Alert trigger distance System Setup All speeds on MFD Airspeed Indicator True Airspeed PFD Wind speed vector Map range Traffic Page Terrain Page CDI scaling System Setup Fuel range calculation EIS Altitude and Vertical Speed Feet Meters All altitudes on MFD All elevations on MFD Altimeter Vertical Speed Indicator VNV altitudes Active Flight Plan Temperature Celsius...

Страница 52: ...to turn the airspace alert ON or counterclockwise to turn the alert OFF Changing the altitude buffer distance setting 1 Use the FMS Knob to select the System Setup Page 2 Press the FMS Knob momentarily to activate the flashing cursor 3 Turn the large FMS Knob to highlight the altitude buffer field in the Airspace Alerts Box 4 Enter an altitude buffer value and press the ENT Key ARRIVAL ALERTS The ...

Страница 53: ...e FMS Knob to select the AUX System Setup Page 2 Press the FMS Knob momentarily to activate the flashing cursor 3 Turn the large FMS Knob to highlight the voice in the Audio Alert Box 4 Turn the small FMS Knob to display and highlight the desired voice and press the ENT Key GPS CDI The GPS CDI Box on the System Setup Page allows the pilot to define the scale for the Course Deviation Indicator CDI ...

Страница 54: ...o display on the MFD Nearest Airports Page A minimum runway length and or surface type can be entered to prevent airports with small runways or runways that are not of appropriate surface from being displayed Default settings are 0 feet or meters for runway length and any for runway surface type Selecting nearest airport surface matching criteria any hard only hard soft water 1 Use the FMS Knob to...

Страница 55: ... time of the last reset A scheduler feature is also provided so the pilot can enter reminder messages to be displayed at specified intervals in the Alerts Window on the PFD see Figure 1 32 Figure 1 31 Utility Page TIMERS The generic timer can be set to count up or down from a specified time HH MM SS When the countdown on the timer reaches zero the digits begin to count up from zero If the timer is...

Страница 56: ...he FMS Knob momentarily to activate the flashing cursor 3 Turn the large FMS Knob to highlight the field next to the flight timer 4 Turn the small FMS Knob to select the starting criterion PWR ON or IN AIR and press the ENT Key Resetting the flight timer 1 Use the FMS Knob to select the AUX Utility Page 2 Press the MENU Key 3 With Reset Flight Timer highlighted press the ENT Key The G950 records t...

Страница 57: ...es e g Change oil Switch fuel tanks Overhaul Messages can be set to display based on a specific date and time event once the message timer reaches zero one time default setting or recurrently whenever the message timer reaches zero periodic Message timers set to periodic alerting automatically reset to the original timer value once the message is displayed When power is cycled messages are retaine...

Страница 58: ...ler message 1 Use the FMS Knob to select the AUX Utility Page 2 Press the FMS Knob momentarily to activate the flashing cursor 3 Turn the large FMS Knob to highlight the name field of the scheduler message to be deleted 4 Press the CLR Key to clear the message text If the CLR Key is pressed again the message is restored 5 Press the ENT Key to confirm message deletion Scheduler messages appear in t...

Страница 59: ...ing the MENU Key while any other PFD window is displayed does not display the PFD Setup Menu 2 Turn the small FMS Knob to select MANUAL and press the ENT Key The intensity value is now highlighted 3 Use the FMS Knob to enter the desired backlighting then press the ENT Key 4 Turn the large FMS Knob to highlight AUTO next to MFD DSPL and repeat steps 2 4 5 To remove the menu press the CLR or MENU Ke...

Страница 60: ...ilot s Guide for the Pilatus PC 6 190 00870 02 Rev A 48 SYSTEM OVERVIEW SYSTEM OVERVIEW FLIGHT INSTRUMENTS EIS AUDIO PANEL CNS FLIGHT MANAGEMENT HAZARD AVOIDANCE AFCS ADDITIONAL FEATURES APPENDICES INDEX Blank Page ...

Страница 61: ...ther information are also presented on the PFD and explained in other sections of this Pilot s Guide The following flight instruments and supplemental flight data are displayed on the PFD Airspeed Indicator showing True airspeed Airspeed awareness ranges Trend vector Reference Attitude Indicator with slip skid indication Altimeter showing Trend vector Barometric setting Selected Altitude Vertical ...

Страница 62: ...rrent Heading 5 Selected Heading Bug 6 Outside Air Temperature OAT 7 Softkeys 8 System Time 9 Transponder Data Box 10 Horizontal Situation Indicator HSI 11 Turn Rate Indicator 12 Altimeter Barometric Setting 13 Selected Altitude Bug 14 Vertical Speed Indicator VSI 15 Altimeter 16 Selected Altitude 17 COM Frequency Box 18 Navigation Status Box 19 Slip Skid Indicator 20 Attitude Indicator Figure 2 1...

Страница 63: ...1 4 6 9 11 12 8 10 1 Traffic Annunciation 2 Selected Heading 3 Wind Data 4 Inset Map 5 DME Information Window 6 Bearing Information Windows 7 Minimum Descent Altitude Decision Height 8 Flight Plan Window 9 Annunciation Window 10 Selected Course 11 Vertical Speed Required 12 Vertical Deviation Indicator VDI 13 Current VNV Target Altitude 14 Terrain Annunciation Figure 2 2 Primary Flight Display Add...

Страница 64: ...er Showing Overspeed Figure 2 3 Airspeed Indicator Indicated Airspeed Speed Ranges True Airspeed Airspeed Trend Vector Vspeed Reference A color coded red white green yellow and red white barber pole speed range strip is located on the moving tape The colors denote flaps operating range normal operating range caution range and never exceed speed VNE A red range is also present for low speed awarene...

Страница 65: ...ed in 1 kt increments when a speed has been changed from a default value an asterisk appears next to the speed 4 Press the ENT Key or turn the large FMS Knob to highlight the ON OFF field 5 Turn the small FMS Knob clockwise to ON or counterclockwise to OFF 6 To remove the window press the CLR Key or select the TMR REF Softkey Figure 2 5 References Window Figure 2 6 Timer References Menu Enabling d...

Страница 66: ...very 10 up to 80 Minor pitch marks are shown for intervening 5 increments up to 25 below and 45 above the horizon line Between 20 below to 20 above the horizon line minor pitch marks occur every 2 5 If the optional Garmin Synthetic Vision Technology SVT is activated the pitch scale is reduced to 10 up and 7 5 down refer to the Additional Features section for more information about SVT The inverted...

Страница 67: ...ox above the Selected Altitude A magenta Altitude Trend Vector extends up or down the left of the altitude tape the end resting at the approximate altitude to be reached in 6 seconds at the current vertical speed The trend vector is not shown if altitude remains constant or if data needed for calculation is not available due to a system failure Setting the Selected Altitude Turn the ALT Knob to se...

Страница 68: ...V vertical deviation moving the descent path For large adjustments it may take several minutes for the aircraft to re establish on the descent path If the change is made while nearing a waypoint with a VNV Target Altitude the aircraft may not re establish on the descent path in time to meet the vertical constraint Selecting the altimeter barometric pressure setting Turn the BARO Knob to select the...

Страница 69: ...rough this altitude and the barometric pressure setting has not been changed from STD BARO the setting flashes in cyan until it is changed Figure 2 12 Setting the Baro Transition Alert 1 Use the FMS Knob to select the AUX System Setup Page 2 Press the FMS Knob to activate the cursor 3 Turn the large FMS Knob to highlight OFF or ON in the BARO TRANSITION ALERT box 4 Turn the small FMS Knob to turn ...

Страница 70: ...gation VNV is being used The VDI appears in conjunction with the TOD within 1 minute alert The VDI is removed from the display if vertical deviation becomes invalid See the Flight Management Section for details on VNV features and refer to Section 2 2 Supplemental Flight Data for more information about VNV indications on the PFD The Glideslope Indicator Figure 2 14 appears to the left of the Altim...

Страница 71: ...mats 360 compass rose and 140 arc Changing the HSI display format 1 Select the PFD Softkey 2 Select the HSI FRMT Softkey 3 Select the 360 HSI or ARC HSI Softkey The 360 HSI contains a Course Deviation Indicator CDI with a Course Pointer To From Indicator and a sliding deviation bar and scale The course pointer is a single line arrow GPS VOR1 and LOC1 or a double line arrow VOR2 and LOC2 which poin...

Страница 72: ...Heading is shown to the upper left of the HSI for 3 seconds after being adjusted The cyan bug on the compass rose corresponds to the Selected Heading While the HSI is displayed as an arc if the Selected Heading Bug is adjusted off the shown portion of the compass rose the digital reading displayed Adjusting the Selected Heading Turn the HDG Knob to set the Selected Heading Press the HDG Knob to sy...

Страница 73: ...into the flight plan the system generates a message to change the navigation angle setting to True at the appropriate time Figure 2 19 Heading and Course Indications True Changing the navigation angle setting 1 Use the FMS Knob to select the AUX System Setup Page on the MFD 2 Press the FMS Knob to activate the cursor 3 Turn the large FMS Knob to highlight Nav Angle in the Display Units box 4 Turn ...

Страница 74: ...iction is no longer valid Standard Turn Rate Half standard Turn Rate Arrow Shown for Turn Rate 4 deg sec Figure 2 21 Turn Rate Indicator and Trend Vector BEARING INFORMATION NOTE When the Arc HSI is displayed the Bearing Information windows and pointers are disabled Two bearing pointers and associated information can be displayed on the HSI for NAV GPS and sources The pointers are cyan and are sin...

Страница 75: ...ency The bearing pointer is removed from the HSI and NO DATA is displayed in the information window if The NAV radio is not receiving the tuned VOR station GPS is the bearing source and an active waypoint is not selected Selecting bearing display and changing sources 1 Select the PFD Softkey 2 Select a BRG Softkey to display the desired bearing pointer and information window with a NAV source 3 Se...

Страница 76: ...relative to the course If the course deviation data is not valid the CDI is not displayed Figure 2 23 Course Deviation Indicator Crosstrack Error Navigation Source Scale CDI 360º HSI Flight Phase CDI Navigation Source CDI Scale Flight Phase Arc HSI The CDI can display two sources of navigation GPS or NAV VOR localizer Color indicates the current navigation source magenta for GPS or green for VOR a...

Страница 77: ...elected NAV2 Selected for Tuning CDI Softkey Cycles Through Navigation Sources GPS Selected ThesystemautomaticallyswitchesfromGPStoLOCnavigationsourceandchangestheCDIscalingaccordingly when all of the following occur A localizer or ILS approach has been loaded into the active flight plan The final approach fix FAF is the active leg the FAF is less than 15 nm away and the aircraft is moving toward ...

Страница 78: ...UX System Setup Page and the full scale deflection setting may also be changed 2 0 nm 1 0 nm 0 3 nm or Auto from this page If the selected scaling is smaller than the automatic setting for enroute and terminal phases the CDI is scaled accordingly and the selected setting is be displayed rather than the flight phase annunciation Changing the selected GPS CDI setting 1 Use the FMS Knob to select the...

Страница 79: ... departure waypoint if more than 30 nm from the departure airport or the leg after the last departure waypoint has been activated or a direct to waypoint is activated If after completing the departure procedure the nearest airport is more than 200 nm away from the aircraft and the approach procedure has not yet commenced the CDI is scaled for oceanic flight 2 0 nm Within 31 nm of the destination a...

Страница 80: ...he CDI scale changes to 0 3 nm The system automatically switches back to terminal scaling under the following conditions The next leg in the missed approach procedure is not aligned with the final approach path The next leg in the missed approach procedure is not CA CD CF CI CR DF FA FC FD FM IF or TF After any leg in the missed approach procedure that is not CA or FA Flight Phase Annunciation Aut...

Страница 81: ...course line is drawn through the active to waypoint on the moving map If desired the course to from the waypoint can now be adjusted When OBS Mode is disabled the GPS flight plan returns to normal operation with automatic sequencing of waypoints following the course set in OBS Mode The flight path on the moving map retains the modified course line Figure 2 30 Omni bearing Selector OBS Mode Pressin...

Страница 82: ...crosses the missed approach point MAP automatic approach waypoint sequencing is suspended SUSP appears on the HSI at the lower right of the aircraft symbol The OBS Softkey label changes to indicate the suspension is active as shown in Figure 2 31 Pressing the SUSP Softkey deactivates the suspension and resumes automatic sequencing of approach waypoints Figure 2 31 Suspending Automatic Waypoint Seq...

Страница 83: ... the Inset Map and wind data display In addition to the flight instruments the PFD also displays various supplemental information including the Outside Air Temperature OAT wind data and Vertical Navigation VNV indications OUTSIDE AIR TEMPERATURE The Outside Air Temperature OAT is displayed in degrees Celsius C in the lower left of the PFD under normal display conditions During reversionary display...

Страница 84: ...elected for display but wind information is invalid or unavailable the window shows NO WIND DATA Wind data can be displayed in three different ways Figure 2 33 Wind Data No Data Option 2 Option 1 Option 3 Displaying wind data 1 Select the PFD Softkey 2 Select the WIND Softkey to display wind option Softkeys 3 Select one of the OPTN softkeys to change how wind data is displayed OPTN 1 Head and cros...

Страница 85: ...e GPS is Selected Navigation Source Terminal Phase of Flight Required Vertical Speed Bug Vertical Deviation Indicator VNV Target Altitude Figure 2 34 Vertical Navigation Indications PFD Criteria VNV Indication Removed Required Vertical Speed RVSI Vertical Deviation VDI VNV Target Altitude Aircraft 1 min before the next TOD due to flight plan change X X X VNV cancelled CNCL VNV Softkey selected on ...

Страница 86: ... disabled by selecting the ALERTS Softkey If the window is already open when a new message is generated selecting the ALERTS Softkey to acknowledge the message causes it to turn gray The ALERTS Softkey label changes to display the appropriate annunciation when an alert is issued The annunciation flashes and the appropriate aural alert sounds until acknowledged by pressing the softkey The softkey t...

Страница 87: ...ys traffic symbolically on the PFD Inset Map the Navigation Map Page MFD and various other MFD page maps Refer to the Hazard Avoidance Section and Appendix E for more details about the traffic displays When a traffic advisory TA is detected the following automatically occur The PFD Inset Map is enabled and displays traffic A flashing black on yellow TRAFFIC annunciation Figure 2 37 appears to the ...

Страница 88: ...s changed the Altitude Alerter is reset The Altitude Alerter is independent of the installed AFCS The following occur when approaching the Selected Altitude Upon passing through 1000 feet of the Selected Altitude the Selected Altitude shown above the Altimeter changes to black text on a cyan background flashes for 5 seconds and an aural tone is generated When the aircraft passes within 200 ft of t...

Страница 89: ...M DESCENT ALTITUDE DECISION HEIGHT ALERTING For altitude awareness a barometric Minimum Descent Altitude MDA or Decision Height DH can be set in the References Window If desired the system can also compensate this altitude based on a pilot supplied temperature at the destination For example if the pilot enters a destination temperature of 40º C the system increases the displayed MDA DH accordingly...

Страница 90: ...toselectthebarometric BARO ortemperaturecompensated TEMPCOMP barometric altitude OFF is selected by default Press the ENT Key or turn the large FMS Knob to highlight the next field 4 Use the small FMS Knob to enter the desired altitude BARO orTEMP COMP from zero to 16 000 feet IfTEMP COMP is selected a field for entering the temperature at the destination will appear Press the ENT Key or turn the ...

Страница 91: ... phase of flight INTEG OK Lower left of aircraft symbol Integrity OK GPS integrity has been restored to within normal limits annunciation displayed for 5 seconds DR Upper right of aircraft symbol DeadReckoning SystemisusingprojectedpositionratherthanGPSposition to compute navigation data and sequence active flight plan waypoints Table 2 3 Abnormal GPS Conditions Annunciated on HSI Figure 2 43 Exam...

Страница 92: ...nunciation with a red X appear above the TRK annunciation to indicate the HSI is displaying track instead of heading If both the heading and track are unavailable the HSI displays a yellow HDG annunciation with a red X over the heading readout box The system also removes directional numbers and letters from the HSI HSI Track Mode Heading Unavailable Track Available Heading and Track Unavailable Fi...

Страница 93: ...ayed during such situations The following information is removed from the PFD and corresponding softkeys are disabled when the aircraft experiences unusual attitudes Traffic Annunciations Flight director Command Bars Inset Map Outside air temperature OAT DME Information Window Wind data Selected Heading readout Selected Course readout Transponder Status Box System Time PFD Setup Menu Windows displ...

Страница 94: ...lot s Guide for the Pilatus PC 6 190 00870 02 Rev A 82 FLIGHT INSTRUMENTS SYSTEM OVERVIEW FLIGHT INSTRUMENTS EIS AUDIO PANEL CNS FLIGHT MANAGEMENT HAZARD AVOIDANCE AFCS ADDITIONAL FEATURES APPENDICES INDEX Blank Page ...

Страница 95: ...N SYSTEM The G950 Engine Indication System EIS displays critical engine electrical fuel and other system parameters on the left side of the MFD during normal operations Figure 3 1 Figure 3 1 Multi Function Display Normal Operations EIS Display Green bands on the instruments indicate normal ranges of operation yellow and red bands indicate caution and warning respectively When unsafe operating cond...

Страница 96: ...adout this changes to STRT upon engine start No annunciation is shown when the engine is running normally see Figure 3 3 3 Propeller Speed Gauge NP RPM Displays propeller speed in revolutions per minute rpm 4 Gas Generator Speed Gauge NG Displays gas generator speed as a percentage 5 Fuel Flow FFLOW GPH Displays current fuel flow in gallons per hour gph 6 Oil Pressure Indicator OIL PSI Displays en...

Страница 97: ... HAZARD AVOIDANCE AFCS ADDITIONAL FEATURES APPENDICES INDEX SYSTEM OVERVIEW FLIGHT INSTRUMENTS EIS AUDIO PANEL CNS FLIGHT MANAGEMENT HAZARD AVOIDANCE AFCS ADDITIONAL FEATURES APPENDICES INDEX 10 8 7 6 5 4 3 2 1 Figure 3 2 Engine Display 9 11 12 13 Figure 3 3 Interstage Turbine Temperature Gauge Status Annunciations Engine Off Engine Start Normal Floatplane Option 1 ...

Страница 98: ...Gauge ITT C Displays Interstage Turbine Temperature ITT in degrees Celsius C When the engine is not running OFF is annunciated above the ITT readout this changes to STRT upon engine start No annunciation is shown when the engine is running normally 3 Propeller Speed Gauge NP RPM Displays propeller speed in revolutions per minute rpm 4 Generator Speed Gauge NG Displays gas generator speed as a perc...

Страница 99: ...GHT INSTRUMENTS EIS AUDIO PANEL CNS FLIGHT MANAGEMENT HAZARD AVOIDANCE AFCS ADDITIONAL FEATURES APPENDICES INDEX SYSTEM OVERVIEW FLIGHT INSTRUMENTS EIS AUDIO PANEL CNS FLIGHT MANAGEMENT HAZARD AVOIDANCE AFCS ADDITIONAL FEATURES APPENDICES INDEX 8 7 6 5 4 3 2 1 Figure 3 4 System Display 9 10 11 Floatplane Option 1 ...

Страница 100: ...are based on the fuel flow totalizer and the displayed fuel remaining GAL REM adjusted by the pilot using the following softkeys DEC FUEL Decreases totalizer based fuel remaining in 1 gal increments INC FUEL Increases totalizer based fuel remaining in 1 gal increments RST FUEL Resets totalizer based fuel remaining to 170 gal and the displayed fuel used GAL USED to zero 1 Torque Gauge TRQ PSI Displ...

Страница 101: ...d Endurance ENDUR Displays flight time remaining in hours minutes HH MM based on the calculated fuel remaining 13 Calculated Range RANGE NM Displays aircraft range in nautical miles nm based on the calculated fuel remaining the aircraft s heading and the wind direction and speed 14 Aileron and Rudder Trim Bars AIL RUD Aileron and rudder trim are indicated with pointers along slide bars the green b...

Страница 102: ...MENT HAZARD AVOIDANCE AFCS ADDITIONAL FEATURES APPENDICES INDEX 3 4 EIS DISPLAY IN REVERSIONARY MODE In reversionary mode the remaining display is re configured to present PFD symbology together with the EIS Display refer to the System Overview for information about display Reversionary Mode When the G950 displays enter reversionary mode the EIS is separated into Engine System and Fuel displays Th...

Страница 103: ...oftkey Select the BACK Softkey to return to the top level softkeys SYSTEM ENGINE LEAN INC FUEL RST FUEL DEC FUEL BACK CO RST optional SYSTEM ENGINE LEAN BACK ASSIST CYL SLCT Select the BACK Softkey to return to the top level softkeys ENGINE INC FUEL RST FUEL DEC FUEL BACK ENGINE FUEL BACK ENGINE SYSTEM FUEL SYSTEM ENGINE FUEL BACK SYSTEM Figure 3 7 EIS Softkeys Reversionary Mode ENGINE Displays se...

Страница 104: ...ION SYSTEM SYSTEM OVERVIEW FLIGHT INSTRUMENTS EIS AUDIO PANEL CNS FLIGHT MANAGEMENT HAZARD AVOIDANCE AFCS ADDITIONAL FEATURES APPENDICES INDEX SYSTEM OVERVIEW FLIGHT INSTRUMENTS EIS AUDIO PANEL CNS FLIGHT MANAGEMENT HAZARD AVOIDANCE AFCS ADDITIONAL FEATURES APPENDICES INDEX Blank Page ...

Страница 105: ...rated Avionics Unit 2 Audio Panel Mode S Transponder The MFD PFD controls are used to tune the communication transceivers and navigation radios The Audio Panel provides the traditional audio selector functions of microphone and receiver audio selection The Audio Panel includes an intercom system ICS between the pilot copilot and passengers a marker beacon system and a COM clearance recorder Ambien...

Страница 106: ...ANEL AND CNS SYSTEM OVERVIEW FLIGHT INSTRUMENTS EIS AUDIO PANEL CNS FLIGHT MANAGEMENT HAZARD AVOIDANCE AFCS ADDITIONAL FEATURES APPENDICES INDEX PFD CONTROLS AND FREQUENCY DISPLAY Figure 4 1 PFD Controls NAV COM Frequency Tuning Boxes and NRST Window 12 2 1 6 8 7 3 4 5 9 10 11 ...

Страница 107: ...y is displayed in green 6 COM Knob Tunes the standby frequencies for the COM transceiver large knob for MHz small knob for kHz Press to move the tuning box cyan box and Frequency Transfer Arrow between COM1 and COM2 7 COM Frequency Transfer Key Transfers the standby and active COM frequencies Press and hold this key for two seconds to tune the emergency frequency 121 500 MHz automatically into the...

Страница 108: ...new marker beacon audio is received Enables Music Mute feature Also stops play of recorded COM audio 3 COM1 When selected audio from the 1 COM receiver can be heard 4 COM2 When selected audio from the 2 COM receiver can be heard 5 COM3 Reserved for optional COM radio 6 NAV1 When selected audio from the 1 NAV receiver can be heard 7 NAV2 When selected audio from the 2 NAV receiver can be heard 8 DM...

Страница 109: ...COM1 receive is simultaneously selected when this key is pressed allowing received audio from the 1 COM receiver to be heard COM2 receive can be added by pressing the COM2 Key 17 COM2 MIC Selects the 2 transmitter for transmitting COM2 receive is simultaneously selected when this key is pressed allowing received audio from the 2 COM receiver to be heard COM1 receive can be added by pressing the CO...

Страница 110: ... left side and the two standby frequencies are on the right The COM transceiver is selected for transmitting by pressing the COM MIC Keys on the Audio Panel During reception of audio from the COM radio selected for transmission audio from the other COM radio is muted An active COM frequency displayed in green indicates that the COM transceiver is selected on the Audio Panel COM1 MIC or COM2 MIC Ke...

Страница 111: ...Transmit and Receive Indications Annunciator Flashes During Transmission Transmit and Receive Indicators COM TRANSCEIVER MANUAL TUNING The COM frequency controls and frequency boxes are on the right side of each PFD Manually tuning a COM frequency 1 Turn the COM Knob to tune the desired frequency in the COM Tuning Box large knob for MHz small knob for kHz 2 Press the Frequency Transfer Key to tran...

Страница 112: ...d lower radio frequency fields Figure 4 6 Switching COM Tuning Boxes Press the COM Knob to Switch the Tuning Box From One COM Radio to the Other QUICK TUNING AND ACTIVATING 121 500 MHZ Pressing and holding the COM Frequency Transfer Key for two seconds automatically loads the emergency COM frequency 121 500 MHz in the active field of the COM radio selected for tuning the one with the transfer arro...

Страница 113: ...m the Nearest Airports Window on the PFD When the desired frequency is entered it becomes a standby frequency Pressing the Frequency Transfer Key places this frequency into the COM Active Frequency Field Auto tuning a COM frequency for a nearby airport from the PFD 1 Press the NRST Softkey on the PFD to open the Nearest Airports Window A list of 25 nearest airport identifiers and COM frequencies i...

Страница 114: ...ed COM frequency Figure 4 11 3 Press the ENT Key to load the COM frequency into the standby field of the selected COM radio 4 Press the Frequency Transfer Key to transfer the frequency to the COM Active Frequency Field Figure 4 9 Frequency Auto Tuning from the MFD Turn the FMS Knob to Scroll Through a List of Frequencies Press the ENT Key to Load a Highlighted Frequency into the COM Standby Freque...

Страница 115: ...Nearest Frequencies Menu On the WPT Airport Information Page the cursor can be placed on the frequency field by pressing the FMS Knob and scrolling through the list The frequency is transferred to the COM Standby Field with the ENT Key Press ENT Key to load frequency into COM Standby Field Cursor then advances to the next frequency Select INFO Softkey for AIRPORT RUNWAYS and FREQUENCIES Windows Se...

Страница 116: ...VOIDANCE AFCS ADDITIONAL FEATURES APPENDICES INDEX COM frequencies can also be auto tuned from the NRST Nearest Airspaces NRST Nearest Frequencies and NRST Nearest Airports Pages on the MFD in a similar manner using the appropriate softkeys or MENU Key the FMS Knob and the ENT Key Figure 4 12 NRST Nearest Airspaces NRST Nearest Airports and NRST Nearest Frequencies Pages ...

Страница 117: ...vailable in the complete 3040 channel list COM channel spacing is set on the System Setup Page of the AUX Page Group Figure 4 13 COM Channel Spacing 25 kHz Channel Spacing 8 33 kHz Channel Spacing Changing COM frequency channel spacing 1 Select the AUX System Setup Page 2 Press the FMS Knob to activate the flashing cursor 3 Turn the large FMS Knob to highlight the Channel Spacing Field in the COM ...

Страница 118: ...d over the headsets and speaker if selected Pressing the VOL SQ Knob again enables Automatic Squelch When Automatic Squelch is disabled a white SQ appears next to the COM frequency Figure 4 15 Overriding Automatic Squelch Squelch Indication Press the COM VOL SQ Knob to turn off Automatic Squelch Press again to restore Automatic Squelch VOLUME COM radio volume level can be adjusted from 0 to 100 us...

Страница 119: ...V1 While cycling through the CDI Softkey selections the NAV Tuning Box and the Frequency Transfer Arrow are placed in the active NAV Frequency Field and the active NAV frequency color changes to green The three navigation modes that can be cycled through are VOR1 or LOC1 If NAV1 is selected a green single line arrow not shown labeled either VOR1 or LOC1 is displayed on the HSI and the active NAV1 ...

Страница 120: ...8 Selecting a NAV Radio Receiver NAV RECEIVER MANUAL TUNING The NAV frequency controls and frequency boxes are on the left side of the MFD and PFDs Manually tuning a NAV frequency 1 Turn the NAV Knob to tune the desired frequency in the NAV Tuning Box 2 Press the Frequency Transfer Key to transfer the frequency to the NAV Active Frequency Field 3 Adjust the volume level with the NAV VOL ID Knob 4 ...

Страница 121: ...mple shown in order to listen to either station identifier press the NAV1 or NAV2 Key on the Audio Panel Pressing the VOL ID Knob turns off the Morse code audio only in the radio with the NAV Tuning Box To turn off both NAV IDs transfer the NAV Tuning Box between NAV1 and NAV2 with the small NAV Knob and press the VOL ID Knob again to turn the Morse code off in the other radio Figure 4 21 NAV Radi...

Страница 122: ...cies can be automatically loaded into the NAV Frequency Box from pages in the NRST or WPT page group by highlighting the frequency and pressing the ENT Key Figures 4 23 4 24 and 4 25 Auto tuning a NAV frequency from the WPT and NRST Pages 1 From any page that the NAV frequency can be auto tuned activate the cursor by pressing the FMS Knob or selecting the appropriate softkey 2 Turn the FMS Knob to...

Страница 123: ...u 2 Turn the large FMS Knob to scroll through the menu options 3 Press the ENT Key to place the cursor in the desired window 4 Scroll through the frequency selections with the FMS Knob 5 Press the ENT Key to load the NAV frequency into the standby field of the selected NAV radio 6 Press the Frequency Transfer Key to transfer the frequency to the NAV Active Frequency Field Figure 4 24 Nearest Pages...

Страница 124: ...the VOR Softkey or from the page menu The FMS Knob or ENT Key is used to scroll through the list The cursor is placed on the frequency with the FREQ Softkey and loaded into the NAV Tuning Box with the ENT Key Select the FREQ Softkey to Place the Cursor on the VOR Frequency Figure 4 25 Loading the NAV Frequency from the NRST Nearest VOR Page Press the ENT Key to Load the Frequency into the NAV Stan...

Страница 125: ...TURES APPENDICES INDEX While enroute NAV frequencies can also be auto tuned from the NRST Nearest Airports WPT Airport Information WPT VOR Information and NRST Nearest Frequencies Pages on the MFD in a similar manner using the appropriate softkeys or MENU Key the FMS Knob and the ENT Key Figure 4 26 NRST Nearest Frequencies WPT VOR Information WPT Airport Information and NRST Nearest Airports Page...

Страница 126: ...s are automatically loaded into the NAV Frequency Box on approach activation When loading or activating a VOR or ILS LOC approach the approach frequency is automatically transferred to a NAV frequency field as follows If the current CDI navigation source is GPS the approach frequency is transferred to the NAV1 or NAV2 active frequency fields The frequency that was previously in the NAV1 or NAV2 ac...

Страница 127: ...anel provides three different states of marker beacon operation On Muted and Deselected Pressing the MKR MUTE Key selects and deselects marker beacon audio The key annunciator indicates when marker beacon audio is selected During marker beacon audio reception pressing the MKR MUTE Key mutes the audio but does not affect the marker annunciations Figure 4 27 The marker tone is silenced then waits fo...

Страница 128: ...iodically and contains information such as altitude barometric and GPS GPS position and aircraft identification The purpose of extended squitter is to provide aircraft position and identification to ADS B Ground Based Transceivers GBTs and other aircraft The Hazard Avoidance Section provides more details on traffic avoidance systems TRANSPONDER CONTROLS Transponder function is displayed on three l...

Страница 129: ...ftkey Selecting a transponder mode 1 Select the XPDR Softkey to display the Transponder Mode Selection Softkeys 2 Select the desired softkey to activate the transponder mode GROUND MODE Ground Mode is normally selected automatically when the aircraft is on the ground The transponder powers up in the last mode it was in when shut down Ground Mode can be overridden by pressing any one of the Mode Se...

Страница 130: ...s are transmitted When Standby is selected a white STBY indication and transponder code appear in the mode field of the Transponder Data Box In all other modes these fields appear in green STBY Mode White Code Number and Mode Figure 4 31 Standby Mode MANUAL ON MODE ON Mode can be selected at any time by pressing the ON Softkey ON Mode generates Mode A and Mode S replies as well as transmission of ...

Страница 131: ...e A Mode C and Mode S replies as well as transmissions of acquisition and extended squitters including ADS B out if equipped If Altitude Mode is selected a green ALT indication and transponder code appear in the mode field of the Transponder Data Box and all transponder replies requesting altitude information are provided with pressure altitude information ALT Mode Mode C Altitude Reporting Figure...

Страница 132: ...us digit Five seconds after the fourth digit has been entered the transponder code becomes active Entering a Code Figure 4 35 Entering a Code Entering a transponder code with the PFD FMS Knob 1 Press the XPDR and the CODE Softkeys as in the previous procedure to enable code entry 2 Turn the small FMS Knob on the PFD to enter the first two code digits 3 Turn the large FMS Knob to move the cursor to...

Страница 133: ...l ATC The ID return distinguishes one transponder from all the others on the air traffic controller s radar screen The IDENT Softkey appears on all levels of transponder softkeys When the IDENT Softkey is pressed a green IDNT indication is displayed in the mode field of the Transponder Data Box for a duration of 18 seconds After the IDENT Softkey is pressed while in Mode or Code Selection the syst...

Страница 134: ...he system automatically removes it upon completion of Flight ID entry Entering a Flight ID 1 Press the TMR REF Softkey to display the Timer References Window 2 Press the FMS Knob to activate the selection cursor if not already activated 3 Turn the large FMS Knob to scroll down to the Flight ID 4 Turn the small FMS Knob to enter the desired Flight ID 5 Press the ENT Key to complete Flight ID entry ...

Страница 135: ...ing a monaural headset in a stereo jack shorts the right headset channel output to ground While this does not damage the Audio Panel a person listening on a monaural headset hears only the left channel in both ears If a monaural headset is used at one of the passenger positions any other passenger using a stereo headset hears audio in the left ear only SPEAKER All of the radios can be heard over t...

Страница 136: ...NS FLIGHT MANAGEMENT HAZARD AVOIDANCE AFCS ADDITIONAL FEATURES APPENDICES INDEX INTERCOM The Audio Panel includes a four position intercom system ICS and two stereo music inputs for the pilot copilot and up to two passengers The intercom provides Pilot and Copilot isolation from the passengers and aircraft radios Figure 4 42 Intercom Controls ...

Страница 137: ...s aural alerts pilot passengers music1 TEL audio Copilot Selected radios aural alerts pilot passengers music2 TEL audio Pilot passengers ON ON OFF Selected radios aural alerts pilot copilot Selected radios aural alerts pilot copilot Passengers music2 TEL audio Passengers ON ON ON Selected radios aural alerts pilot copilot TEL audio Selected radios aural alerts pilot copilot TEL audio Passengers mu...

Страница 138: ...squelch threshold Turning either knob clockwise increases the squelch threshold level Turning either knob counterclockwise decreases the squelch threshold level When the MAN SQ annunciation is not lit squelch is automatic and the large squelch knobs have no function Figure 4 43 Intercom Volume and Squelch Controls Copilot Passenger Volume and Manual Squelch Pulling the right volume knob controls p...

Страница 139: ...RANCE RECORDER AND PLAYER The Audio Panel contains a digital clearance recorder that records up to 2 5 minutes of the selected COM radio signal Recorded COM audio is stored in separate memory blocks Once 2 5 minutes of recording time have been reached the recorder begins recording over the stored memory blocks starting from the oldest block The PLAY Key controls the play function Pressing the PLAY...

Страница 140: ...adios The pilot can still monitor NAV1 NAV2 ADF DME and MKR Audio as selected but the copilot is only able to monitor COM2 Pressing the COM 1 2 Key selects Split COM operation The COM 1 2 Annunciator is illuminated indicating Split COM operation COM1 and COM2 frequencies are displayed in green indicating that both transceivers are active Split COM operation is cancelled by pressing the COM 1 2 Key...

Страница 141: ...istribution of the entertainment input see Table 4 1 CREW MUSIC Crew music Music1 can be heard by the pilot and copilot when both the PILOT and the COPLT ICS Annunciators are extinguished Crew music can also be heard by the pilot when the COPLT Annunciator is illuminated and by the copilot when the PILOT Annunciator is illuminated Music Muting Crew music muting occurs when aircraft radio or marker...

Страница 142: ... LED turns OFF and squelch is automatic The Copilot side volume knob controls the Copilot and passenger intercom volume level Pulling the right volume knob controls passenger volume pushing in controls Copilot volume Figure 4 47 Intercom Volume and Squelch Controls Copilot Passenger Volume and Manual Squelch Pilot Volume On Off and Manual Squelch The MKR MUTE key selects marker audio and silences ...

Страница 143: ...m the following steps will aid in maximizing the use of the Audio Panel as well as prevent pilot and copilot induced issues These preflight procedures should be performed each time a pilot boards the aircraft to insure awareness of all audio levels in the Audio Panel and radios Pilot and Copilot ICS Isolation Keys Copilot Passenger Volume and Manual Squelch Pilot Volume and Manual Squelch Automati...

Страница 144: ...M2 MIC Key Annunciator on the Audio Panel flashes as long as the PTT Key remains stuck Figure 4 51 Stuck Microphone Alert COM TUNING FAILURE In case of a COM system tuning failure the emergency frequency 121 500 MHz is automatically tuned in the radio in which the tuning failure occurred Depending on the failure mode a red X may appear on the frequency display Figure 4 52 COM Tuning Failure Emerge...

Страница 145: ...the INSET Softkey Pressing the INSET Softkey again then pressing the OFF Softkey removes the Inset Map The Navigation Map displays aviation data e g airports VORs airways airspaces geographic data e g cities lakes highways borders topographic data map shading indicating elevation and hazard data e g traffic terrain weather The amount of displayed data can be reduced by pressing the DCLTR Softkey T...

Страница 146: ...Nearest Airports Window Timer Reference Window Inset Map Navigation Status Box Navigation Mode Figure 5 2 GPS Navigation Information on the MFD Navigation Page Active Flight Plan Leg Navigation Map Aviation Data Geographic Data Topographic Data Hazard Data Navigation Status Box Aircraft Icon at Present Position Navigation Page Title Map Range Map Orientation Flight Plan Leg NAVIGATION STATUS BOX T...

Страница 147: ...Bearing BRG Fuel over Destination FOD Distance DIS Ground Speed GS Desired Track DTK Minimum Safe Altitude MSA Endurance END True Air Speed TAS Enroute Safe Altitude ESA Track Angle Error TKE Estimated Time of Arrival ETA Track TRK Estimated Time Enroute ETE Vertical Speed Required VSR Fuel on Board FOB Crosstrack Error XTK MFD Navigation Status Box The navigation information displayed in the four...

Страница 148: ...ange ring Obstacle data Fuel range ring The information in this section applies to the following maps unless otherwise noted All Map Group Pages MAP Flight Plan Pages FPL All Waypoint Group Pages WPT Direct to Window AUX Trip Planning PFD Inset Map All Nearest Group Pages NRST Procedure Loading Pages MAP ORIENTATION Maps are shown in one of four different orientation options allowing flexibility i...

Страница 149: ...ion data reflect the orientation selected for the Navigation Map Page Changing the Navigation Map orientation 1 With the Navigation Map Page displayed press the MENU Key The cursor flashes on the Map Setup option Figure 5 4 Navigation Map Page Menu Window Map Setup Selection 2 Press the ENT Key to display the Map Setup Window 3 Turn the large FMS Knob or press the ENT Key once to select the ORIENT...

Страница 150: ... map ranges available from 500 feet to 2000 nm The current range is indicated in the lower right corner of the map and represents the top to bottom distance covered by the map When the map range is decreased to a point that exceeds the capability of the G950 to accurately represent the map a magnifying glass icon is shown to the left of the map range To change the map range turn the Joystick count...

Страница 151: ... awareness may not be what is desired Increase the minimum look ahead time to a value that limits the auto zoom to a minimum range that provides acceptable situational awareness Flight plans that have a combination of long and short legs cause the range to increase and decrease as waypoints sequence To avoid this auto zoom can be disabled or the maximum minimum times can be adjusted The time out t...

Страница 152: ...s the FMS Knob to return to the Navigation Map Page MAP PANNING Map panning allows the pilot to View parts of the map outside the displayed range without adjusting the map range Highlight and select locations on the map Review information for a selected airport NAVAID or user waypoint Designate locations for use in flight planning View airspace and airway information When the panning function is s...

Страница 153: ...ed and there has been no pointer movement for about 60 seconds the map reverts back to centered on the aircraft position and the flashing pointer is removed When the Map Pointer is placed on an object the name of the object is highlighted even if the name was not originally displayed on the map When any map feature or object is selected on the map display pertinent information is displayed Figure ...

Страница 154: ...space information is shown at the top of the display The information includes the name and class of airspace the ceiling in feet above Mean Sea Level MSL and the floor in feet MSL Figure 5 10 Navigation Map Map Pointer on Airspace Map Pointer on Airspace Information about Airspace Panning the map 1 Press the Joystick to display the Map Pointer 2 Move the Joystick to move the Map Pointer around the...

Страница 155: ...ewing information for an airport NAVAID or user waypoint 1 Place the Map Pointer on a waypoint 2 Press the ENT Key to display the Waypoint Information Page for the selected waypoint 3 Press the GO BACK Softkey the CLR Key or the ENT Key to exit the Waypoint Information Page and return to the Navigation Map showing the selected waypoint Figure 5 11 Navigation Map Information Window NAVAID NAVAID In...

Страница 156: ...r a special use or controlled airspace 1 Place the Map Pointer on an open area within the boundaries of an airspace 2 Press the ENT Key to display an options menu 3 Review Airspace should already be highlighted if not select it Press the ENT Key to display the Airspace Information Page for the selected airspace 4 Press the CLR or ENT Key to exit the Airspace Information Page Figure 5 12 Navigation...

Страница 157: ...r the Measure Pointer is provided in a window at the top of the navigation map Measuring bearing and distance between any two points 1 Press the MENU Key with the Navigation Map Page displayed 2 Highlight the Measure Bearing Distance field 3 Press the ENT Key A Measure Pointer is displayed on the map at the aircraft s present position 4 Move the Joystick to place the reference pointer at the desir...

Страница 158: ... TOPO Softkey Not Enabled Topographic data on Profile Map Displaying removing topographic data on all pages displaying navigation maps 1 Press the MAP Softkey the INSET Softkey for the PFD Inset Map 2 Press the TOPO Softkey 3 Press the TOPO Softkey again to remove topographic data from the Navigation Map When topographic data is removed from the page all navigation data is presented on a black bac...

Страница 159: ...aller than the range selected in the Map Setup pages e g a setting of 100 nm removes the item at ranges above 100 nm on MFD navigation maps while the PFD Inset Map removes the same item at 50 nm Selecting a topographical data range TOPO DATA 1 Press the MENU Key with the Navigation Map Page displayed The cursor flashes on the Map Setup option 2 Press the ENT Key The Map Setup Menu is displayed 3 S...

Страница 160: ...TOPO SCALE Maximum Displayed Elevation Minimum Displayed Elevation Aircraft Altitude MSL Ground Elevation at Pointer Location only visible when Pointer is displayed Range of Displayed Elevations Displaying removing the topographic scale TOPO SCALE 1 Press the MENU Key with the Navigation Map Page displayed The cursor flashes on the Map Setup option 2 Press the ENT Key The Map Setup Menu is display...

Страница 161: ...ing the DCLTR Softkey is also discussed LAND SYMBOLS The following items are configured on the land menu Land Symbols Text label size can be None Small Medium Med or Large Lrg Symbol Default Range nm Maximum Range nm Latitude Longitude LAT LON Off 2000 Highways and Roads Interstate Highway FREEWAY 300 800 International Highway FREEWAY 300 800 US Highway NATIONAL HWY 30 80 State Highway LOCAL HWY 1...

Страница 162: ... NAVAIDs 2000 2000 Large Airports LARGE APT Longest Runway 8100 ft 250 500 Medium Airports MEDIUM APT 8100 ft Longest Runway 5000 ft 150 300 Small Airports SMALL APT Longest Runway 5000 ft Medium Airport if it has a tower frequency 50 100 Taxiways SAFETAXI See Additional Features 3 20 Runway Extension RWY EXTENSION N A Off 100 Intersection INT WAYPOINT 15 30 Non directional Beacon NDB WAYPOINT 15 ...

Страница 163: ...shes on the Map option 3 Highlight the LAND DATA field 4 Select On or Off 5 Press the FMS Knob to return to the Navigation Map Page Figure 5 18 Navigation Map Setup Menu LAND DATA Setup LAND DATA On Off The label size TEXT sets the size at which labels appear on the display none small medium and large The range RNG sets the maximum range at which items appear on the display Selecting a Land or Avi...

Страница 164: ...gure 5 19 Navigation Map Setup Menu LAND GROUP Setup Maximum Display Range Text Label Size None Small Med or Lrg Figure 5 20 Navigation Map Setup Menu AVIATION GROUP Setup Maximum Display Range Text Label Size None Small Med or Lrg NOTE Since the PFD Inset Map is much smaller than the MFD navigation maps items are removed on the PFD Inset Map two range levels smaller than the range selected in the...

Страница 165: ...ption Figure 5 21 Navigation Map Declutter Level Indications Declutter Level Navigation Map Page Menu DCLTR Softkey Decluttering the map Press the DCLTR Softkey with the Navigation Map Page displayed The current declutter level is shown With each softkey selection another level of map information is removed Or 1 Press the MENU Key with the Navigation Map Page displayed 2 Select Declutter The curre...

Страница 166: ...ter 2 Declutter 3 Data Link Radar Precipitation X Data Link Lightning X Graphical METARs X Airports X Safe Taxi X Runway Labels X TFRs X Restricted X MOA Military X User Waypoints X X Latitude Longitude Grid X X NAVAIDs does not declutter if used to define airway X X Intersections does not declutter if used to define airway X X Class B Airspaces TMA X X Class C Airspaces TCA X X Class D Airspaces ...

Страница 167: ... primarily between VORs High Altitude Airways or Jet Routes primarily serve airliners jets turboprops and turbocharged piston aircraft operating above 18 000 feet MSL Jet Routes start at 18 000 feet MSL and extend upward to 45 000 feet MSL altitudes above 18 000 feet are called flight levels and are described as FL450 for 45 000 feet MSL Jet Routes are designated with a J before the route number L...

Страница 168: ...or flashes on the Map Setup option 2 Press the ENT Key The Map Setup Menu is displayed 3 Turn the small FMS Knob to select the Airways group and press the ENT Key 4 Turn the large FMS Knob to highlight the AIRWAYS field 5 Turn the FMS Knob to select Off All LO Only or HI Only and press the ENT Key 6 Press the FMS Knob to return to the Navigation Map Page Figure 5 23 Navigation Map Setup Menu AIRWA...

Страница 169: ...to a predicted location The track vector look ahead time is selectable 30 sec 60 sec default 2 min 5 min 10 min 20 min and determines the length of the track vector The track vector shows up to 90 degrees of a turn for the 30 and 60 second time settings Figure 5 24 Navigation Map Track Vector Track Vector Displaying removing the track vector 1 Press the MENU Key with the Navigation Map Page displa...

Страница 170: ...e map displays a wind vector arrow in the upper right hand portion of the screen Wind vector information is displayed as a white arrow pointing in the direction in which the wind is moving for wind speeds greater than or equal to 1 kt Figure 5 26 Navigation Map Wind Vector Wind Direction Wind Speed NOTE The wind vector is not displayed until the aircraft is moving It is not displayed on the Waypoi...

Страница 171: ...avigation Map Nav Range Ring Nav Range Ring Range radius NOTE The Nav Range Ring is not displayed on the Waypoint Information pages Nearest pages or Direct to Window map Displaying removing the Nav Range Ring 1 Press the MENU Key with the Navigation Map Page displayed The cursor flashes on the Map Setup option 2 Press the ENT Key The Map Setup Menu is displayed 3 Select the Map group 4 Press the E...

Страница 172: ...n Map Fuel Range Ring Range to Reserve Fuel Time to Reserve Fuel Total Endurance Range Displaying removing the fuel range ring and selecting a fuel range time 1 Press the MENU Key with the Navigation Map Page displayed The cursor flashes on the Map Setup option 2 Press the ENT Key The Map Setup Menu is displayed 3 Select the Map group 4 Press the ENT Key 5 Highlight the FUEL RNG RSV field 6 Select...

Страница 173: ...n as two dashed lines forming a V shape in front of the aircraft symbol on the map This is only available if SVT is installed on the aircraft Figure 5 29 Navigation Map Field of View Lateral Field of View Boundaries Displaying removing the field of view 1 Press the MENU Key with the Navigation Map Page displayed The cursor flashes on the Map Setup option 2 Press the ENT Key The Map Setup Menu is d...

Страница 174: ...selected altitude The location will be shown as a cyan arc when the aircraft is actuallly climbing or descending Figure 5 30 Navigation Map Range to Altitude Arc Range to Altitude Arc Displaying removing the selected altitude intercept arc 1 Press the MENU Key with the Navigation Map Page displayed The cursor flashes on the Map Setup option 2 Press the ENT Key The Map Setup Menu is displayed 3 Sel...

Страница 175: ...r to the CNS and Audio Panel section for details on auto tuning Waypoints can be selected by entering the ICAO identifier entering the name of the facility or by entering the city name See the System Overview section for detailed instructions on entering data in the G950 As a waypoint identifier facility name or location is entered the G950 s Spell N Find feature scrolls through the database displ...

Страница 176: ...rport Information Page Map The Airport Information Page is the first page in WPT group and allows the pilot to view airport information load frequencies COM NAV and lighting review runways and review instrument procedures that may be involved in the flight plan See the Audio Panel and CNS Section for more information on loading frequencies auto tuning After engine startup the Airport Information P...

Страница 177: ...irport Information ID Facility City Usage Type Region Lat Long Elev Fuel Available Time Zone UTC Offset COM NAV Freq Info Identification Frequency Availability Additional Information Softkeys The following descriptions and abbreviations are used on the Airport Information Page Usage type Public Military Private or Heliport Runway surface type Hard Turf Sealed Gravel Dirt Soft Unknown or Water Runw...

Страница 178: ...tudes TPA Aircraft Class Altitude Runway Headings Length Width Obstructions Surface Phones Phone Fax Numbers Weather Service Type Frequency Phone Number Obstructions General Airport Obstructions Hours Facility Hours Light Hours Tower Hours Beacon Hours Flight Service Station FSS FSS Name Phone Numbers Special Operations at Airport Location Sectional Magnetic Variation Instrument Approaches Publish...

Страница 179: ... The Destination Airport is displayed The Airport Frequencies Box uses the descriptions and abbreviations listed in the following table Communication Frequencies Navigation Frequencies Approach Arrival ASOS ATIS AWOS Center Class B Class C Clearance Control CTA Departure Gate Ground Helicopter Multicom Other Pre Taxi Radar Ramp Terminal TMA Tower TRSA Unicom ILS LOC May include Additional Informat...

Страница 180: ...nformation Window on PFD Airport Information Usage Time Elev Region Airport Information Lat Long Airport Information ID Type City Facility The Nearest Airports Page on the MFD is first in the group of NRST pages because of its potential use in the event of an in flight emergency In addition to displaying a map of the currently selected airport and surrounding area the page displays nearest airport...

Страница 181: ...n to the Nearest Airports Window press the ENT Key with the cursor on BACK or press the CLR Key The cursor is now on the next airport in the nearest airports list Repeatedly pressing the ENT Key moves through the airport list alternating between the NearestAirportsWindow and theAirport InformationWindow 4 Press the CLR Key or the NRST Softkey to close the PFD Nearest Airports Window Viewing inform...

Страница 182: ...ways or runways that are not appropriately surfaced from being displayed Default settings are 0 feet or meters for runway length and HARD SOFT for runway surface type Selecting nearest airport surface matching criteria 1 Use the FMS Knob to select the System Setup Page 2 Press the FMS Knob momentarily to activate the flashing cursor 3 Turn the large FMS Knob to highlight the runway surface field i...

Страница 183: ...Information Page displays intersection information in three boxes labeled INTERSECTION INFORMATION and NEAREST VOR Figure 5 39 Intersection Information Page Selected Intersection Navigation Map Showing Selected Intersection Intersection Identifier Nearest VOR Info Identifier Type symbol Radial to VOR Distance to VOR Intersection Info Region Lat Long Select an intersection 1 With the Intersection I...

Страница 184: ...s labeled NEAREST INT INFORMATION and REFERENCE VOR The selected intersection is indicated by a white arrow Up to eleven Intersections are visible at a time If there are more than can be shown the list can be scrolled If there are no items for display text indicating that fact is displayed NOTE The list only includes waypoints that are within 200 nm Figure 5 40 Nearest Intersections Page Nearest I...

Страница 185: ...Nearest City Nearest Airport Info Identifier Type symbol Bearing Distance to Airport NDB Information Type Region Lat Long NDB Frequency NOTE Compass locator LOM a low power low or medium frequency radio beacon installed in conjunction with the instrument landing system When LOM is used the locator is at the Outer Marker when LMM is used the locator is at the Middle Marker Select an NDB 1 With the ...

Страница 186: ...NDB INFORMATION and FREQUENCY A white arrow before the NDB identifier indicates the selected NDB Up to eleven NDBs are visible at a time If there are more than can be shown each list can be scrolled The list only includes waypoints that are within 200nm If there are no NDBs in the list text indicating that there are no nearest NDBs is displayed If there are no nearest NDBs in the list the informat...

Страница 187: ...t s displayed as VOR DME In addition to displaying a map of the currently selected VOR and surrounding area the VOR Information Page displays VOR information in four boxes labeled VOR INFORMATION FREQUENCY and NEAREST AIRPORT Figure 5 43 VOR Information Page Selected VOR Navigation Map Showing Selected VOR VOR Identifier Type Facility Name Nearest City Nearest Airport Info Identifier Type symbol B...

Страница 188: ...kly find a VOR station close to the aircraft Also a NAV frequency from a selected VOR station can be loaded from the Nearest VOR Page In addition to displaying a map of the surrounding area the Nearest VOR Page displays information for up to 25 nearest VOR stations in three boxes labeled NEAREST VOR INFORMATION and FREQUENCY The list only includes waypoints that are within 200 nm A white arrow bef...

Страница 189: ...r waypoints are erased upon system power down Figure 5 45 User Waypoint Information Page Selected User Waypoint Navigation Map Showing Selected User Waypoint User Waypoint List Identifier Comment Softkeys User Wpts Used GO BACK displayed if User Wpt was created on map page User Wpt Comment User Waypoint Info Identifier Temporary Normal Waypoint Type Reference Wpt Info Identifier Rad Dist or Identi...

Страница 190: ...ss the NEW Softkey or press the MENU Key and select Create New User Waypoint 2 Enter a user waypoint name up to six characters 3 Press the ENT Key The current aircraft position is the default location of the new waypoint 4 If desired define the type and location of the waypoint in one of the following ways a Select RAD RAD using the small FMS Knob press the ENT Key and enter the two reference wayp...

Страница 191: ... ENT Key and enter the two reference waypoint identifiers and radials into the REFERENCE WAYPOINTS window using the FMS Knobs Or b Select RAD DIS using the small FMS Knob press the ENT Key and enter the reference waypoint identifier the radial and the distance into the REFERENCE WAYPOINTS window using the FMS Knobs Or c Select LAT LON using the small FMS Knob press the ENT Key and enter the latitu...

Страница 192: ... two reference waypoint identifiers and radials into the REFERENCE WAYPOINTS window using the FMS Knobs Or b Select RAD DIS using the small FMS Knob press the ENT Key and enter the reference waypoint identifier the radial and the distance into the REFERENCE WAYPOINTS window using the FMS Knobs Or c Select LAT LON using the small FMS Knob press the ENT Key and enter the latitude and longitude into ...

Страница 193: ...5 Press the FMS Knob to remove the flashing cursor A system generated comment for a user waypoint incorporates the reference waypoint identifier bearing and distance If a system generated comment has been edited a new comment can be generated Resetting the comment field to the system generated comment 1 Enter a waypoint name or select the waypoint in the User Waypoint List then press the ENT Key 2...

Страница 194: ...indow 3 Press the ENT Key 4 Press the FMS Knob to remove the flashing cursor Or 1 Highlight a User Waypoint in the User Waypoint List or enter a waypoint in the User Waypoint field 2 Press the MENU Key 3 Select Delete User Waypoint 4 Press the ENT Key twice to confirm the selection 5 Press the FMS Knob to remove the flashing cursor NOTE The option to Delete All User Waypoints is not available whil...

Страница 195: ...irspaces MOA Military Class D Airspace Class B Airspace TFR Restricted Area Class C Airspace Alert Area ADIZ Warning Area The Nearest Airspaces Page Airspace Alerts Window and Airspace Alerts on the PFD provide additional information about airspaces and the location of the aircraft in relationship to them The Airspace Alerts Box allows the pilot to turn the controlled special use airspace message ...

Страница 196: ...e setting 1 Use the FMS Knob to select the AUX System Setup Page 2 Press the FMS Knob momentarily to activate the flashing cursor 3 Turn the large FMS Knob to highlight the altitude buffer field in the Airspace Alerts Box 4 Use the FMS Knob to enter an altitude buffer value and press the ENT Key 5 Press the FMS Knob to remove the flashing cursor Turning an airspace alert on or off 1 Use the FMS Kn...

Страница 197: ...AIRSPACE AGENCY VERTICAL LIMITS and FREQUENCIES Figure 5 50 Nearest Airspaces Page Airspace Alerts Info Name Proximity Ahead Inside Ahead 2nm Within 2nm Time till Intercept only if Ahead or Ahead 2nm Airspace Vertical Limits Ceiling Floor Airspace Agency Info Airspace Type Controlling Agency Softkeys Airspace 3 Associated Frequencies Type Availability Info Frequency Airspace 1 Airspace 2 Airspace ...

Страница 198: ...ace alerts are displayed in the message window Message Comments INSIDE ARSPC Inside airspace The aircraft is inside the airspace ARSPC AHEAD Airspace ahead less than 10 minutes Special use airspace is ahead of aircraft The aircraft penetrates the airspace within 10 minutes ARSPC NEAR Airspace near and ahead Special use airspace is near and ahead of the aircraft position ARSPC NEAR Airspace near le...

Страница 199: ... vertical navigation VNV direct to creates a descent path and provides guidance to stay on the path from the current altitude to a selected altitude at the direct to waypoint Vertical navigation is based on barometric altitudes not on GPS altitude and is used for cruise and descent phases of flight The Direct to Window allows selection and activation of direct to navigation The Direct to Window di...

Страница 200: ...s the ENT Key The Activate field is highlighted 4 Press the ENT Key to activate the direct to Any waypoint contained in the active flight plan can be selected as a direct to waypoint from the Direct to Window the Active Flight Plan Page or the Active Flight Plan Window Figure 5 53 Waypoint Submenu Waypoint Submenu Flight Plan Waypoints Nearest Airports Recent Waypoints User Waypoints Airway Waypoi...

Страница 201: ... is active or a blank waypoint field Direct to requests on any WPT page defaults to the displayed waypoint Selecting any waypoint as a direct to destination 1 Select the page or window containing the desired waypoint type and select the desired waypoint 2 Press the Direct to Key to display the Direct to Window with the selected waypoint as the direct to destination 3 Press the ENT Key The cursor i...

Страница 202: ...ect to Navigation Page Menu Cancel Direct To Navigation When navigating a direct to the G950 sets a direct great circle course to the selected destination The course to a destination can also be manually selected using the course field COURSE on the Direct to Window Selecting a manual direct to course 1 Press the Direct to Key The Direct to Window is displayed with the destination field highlighte...

Страница 203: ...ical Navigation for more information regarding the use and purpose of VNV altitudes and offset distances Entering a VNV altitude and along track offset for the waypoint 1 Press the Direct to Key to display the Direct to Window 2 Turn the large FMS Knob to place the cursor over the VNV altitude field 3 Enter the desired altitude 4 Press the ENT Key The option to select MSL or AGL is now displayed 5...

Страница 204: ...t TOPO On Non heading Leg not in the current flight segment TOPO Off Turn Anticipation Arc TOPO On TOPO Off Table 5 7 Flight Plan Leg Symbols Up to 99 flight plans with up to 99 waypoints each can be created and stored in memory One flight plan can be activated at a time and becomes the active flight plan The active flight plan is erased when the system is turned off and overwritten when another f...

Страница 205: ... exit waypoint not found in the new database Airway entry exit waypoint is not an acceptable waypoint for the airway either the waypoint is no longer on the airway or there is a new directional restriction that prevents it being used Loading the new airway sequence would exceed the capacity of the flight plan FLIGHT PLAN CREATION There are three methods to create or modify a flight plan Active Fli...

Страница 206: ...FPL Info Departure Waypoint Destination Waypoint Total Flight Plan Distance Enroute Safe Altitude Catalog Contents Used Empty Softkeys Selected Flight Plan Map The active flight plan is listed on the active Flight Plan Page on the MFD and in the Active Flight Plan Window on the PFD It is the flight plan to which the G950 is currently providing guidance and is shown on the navigation maps Stored fl...

Страница 207: ...er each additional flight plan waypoint 6 When all waypoints have been entered press the FMS Knob to remove the cursor Creating a stored flight plan 1 Press the FPL Key 2 Turn the small FMS Knob clockwise to display the Flight Plan Catalog Page 3 Press the NEW Softkey or press the MENU Key highlight Create New Flight Plan and press the ENT Key to display a blank flight plan for the first empty sto...

Страница 208: ... plan 6 Press the IMPORT Softkey or press the MENU Key select Import Flight Plan and press the ENT Key If an empty slot is selected a list of the available flight plans on the SD card will be displayed Or If an existing flight plan is selected an Overwrite existing flight plan OK or CANCEL prompt is displayed Press the ENT Key to choose to overwrite the selected flight plan and see the list of ava...

Страница 209: ...rd slot on the MFD 2 Press the FPL Key on the Control Unit to display the Active Flight Plan Page on the MFD 3 Turn the small FMS Knob to select the Flight Plan Catalog Page 4 Press the FMS Knob to activate the cursor 5 Turn the large FMS Knob to highlight the flight plan to be exported 6 Press the EXPORT Softkey or press the MENU Key select Export Flight Plan 7 If desired change the name for the ...

Страница 210: ...and it is added in front of the selected waypoint Flight plans are limited to 99 waypoints including waypoints within airways and procedures If the number of waypoints in the flight plan exceeds 99 the message Flight plan is full Remove unnecessary waypoints appears and the new waypoint s are not added to the flight plan Figure 5 61 Stored Flight Plan Page Stored Flight Plan Selected Memory Slot C...

Страница 211: ... Enter the identifier facility or city name of the waypoint or select a waypoint from the submenu of waypoints and press the ENT Key The new waypoint now exists in the flight plan NOTE If the identifier entered in the Waypoint Information Window has duplicates a Duplicate Waypoint Window is displayed Use the FMS Knob to select the correct waypoint Figure 5 63 Duplicate Waypoints Window Adding a wa...

Страница 212: ...t plan Choose a flight plan add the desired airway entry point if not already in the flight plan select the waypoint after the desired airway entry point select the airway and it is added in front of the selected waypoint An airway can only be loaded if there is a waypoint in the flight plan that is part of the desired airway and is not part of an arrival or approach procedure The G950 also antici...

Страница 213: ...lid airway entry waypoint has been chosen the waypoint ahead of the cursor position 5 Turn the FMS Knob to select the desired airway from the list and press the ENT Key Low altitude airways are shown first in the list followed by all altitude airways and then high altitude airways 6 Turn the FMS Knob to select the desired airway exit point from the list and press the ENT Key LOAD is highlighted 7 ...

Страница 214: ...uch that it can be flown only in the direction MTD ABB BNE DEVAL Airway UR975 in North Africa has more complicated directional restrictions within the list of airway waypoints AMANO VAKOR LIBRO NELDA DIRKA GZO KOSET and SARKI Starting from AMANO the airway can be flown only to LIBRO Starting from SARKI the airway can be flown only to LIBRO Between NELDA and GZO the airway can be flown in either di...

Страница 215: ...allows the pilot to insert pre defined instrument procedures from the navigation database into a flight plan The procedures are designed to facilitate routing of traffic leaving an airport departure arriving at an airport arrival and landing at an airport approach See the procedures section for more details Figure 5 67 Stored Flight Plan Page Flight Plan Name Flight Plan Waypoint List Softkeys New...

Страница 216: ...elected Departure Departures Available at KMKC Departure Waypoint Sequence Preview of Selected Departure Loading a departure procedure into a stored flight plan 1 Select a stored flight plan from the Flight Plan Catalog Page 2 Press the EDIT Softkey or press the MENU Key select EDIT FLIGHT PLAN and press the ENT Key The Stored Flight Plan Page is displayed 3 Press the LD DP Softkey or press the ME...

Страница 217: ...ure 5 69 Departure Loading Page Selecting Transition Departure Airport Selected Departure Departure Transition Points Available Selected Runway Selected Departure End Point Preview of Selected Departure Selected Transition Figure 5 70 Stored Flight Plan Page Departure Inserted Inserted Departure Header Departure Identifier departure airport departure runway departure transition departure end point...

Страница 218: ...rt Selected Arrival Arrivals Available at KCOS Arrival Waypoint Sequence Preview of Selected Arrival Selected Runway Loading an arrival procedure into a stored flight plan 1 Select a stored flight plan from the Flight Plan Catalog Page 2 Press the EDIT Softkey or press the MENU Key select EDIT FLIGHT PLAN and press the ENT Key The Stored Flight Plan Page is displayed 3 Press the LD STAR Softkey or...

Страница 219: ...URES APPENDICES INDEX Figure 5 72 Arrival Loading Page Selecting the Transition Destination Airport Selected Arrival Transitions Available with DBRY1 Arrival Waypoint Sequence Preview of Selected Arrival Selected Transition Figure 5 73 Stored Flight Plan Page Arrival Inserted Inserted Arrival Header Arrival Identifier arrival airport arrival transition arrival arrival runway e g KCOS TBE DBRY1 ALL...

Страница 220: ...ght plan 1 Select a stored flight plan from the Flight Plan Catalog Page 2 Press the EDIT Softkey or press the MENU Key select Edit Flight Plan and press the ENT Key The Stored Flight Plan Page is displayed 3 Press the LD APR Softkey or press the MENU Key select Load Approach and press the ENT Key The Approach Loading Page is displayed 4 Select the airport and approach a Use the FMS Knob to select...

Страница 221: ...DICES INDEX Figure 5 75 Approach Loading Page Selecting the Transition Destination Airport Selected Approach Transitions Available with Selected Approach Approach Waypoint Sequence Preview of Selected Approach Load Approach Selected Transition Figure 5 76 Stored Flight Plan Page Approach Inserted Inserted Approach Header Approach Identifier approach airport runway and approach type e g KCOS RNAV 3...

Страница 222: ...he cursor and turn the FMS Knob to highlight the desired flight plan 4 The Flight Plan Information is displayed showing departure destination total distance and enroute safe altitude information for the selected Flight Plan 5 Press the EDIT Softkey to open the Stored Flight Plan Page and view the waypoints in the flight plan 6 Press the FMS Knob to exit the Stored Flight Plan Page Figure 5 77 Stor...

Страница 223: ...NVERT Softkey or press the MENU Key highlight Invert activate FPL and press the ENT Key The Invert and activate stored flight plan window is displayed 4 With OK highlighted press the ENT Key To cancel the request press the CLR Key or highlight CANCEL and press the ENT Key COPY A FLIGHT PLAN The G950 allows copying a flight plan into a new flight plan memory slot allowing editing etc without affect...

Страница 224: ...tive flight plan affect navigation as soon as they are entered DELETING THE ACTIVE FLIGHT PLAN The G950 allows deletion of an active flight plan Deleting the active flight plan suspends navigation by the G950 Deleting the active flight plan 1 Press the FPL Key to display the Active Flight Plan Page MFD or the Active Flight Plan Window PFD 2 Press the MENU Key highlight Delete Flight Plan and press...

Страница 225: ...ight plan 1 Press the FPL Key to display the Active Flight Plan Page MFD or the Active Flight Plan Window PFD 2 Press the FMS Knob to activate the cursor not required on the PFD and turn the large FMS Knob to highlight the white header of the procedure to be deleted Or Use the Joystick to place the Quick Select Box on the white header of the procedure to be deleted MFD only 3 Press the CLR Key The...

Страница 226: ...ght the white header of the airway to be deleted 6 Press the CLR Key The Remove airway name window is displayed 7 With OK highlighted press the ENT Key To cancel the request press the CLR Key or highlight CANCEL and press the ENT Key 8 Press the FMS Knob to remove the flashing cursor Deleting an entire procedure from a stored flight plan 1 Press the FPL Key to display the Active Flight Plan Page 2...

Страница 227: ...nges 5 Press the FMS Knob to remove the flashing cursor Changing a stored flight plan comment 1 Press the FPL Key to display the Active Flight Plan Page 2 Turn the small FMS Knob clockwise one click to display the Flight Plan Catalog Page 3 Press the FMS Knob to activate the cursor and turn the FMS Knob to highlight the flight plan to be edited 4 Press the EDIT Softkey or press the MENU Key select...

Страница 228: ... cannot be modified once entered If the along track offset distance must be changed the existing along track offset waypoint must be deleted and a new one created with the new offset distance Figure 5 78 Along Track Offset Along Track Offset Waypoint and Distance Along Track Offset Waypoint and Distance from Flight Plan Waypoint Entering an along track offset distance 1 Press the FPL Key to displa...

Страница 229: ...ccurs greater than 120 or the parallel tracks overlap as a result of the course change NOTE Vertical navigation is unavailable while the Parallel Track feature is active Figure 5 79 Active Flight Plan Window Selecting Parallel Track Selecting Parallel Track Active Flight Plan prior to Parallel Track Activating parallel track 1 Press the FPL Key to display the Active Flight Plan Page MFD or the Act...

Страница 230: ...S p LAA p Activating Parallel Track affects the entire active flight plan up to but not including the IAF Parallel Track Original Track If the parallel track proposed by the offset direction and distance is not allowed by the system the activation prompt is displayed but disabled Parallel Track cannot be activated if a course is set using direct to or if the active leg is the first leg of the depa...

Страница 231: ...re 5 82 Parallel Track Unavailable Subdued Prompt Unavailable Unavailable Status Invalid Approach Geometry Active If the active leg is not a track between two fixes TF or a course to a fix DF leg the status indicates that the system is unable to activate the parallel track because parallel track is not available for the active leg type Figure 5 83 Cancelling Parallel Track Cancel Prompt Active Sta...

Страница 232: ... FMS Knob to activate the cursor not required on the PFD and turn the large FMS Knob to highlight the destination waypoint for the desired leg Or Use the Joystick to place the Quick Select Box on the destination waypoint for the desired leg 3 Press the ACT LEG Softkey MFD only or press the MENU Key highlight Activate Leg and press the ENT Key A confirmation window is displayed with ACTIVATE highli...

Страница 233: ...nvert Active Flight Plan confirmation window is displayed 3 Select OK 4 Press the ENT Key to invert and activate the active flight plan To cancel press the CLR Key or highlight CANCEL and press the ENT Key Inverting and activating a stored flight plan 1 Press the FPL Key on the MFD to display the Active Flight Plan Page 2 Turn the small FMS Knob clockwise one click to display the Flight Plan Catal...

Страница 234: ...e and cumulative waypoint distance 1 Press the FPL Key on the MFD to display the Active Flight Plan Page 2 Press the VIEW Softkey to display the CUM and LEG LEG Softkeys 3 Press the CUM Softkey to view cumulative waypoint distance or press the LEG LEG Softkey to view leg to leg waypoint distance 4 Press the BACK Softkey to return to the top level active flight plan softkeys Figure 5 86 Active Flig...

Страница 235: ...on the airway heading When airways are collapsed leg to leg computed values such as DIS or ETE shown for the exit waypoint reflects the total of all the legs on the airway that have been hidden in the collapsed display The DTK value is inhibited because it is not usable in this context The Active Flight Plan Page always keeps the following three waypoints visible From waypoint To waypoint and the ...

Страница 236: ... flight plan to the selected reference waypoint and creates a user waypoint at this location The name for the new user waypoint is derived from the identifier of the reference waypoint USER DEFINED HOLDING PATTERNS A holding pattern can be defined at any active flight plan waypoint at the aircraft present position or at a direct to waypoint Creating a user defined hold at an active flight plan way...

Страница 237: ...NDICES INDEX Waypoint Selected Hold At Wpt Menu Selection Figure 5 89 Creating a User Defined Holding Pattern at an Active Flight Plan Waypoint Location of Hold Expect Further Clearance Time Leg Length Mode Button TIME or DIST Map of Hold Location Course Direction INBOUND or OUTBOUND Leg Length Time in nm or Distance in minutes Hold Entry Course Turn Direction RIGHT or LEFT Load Hold in Active Fli...

Страница 238: ...to edit the entry course and press the ENT Key 3 Use the small FMS Knob to select INBOUND or OUTBOUND course direction and press the ENT Key 4 Use the small FMS Knob to select TIME or DIST length mode and press the ENT Key 5 Use the FMS Knobs to edit the length and press the ENT Key 6 Use the small FMS Knob to select RIGHT or LEFT turn direction and press the ENT Key 7 Use the FMS Knobs to edit th...

Страница 239: ...PFD or MFD 2 Press the MENU Key to display the PAGE MENU with the cursor on the Cancel Direct To NAV selection 3 Press the ENT Key The holding pattern is removed Hold At Present Position Menu Selection Figure 5 90 Creating a User Defined Holding Pattern at the Aircraft Present Position Location of Hold Expect Further Clearance Time Leg Length Mode Button TIME or DIST Map of Hold Location Course Di...

Страница 240: ...NDICES INDEX Waypoint Selected Hold At Direct To Waypoint Selection Figure 5 91 Creating a User Defined Holding Pattern at a Direct To Waypoint Location of Hold Expect Further Clearance Time Course Direction INBOUND or OUTBOUND Leg Length Time in nm or Distance in minutes Turn Direction RIGHT or LEFT Load Hold and Activate Direct To Map of Hold Location Hold Entry Course Leg Length Mode Button TIM...

Страница 241: ...ath is defined by a line joining two waypoints with specified altitudes or as a vertical angle from a specified waypoint altitude The vertical waypoints are integrated into the active flight plan Figure 5 92 Enabling Disabling Vertical Navigation CNCL VNV Softkey Current Vertical Navigation Profile Disabled fields dashed ENBL VNV Softkey Current Vertical Navigation Profile Enabled valid data Enabl...

Страница 242: ...allows the flight plan to be flown while vertical guidance based on the altitude constraint at the VNV direct to waypoint is provided The altitude change begins immediately and is spread along the flight plan from current position to the vertical direct to waypoint not just along the leg for the direct to waypoint A direct to with altitude constraint activated by pressing the Direct to Key also pr...

Страница 243: ... 1 Press the FPL Key to display the Active Flight Plan Page on the MFD 2 Press the VNV PROF Softkey or press the MENU Key highlight SelectVNV ProfileWindow and press the ENT Key The cursor is now located in the CURRENT VNV PROFILE box 3 Turn the FMS Knobs as needed to edit the values 4 Press the FMS Knob to remove the flashing cursor ALTITUDE CONSTRAINTS The G950 system can use altitude constraint...

Страница 244: ...titude Constraint Size and Color Coding Altitudes associated with approach procedures are auto designated This means the system automatically uses the altitudes loaded with the approach for giving vertical speed and deviation guidance Note that these altitudes are displayed as cyan text up to but not including the FAF The FAF is always a reference only altitude and cannot be designated unless the ...

Страница 245: ...play the Active Flight Plan Page on the MFD 2 Press the FMS Knob and turn to highlight the desired waypoint altitude constraint 3 Enter an altitude constraint value using the FMS Knobs To enter altitudes as a flight level turn the small FMS Knob counter clockwise past zero or clockwise past 9 on the first character and the system automatically changes to show units of Flight Level Turn the large F...

Страница 246: ...e 1 Press the FPL Key to display the Active Flight Plan Page on the MFD 2 Press the FMS Knob and turn to highlight the desired waypoint altitude constraint Or Use the Joystick to place the Quick Select Box on the desired waypoint altitude constraint MFD only 3 Press the CLR Key A Remove or Revert to published VNV altitude of nnnnnFT confirmation window is displayed 4 Select REVERT and press the EN...

Страница 247: ...ther load or activate is given Loading adds the approach to the end of the flight plan without immediately using it for navigation guidance This allows continued navigation via the intermediate waypoints in the original flight plan but keeps the procedure available on the Active Flight Plan Page for quick activation when needed Activating also adds the procedure to the end of the flight plan but i...

Страница 248: ...route is defined by selection of a departure the transition waypoints and a runway LOADING A DEPARTURE INTO THE ACTIVE FLIGHT PLAN Loading a departure into the active flight plan using the PROC Key 1 Press the PROC Key The Procedures Window is displayed 2 Highlight SELECT DEPARTURE 3 Press the ENT Key The Departure Loading Page is displayed 4 Select a departure from the list and press the ENT Key ...

Страница 249: ... to activate the cursor enter an identifier facility name city and press the ENT Key 3 Press the FMS Knob then turn the large FMS Knob to highlight the Departure The departure is previewed on the map 4 Turn the small FMS Knob to view the available departures Press the ENT Key to select the departure The cursor moves to the Runway box The departure is previewed on the map 5 Turn the small FMS Knob ...

Страница 250: ... select the transition The cursor moves to the Sequence box The departure is previewed on the map 4 Press the MENU Key to display the Departure Information Page Menu 5 Turn the FMS Knob to highlight Load Departure 6 Press the ENT Key to load the departure procedure into the active flight plan REMOVING A DEPARTURE FROM THE ACTIVE FLIGHT PLAN When plans change while flying IFR departures can be easi...

Страница 251: ...The route is defined by selection of an arrival the transition waypoints and a runway LOADING AN ARRIVAL INTO THE ACTIVE FLIGHT PLAN Loading an arrival into the active flight plan using the PROC Key 1 Press the PROC Key The Procedures Window is displayed 2 Highlight SELECT ARRIVAL 3 Press the ENT Key The Arrival Loading Page is displayed 4 Select an arrival from the list and press the ENT Key 6 Se...

Страница 252: ...ss the FMS Knob to activate the cursor enter an identifier facility name city and press the ENT Key 3 Press the FMS Knob then turn the large FMS Knob to highlight the Arrival The arrival is previewed on the map 4 Turn the small FMS Knob to view the available arrivals Press the ENT Key to select the arrival The cursor moves to the Transition box The arrival is previewed on the map 5 Turn the small ...

Страница 253: ...the available runways Press the ENT Key to select the runway The cursor moves to the Sequence box The arrival is previewed on the map 4 Press the MENU Key to display the Arrival Information Page Menu 5 Turn the FMS Knob to highlight Load Arrival 6 Press the ENT Key to load the arrival procedure into the active flight plan REMOVING AN ARRIVAL FROM THE ACTIVE FLIGHT PLAN When plans change while flyi...

Страница 254: ...ts in the original flight plan but keeps the procedure available on the Active Flight Plan Page for quick activation when needed Activating also adds the procedure to the end of the flight plan but immediately begins to provide guidance to the first waypoint in the approach When selecting an approach a GPS designation to the right of the procedure name indicates the procedure can be flown using th...

Страница 255: ...sing published LPV minima Table 5 9 Approach Types LOADING AN APPROACH INTO THE ACTIVE FLIGHT PLAN Loading an approach into the active flight plan using the PROC Key 1 Press the PROC Key The Procedures Window is displayed 2 Highlight SELECT APPROACH and press the ENT Key The Approach Loading Page is displayed 3 Select the airport and approach a Use the FMS Knob to select an airport and press the E...

Страница 256: ...IVATE and press the ENT Key to load and activate the approach procedure NOTE When GPS is not approved for the selected final approach course the message NOT APPROVED FOR GPS is displayed GPS provides guidance to the approach but the HSI must to be switched to a NAV receiver to fly the final course of the approach Figure 5 100 Approach Selection Destination Airport Approach Preview Available Proced...

Страница 257: ...b to select the altitude Press the ENT Key b If temperature compensated minimums was selected the cursor moves to the temperature field Use the small FMS Knob to select the temperature Press the ENT Key The cursor moves to the Sequence box The approach is previewed on the map Or a When minimums are selected off the cursor moves to the Sequence box The approach is previewed on the map 7 Press the I...

Страница 258: ...inal use the steps above to select Activate Vector To Final which makes the inbound course to the FAF waypoint active Activating a previously loaded approach with vectors to final 1 Press the PROC Key to display the Procedures Window 2 Highlight ACTIVATE VECTOR TO FINAL and press the ENT Key Loading and activating an approach using the MENU Key 1 From the Approach Loading Page press the MENU Key T...

Страница 259: ...enterline until the altitude required to safely make the first turn toward the MAHP is exceeded This altitude is provided by the navigation database and may be below equal to or above the published minimums for this approach In this case if the aircraft altitude is below the specified altitude 6 368 feet after crossing the MAP a direct to is established to provide a course on runway heading until ...

Страница 260: ...highlight Temperature Compensation 3 Press the ENT Key The TEMPERATURE COMPENSATION Window is displayed 4 Use the small FMS Knob to select the temperature at the airport The compensated altitude is computed as the temperature is selected NOTE The temperature at the destination can be entered in the TEMPERATURE COMPENSATION Window on the MFD or in the REFERENCES Window on the PFD There is only one ...

Страница 261: ...ncelling temperature compensated altitude 1 From the Active Flight Plan Page press the MENU Key The Page Menu is displayed 2 Turn the FMS Knob to highlight Temperature Compensation 3 Press the ENT Key The TEMPERATURE COMPENSATION Window is displayed 4 Press the ENT Key CANCEL COMPENSATION is highlighted 5 Press the ENT Key The temperature compensated altitude at the FAF is cancelled NOTE Activatin...

Страница 262: ... Calibrated Airspeed Indicated Altitude Barometric Pressure Total Air Temperature Softkeys Automatic Manual Page Mode Flight Plan Waypoint Mode Preview of Selected Flight Plan Flight Plan Leg Trip Planning Page Mode Automatic Manual Selected Flight Plan Segment FPL Number Cumulative Legs CUM or REM or Leg Number NN Waypoints Defining Selected Flight Plan Flight Plan Leg Fuel Statistics Efficiency ...

Страница 263: ...e of the calculated trip statistics are dashed when the selected leg of the active flight plan has already been flown Desired Track DTK DTK is shown as nnn and is the desired track between the selected waypoints It is dashed unless only a single leg is selected Distance DIS The distance is shown in tenths of units up to 99 9 and in whole units up to 9999 Estimated time enroute ETE ETE is shown as ...

Страница 264: ... taking the time of fuel endurance and subtracting the estimated time enroute to the end of the selected leg Fuel required for trip FUEL REQ This value is calculated by multiplying the time to go by the fuel flow Total range at entered fuel flow TOTAL RANGE This value is calculated by multiplying the time of fuel endurance by the ground speed OTHER STATISTICS These statistics are calculated based ...

Страница 265: ...ta Selecting waypoints for waypoint mode 1 Press the WPTS Softkey or press the MENU Key highlight Waypoints Mode and press the ENT Key The cursor is positioned in the waypoint field directly below the FPL field 2 Turn the FMS knobs to select the desired waypoint or select from the Page Menu SetWPT to Present Position if that is what is desired and press the ENT Key The cursor moves to the second w...

Страница 266: ... of the tighter protection limit on approaches there may be times when RAIM is not available RAIM prediction must be initiated manually if there is concern over SBAS coverage at the destination or some other reason that compromises navigation precision If RAIM is not predicted to be available for the final approach course the approach does not become active If RAIM is not available when crossing t...

Страница 267: ...ess the FMS Knob The RAIM Prediction WAYPOINT field is highlighted 3 Press the MENU Key highlight Set WPT to Present Position and press the ENT Key 4 Press the ENT Key to accept the waypoint entry 5 Turn the FMS Knobs to enter an arrival time and press the ENT Key 6 Turn the FMS Knobs to enter an arrival date and press the ENT Key 7 Press the ENT Key with COMPUTE RAIM highlighted to begin the comp...

Страница 268: ... 110 SBAS Display Active SBAS Softkey displays SBAS Selection SBAS SELECTION Box EGNOS Enable Disable MSAS Enable Disable WAAS Enable Disable RAIM Softkey displays RAIM PREDICTION SBAS Status Enabling Disabling SBAS 1 Select the AUX GPS Status Page 2 Press the SBAS Softkey 3 Press the FMS Knob and turn the large FMS Knob to highlight EGNOS MSAS or WAAS 4 Press the ENT Key to disable SBAS Press the...

Страница 269: ...T INSTRUMENTS EIS AUDIO PANEL CNS FLIGHT MANAGEMENT HAZARD AVOIDANCE AFCS ADDITIONAL FEATURES APPENDICES INDEX Figure 5 111 SBAS Display Active SBAS Softkey displays SBAS Selection SBAS SELECTION Box EGNOS Enable Disable MSAS Enable Disable WAAS Enable Disable RAIM Softkey displays RAIM PREDICTION SBAS Status ...

Страница 270: ...ould be considered not current The example is a flight plan from KMKC to KCOS filed using the TIFTO2 departure various Victor Airways and the DBRY1 arrival with the transition at TBE The flight plan includes an enroute altitude of 12 000 feet an LPV WAAS approach selected for runway 35R and a missed approach executed at the Missed Approach Point MAP A few enroute changes are demonstrated 1 Prior t...

Страница 271: ...NEL CNS FLIGHT MANAGEMENT HAZARD AVOIDANCE AFCS ADDITIONAL FEATURES APPENDICES INDEX 3 ATC now assigns routing to joinV4 A heading of 290º is assigned to interceptV4 The aircraft turns to heading 290 as seen in Figure 5 113 Figure 5 113 Assigned Heading of 290º 4 Enter V4 into the flight plan a Press the FMS Knob to activate the cursor ...

Страница 272: ...OP must be entered Turn the large FMS Knob to highlight the desired flight plan insertion point SLN as shown in Figure 5 114 When the V4 entry point TOP is inserted it is placed immediately above the highlighted waypoint SLN Figure 5 114 Begin Adding V4 to the Flight Plan c Turn the small FMS Knob to display the Waypoint Information Window Enter the desired entry point for V4 Topeka VOR TOP as sho...

Страница 273: ...light plan as in Figure 5 116 Figure 5 116 TOP Inserted into the Flight Plan e With SLN still highlighted as in Figure 5 116 turn the small FMS Knob clockwise The Waypoint Information Page is displayed and the LD AIRWY Softkey is now available f Press the LD AIRWY Softkey to display the list of available airways for TOP as seen in Figure 5 117 Figure 5 117 List of Available Airways for TOP g Turn ...

Страница 274: ... h Press the ENT Key The list of available exits for V4 is now displayed as in Figure 5 118 Figure 5 118 List of Available Exits for V4 i If necessary turn either FMS Knob to select the desired exit In this case Salina VOR SLN is selected as in Figure 5 118 j Press the ENT Key The selected airway and exit are displayed and the prompt LOAD highlighted as in Figure 5 119 Figure 5 119 Ready to Load V...

Страница 275: ...flight plan as shown in Figure 5 120 Figure 5 120 V4 is Loaded in the Flight Plan 5 Making V4 the active leg of the flight plan a Press the FMS Knob to activate the cursor b Turn the large FMS Knob to highlight SLN The TO waypoint of the leg is selected in order to activate the leg c Press the ACT LEG Softkey The confirmation window is now displayed as in Figure 5 121 Note the TOP to SLN leg is ac...

Страница 276: ...nta line on the map indicating V4 is now the active flight plan leg Note the phase of flight remained in Terminal TERM mode up to this point because a departure leg was active Since a leg after the departure is now active the current CDI flight phase is ENR Enroute and CDI scaling has changed to 2 0 nm Figure 5 122 V4 Now Active Leg 6 The aircraft continues on heading 290º When crosstrack distance...

Страница 277: ...ENT HAZARD AVOIDANCE AFCS ADDITIONAL FEATURES APPENDICES INDEX 7 As the CDI approaches center the aircraft turns onto the active leg as seen in Figure 5 123 Figure 5 123 Turn on to Active Leg 8 At SLN Victor Airway 244 V244 is intercepted Turn prompts are displayed in the PFD Navigation Status Box as seen in Figure 5 124 Figure 5 124 Turn to Intercept V244 ...

Страница 278: ...2 Rev A 266 FLIGHT MANAGEMENT SYSTEM OVERVIEW FLIGHT INSTRUMENTS EIS AUDIO PANEL CNS FLIGHT MANAGEMENT HAZARD AVOIDANCE AFCS ADDITIONAL FEATURES APPENDICES INDEX 9 As seen in Figure 5 125 V244 is now the active flight plan leg Figure 5 125 V244 Now Active Leg ...

Страница 279: ... intercepted See Figure 5 126 Figure 5 126 HYS to LAA Leg Active 11 ATC grants clearance to proceed direct to the OPSHN intersection to begin the arrival procedure ATC advises to expect an altitude of 10 000 feet at OPSHN a Press the FMS Knob to activate the cursor b Turn the large FMS Knob to select OPSHN in the flight plan list c Press the Direct to Key The Direct to Window is now displayed as s...

Страница 280: ...gure 5 128 Figure 5 128 Enter VNV Altitude e An altitude of 10 000 feet is entered as requested by ATC f Press the ENT Key The cursor is now displayed in the VNV offset field as shown in Figure 5 129 Figure 5 129 Enter VNV Offset Distance g Enter the offset or distance from the waypoint at which to reach the selected altitude In this case three miles prior to OPSHN is entered In other words the G9...

Страница 281: ...centered and maintain a track along the magenta line to OPSHN Note the Direct to waypoint is within the loaded arrival procedure therefore phase of flight scaling for the CDI changes to Terminal Mode and is annunciated by displaying TERM on the HSI NOTE If the loaded arrival procedure has waypoints with altitude constraints retrieved from the database that will be used as is the altitude must be m...

Страница 282: ...CE AFCS ADDITIONAL FEATURES APPENDICES INDEX b SELECT APPROACH should be highlighted as shown in Figure 5 131 Figure 5 131 Procedures Window c Press the ENT Key A list of available approaches for the destination airport is displayed as in Figure 5 132 Figure 5 132 List of Available Approaches d Turn either FMS Knob to select the LPV approach for 35R as shown in Figure 5 132 ...

Страница 283: ...ted approach is displayed as in Figure 5 133 Figure 5 133 List of Available Transitions f Turn either FMS Knob to select the desired transition In this case the Initial Approach Fix IAF at HABUK is used g Press the ENT Key h Barometric Minimums Figure 5 134 To set MINIMUMS turn the small FMS Knob to select BARO and press the ENT Key Turn the small FMS Knob to select the altitude and press the ENT ...

Страница 284: ...ENT SYSTEM OVERVIEW FLIGHT INSTRUMENTS EIS AUDIO PANEL CNS FLIGHT MANAGEMENT HAZARD AVOIDANCE AFCS ADDITIONAL FEATURES APPENDICES INDEX i With LOAD highlighted again press the ENT Key The selected approach is added to the flight plan as seen in Figure 5 135 Figure 5 135 Loaded Approach ...

Страница 285: ...lating vertical deviation guidance perform the following a Press the FMS Knob to activate the cursor b Turn the small FMS Knob to highlight the desired altitude c Press the CLR Key d Press the FMS Knob to deactivate the cursor After making the altitude non designated it is displayed as white text Altitude constraint values associated with the FinalApproach Fix FAF and waypoints beyond the FAF cann...

Страница 286: ...e VNV PROF Softkey to place the cursor in the target vertical speed field VS TGT as shown in Figure 5 137 b At this point the descent vertical speed can be selected or the FPA can be selected Turn the large FMS Knob to select the desired selection field then turn the small FMS Knob to enter the desired value Note the information now displayed in the CURRENTVNV PROFILE box Also note the offset wayp...

Страница 287: ...ed required to reach the selected altitude The Vertical Deviation Indicator VDI and the Required Vertical Speed Indicator RVSI are now displayed on the PFD as shown in Figure 5 139 When the aircraft is within one minute of the TOD it is annunciated as shown in Figure 5 139 and an aural alert Vertical track will be heard Figure 5 138 Approaching Top of Descent TOD Figure 5 139 VDI RVSI Upon Reachin...

Страница 288: ...ch places theVSI pointer in line with the RVSI as shown in Figure 5 140 Figure 5 140 VDI RVSI Showing Correctly Established Descent Align Actual Vertical Speed with Required Vertical Speed Keep Vertical Deviation Pointer Centered 17 When the aircraft is one minute from the bottom of descent BOD it is annunciated as shown in Figure 5 141 Upon reaching the offset waypoint for OPSHN the aircraft is a...

Страница 289: ...S ADDITIONAL FEATURES APPENDICES INDEX 18 The aircraft is approaching OPSHN The upcoming turn and next heading are annunciated at the top left of the PFD as seen in Figure 5 142 Initiate the turn and maneuver the aircraft on a track through the turn radius to intercept the magenta line for the OPSHN to FSHER leg and center the CDI Figure 5 142 Turn to intercept OPSHN to FSHER Leg ...

Страница 290: ...st now indicates the OPSHN to FSHER leg of the arrival procedure is now active Figure 5 143 Tracking the OPSHN to FSHER Leg 20 The flight continues through the arrival procedure to PYNON see Figure 5 144 At a point 31 nm from the destination airport the phase of flight scaling for the CDI changes to Terminal Mode and is annunciated by displaying TERM on the HSI A descent to HABUK is in the next le...

Страница 291: ...n G950 Pilot s Guide for the Pilatus PC 6 279 FLIGHT MANAGEMENT SYSTEM OVERVIEW FLIGHT INSTRUMENTS EIS AUDIO PANEL CNS FLIGHT MANAGEMENT HAZARD AVOIDANCE AFCS ADDITIONAL FEATURES APPENDICES INDEX Figure 5 144 Approaching PYNON ...

Страница 292: ...proceed directly to the IAF In this example the aircraft has progressed through the final waypoint of the arrival and the flight plan has automatically sequenced to the IAF as the active leg activating the approach procedure see Figure 5 145 Figure 5 145 Approach is Now Active Note To manually activate the approach procedure perform the following steps a Press the PROC Key b Turn the large FMS Kno...

Страница 293: ...IS AUDIO PANEL CNS FLIGHT MANAGEMENT HAZARD AVOIDANCE AFCS ADDITIONAL FEATURES APPENDICES INDEX 22 The IAF is the next waypoint At the TOD establish a descent vertical speed as previously discussed in Step 16 The aircraft altitude is 9 000 feet upon reaching HABUK Figure 5 147 Descending Turn to the Initial Approach Fix IAF ...

Страница 294: ...ode and the approach type is LPV CDI scaling changes accordingly and is used much like a localizer when flying an ILS approach The RVSI is no longer displayed and the VDI changes to the Glidepath Indicator as shown in Figure 5 148 when the final approach course becomes active Figure 5 148 Descending to the FAF The descent continues through the FAF CEGIX using the Glidepath Indicator as one would u...

Страница 295: ... be below equal to or above the published minimums for this approach In this case if the aircraft altitude is below the specified altitude 6 368 feet after crossing the MAP a direct to is established to provide a course on runway heading until an altitude of 6 368 feet is reached After reaching 6 368 feet a direct to is established to the published MAHP in this case MOGAL If the aircraft altitude ...

Страница 296: ...decided to execute a missed approach Automatic waypoint sequencing is suspended past the MAP Press the SUSP Softkey on the PFD to resume automatic waypoint sequencing through the missed approach procedure A direct to is initiated to MOGAL which is the Missed Approach Hold Point MAHP as seen in Figure 5 150 The aircraft is climbing to 10 000 feet The CDI flight phase now changes from LPV to MAPR as...

Страница 297: ...NCE AFCS ADDITIONAL FEATURES APPENDICES INDEX 26 The aircraft continues climbing to AT or ABOVE 10 000 feet at MOGAL A holding pattern is established at the MAHP MOGAL as shown in Figure 5 151 Figure 5 151 Establishing the Holding Pattern 27 The aircraft maintains 10 000 feet while following the magenta line through the hold as in Figure 5 152 Figure 5 152 Hold Established ...

Страница 298: ...he aircraft Estimated position information displayed by the G950 through DR while there is no heading and or airspeed data available should not be used for navigation DR Mode is inherently less accurate than the standard GPS SBAS Mode due to the lack of satellite measurements needed to determine a position Changes in wind speed and or wind direction compound the relative inaccuracy of DR Mode Beca...

Страница 299: ...ckoning Mode GPS Derived Data Shown in Yellow Distance Bearing GPS Navigation Lost Message Dead Reckoning Annunciaion Dead Reckoning Annunciation Subdued Aircraft Symbol Nav Data Bar All data except Active Leg TAS and DTK are in yellow Wind Data Wind Data Bearing Pointer Distance Current Track Indicator NOTE The Inset Map is removed from the PFD any time aircraft pitch is greater than 30 or less t...

Страница 300: ...lot s Guide for the Pilatus PC 6 190 00870 02 Rev A 288 FLIGHT MANAGEMENT SYSTEM OVERVIEW FLIGHT INSTRUMENTS EIS AUDIO PANEL CNS FLIGHT MANAGEMENT HAZARD AVOIDANCE AFCS ADDITIONAL FEATURES APPENDICES INDEX Blank Page ...

Страница 301: ...to aid situational awareness and provide advisory information with regard to potential hazards to flight safety associated with weather terrain and air traffic Weather GWX 68 70 Airborne Color Weather Radar Optional L 3 STORMSCOPE WX 500 Lightning Detection System Optional Terrain Avoidance Terrain Proximity Terrain SVS Included with Garmin SVT option Terrain Awareness and Warning System Class B T...

Страница 302: ...sible shadowing effects of short range cell activity identifying areas where radar return signals are weakened or attenuated by intense precipitation or large areas of lesser precipitation and may not fully reflect the weather behind a storm Weather Alert that looks ahead for intense cell activity in the 80 320 nm range even if these ranges are not being monitored PRINCIPLES OF PULSED AIRBORNE WEA...

Страница 303: ...tlight The further the beam travels the wider it becomes The radar is only capable of seeing what is inside the boundaries of the beam The figure below depicts a radar beam s characteristics The figure illustrates vertical dimensions of the radar beam although the same holds true for the horizontal dimensions In other words the beam is as wide as it is tall Note that it is possible to miss areas o...

Страница 304: ...end to the precipitation when in fact the heavy rain may extend much further A cell containing heavy precipitation may block another cell located behind the first preventing it from being displayed on the radar Never fly into these shadowed areas and never assume that all of the heavy precipitation is being displayed unless another cell or a ground target can be seen beyond the heavy cell The WATC...

Страница 305: ...fined Bodies of water such as lakes rivers and oceans are not good reflectors and normally do not provide good returns The energy is reflected in a forward scatter angle with inadequate energy being returned They can appear as dark areas on the display However rough or choppy water is a better reflector and provides stronger returns from the downwind sides of the waves Mountains also provide stron...

Страница 306: ...in SAFE OPERATING DISTANCE The following information establishes a minimum safe distance from the antenna for personnel near operating weather radar The minimum safe distance is based on the FCC s exposure limit at 9 3 to 9 5 GHz for general population uncontrolled environments which is 1 mW cm2 See Advisory Circular 20 68B for more information on safe distance determination MAXIMUM PERMISSIBLE EX...

Страница 307: ...isplayed at a distance that equals the aircraft s current altitude AGL divided by 1 000 For example if the aircraft is at 14 000 feet adjust the tilt so the front edge of ground returns are displayed at 14 nautical miles Note this antenna tilt angle setting Now raise the antenna tilt six degrees above this setting The bottom of the radar beam is now angled down 4º from parallel with the ground PRA...

Страница 308: ...e 6 6 Vertical Change in Radar Beam per Nautical Mile Therefore with the antenna tilt set so that the bottom of the beam is four degrees below parallel with the ground a target return at 10 nm is approximately 4 000 feet below the aircraft at 20 nm 8 000 feet at 50 nm 20 000 feet In other words at this tilt setting a ground return such as a mountain peak being displayed at 10 nm would have a maxim...

Страница 309: ...ssary to identify areas of maximum intensity Along squall lines multiple cells or clusters of cells in a line individual cells may be in different stages of development Areas between closely spaced intense targets may contain developing clouds not having enough moisture to produce a return However these areas could have strong updrafts or downdrafts Targets showing wide areas of green are generall...

Страница 310: ...e shapes do not always indicate tornadoes and tornado returns are not limited to these characteristics Confirmed radar observations of tornadoes most often have not shown shapes different from those of a normal thunderstorm display Hail Hail results from updrafts carrying water high enough to freeze Therefore the higher the top of a thunderstorm the greater the probability that it contains hail Ve...

Страница 311: ...ntial OPERATION IN WEATHER MODE WARNING Begin transmitting only when it is safe to do so When transmitting while the aircraft is on the ground no personnel or objects should be within 9 16 feet of the antenna CAUTION In Standby mode the antenna is parked at the center line It is always a good idea to put the radar in Standby mode before taxiing the aircraft to prevent the antenna from bouncing on ...

Страница 312: ...ey to continue radar activation Or If the aircraft is airborne press the WEATHER Softkey For the GWX 68 only a one minute warm up period is initiated countdown is displayed on the screen After the warm up is complete the radar begins transmitting 4 Turn the Joystick to select the desired map range 5 The horizontal scan is initially displayed Figure 6 10 If desired press the VERTICAL Softkey to cha...

Страница 313: ...the VERTICAL Softkey A vertical slice of the selected area is displayed Figure 6 13 5 The small FMS Knob may be used to move the scanned slice a few degrees right or left 6 Turn the Joystick to adjust the range 7 Press the FMS Knob to remove the cursor 8 To select a new area to be vertically scanned press the HORIZON Softkey to return to the Horizontal Scan view and repeat the previous steps The J...

Страница 314: ...te view of the coverage and intensity of the target in the horizontal scan Adjusting antenna tilt on the Horizontal Scan display 1 Press the FMS Knob to activate the cursor in the TILT field 2 Turn the small FMS Knob to select the desired antenna tilt angle 3 Press the FMS Knob to remove the cursor The Joystick can also be used to adjust tilt up and down Adjusting antenna tilt on the Vertical Scan...

Страница 315: ... the GAIN field 2 Turn the small FMS Knob to adjust the gain for the desirable level The gain setting is visible in the GAIN field as a movable horizontal bar in a flashing box The line pointer is a reference depicting the calibrated position 3 Press the FMS Knob to remove the cursor 4 Press the GAIN Softkey again to recalibrate the gain CALIBRATED is displayed in the GAIN field Calibrated Gain Ma...

Страница 316: ...e small FMS Knob to select FULL 60 40 or 20 scan 6 If desired readjust the Bearing Line as discussed previously to change the center of the Sector Scan 7 Press the BRG Softkey again to remove the Bearing Line and cursor The bearing reference resets to 0º Figure 6 17 40 Sector Scan Antenna Stabilization When radar stabilization is active the radar tilt is corrected for pitch and roll and therefore ...

Страница 317: ...e to weakening of the radar energy This weakening is known as attenuation The radar energy weakens as it passes through areas of intense precipitation large areas of lesser precipitation and distance Issues with the radome also attenuates the radar energy All these factors have an effect on the return intensity The more energy that dissipates the lesser the displayed intensity of the return Accura...

Страница 318: ...ct the WX ALRT Softkey Figure 6 19 Weather Alert Indications Weather Alerts Targets To enable or disable Weather Alerts on the PFD press the WX ALRT Softkey Activating and deactivating enables or inhibits the alert on the PFD and does not affect the display of the Weather Alert Targets on the Weather Radar Page Figure 6 20 Weather Alert on PFD GROUND MAPPING AND INTERPRETATION A secondary use of t...

Страница 319: ...e large FMS Knob to place the cursor in the TILT field 6 Adjust the antenna tilt angle by turning the small FMS Knob to display ground returns at the desired distance 7 Press the FMS Knob to remove the cursor WEATHER RADAR OVERLAY ON THE NAVIGATION MAP PAGE The Map Weather Radar Page is the principal map page for viewing airborne weather radar information Weather radar information may also be show...

Страница 320: ...ress the ENT Key 4 Turn the large FMS Knob to scroll through the product selections and highlight theWX RADAR overlay selection On or Off Turn the small FMS knob to highlight the desired selection 5 To remove the menu press the FMS Knob or CLR Key Weather radar controls on the Navigation Map Page are limited to adjustment of the radar range bearing and antenna tilt angle The airborne weather radar...

Страница 321: ...p or down arrow next to the antenna tilt angle setting indicates the direction of the antenna tilt angle The weather radar overlay uses the same colors as those shown on the Weather Radar Page to indicate the intensity of radar returns However the display of gray WATCH radar attenuation and red weather alert target bands is exclusive to the Weather Radar Page Because terrain information uses simil...

Страница 322: ...AB INOP The radar is not receiving pitch and roll information The antenna stabilization feature is inoperative Table 6 4 Antenna Stabilization Annunciations on the Weather Radar Page If the unit fails an annunciation as to the cause of the failure is shown as a banner in the center of the Weather Radar Page Weather Radar Page Center Banner Annunciation Description BAD CONFIG The radar configuratio...

Страница 323: ... principal map page for viewing Stormscope lightning information To display Stormscope data on the Navigation Map AUX Trip Planning Page or any of the Nearest Pages press the MAP Softkey then press the STRMSCP Softkey These pages can also display cell or strike data using the yellow lightning strike symbology shown in Table 6 6 Table 6 6 Lightning Age and Symbols SETTING UP STORMSCOPE ON THE NAVIG...

Страница 324: ...23 STRMSCP LTNG Turns the display of Stormscope data on or off STRMSCP MODE Selects the CELL or STRIKE mode of lightning activity Cell mode identifies clusters or cells of electrical activity Strike mode indicates the approximate location of lightning strikes STRMSCP SMBL Selects the range at which Stormscope data displays Stormscope data is removed when a map range greater than the STRMSCP SMBL v...

Страница 325: ... indicate cells Strike mode indicates the approximate location of lightning strikes Selecting the cell or strike mode on the Navigation Map 1 Press the MENU Key 2 With Map Setup selected press the ENT Key 3 Select the Weather group 4 Press the ENT Key The cursor flashes on STRMSCP LTNG 5 Turn the large FMS Knob to select STRMSCP MODE 6 Turn the small FMS Knob to change between CELL and STRIKE opti...

Страница 326: ... track up mode at the 500 nm range a portion of Stormscope lightning data can be behind the aircraft and therefore not visible on the Navigation Map Since the range for Stormscope data is 400 nm diameter total 200 nm in front and 200 nm behind the 500 nm range in North up mode shows all the data At a map range of less than 25 nm Stormscope lightning data is not displayed but can still be present T...

Страница 327: ... clockwise to zoom out or counter clockwise to zoom in Figure 6 26 Stormscope Page Changing between cell and strike mode on the Stormscope Page 1 Select the Stormscope Page 2 Press the MODE Softkey The CELL and STRIKE softkeys are displayed 3 Press the CELL Softkey to display CELL data or press the STRIKE Softkey to display STRIKE data CELL or STRIKE is displayed in the mode box in the upper left ...

Страница 328: ...curacies Terrain and obstructions are shown only if they are in the database Terrain and obstacle information should be used as an aid to situational awareness They should never be used to navigate or maneuver around terrain Note that all obstructions may not be available in the terrain and obstacle database No terrain and obstacle information is shown without a valid 3 D GPS position The G950 GPS...

Страница 329: ...nformation maps other than the Terrain Proximity Page 1 Press the MAP Softkey for the PFD Inset Map press the INSET Softkey 2 Press the TERRAIN Softkey to display terrain and obstacle data The Map Terrain Proximity Page is the principal map page for viewing Terrain Proximity information When Terrain Proximity is selected on maps other than the Terrain Proximity Page an icon to indicate the feature...

Страница 330: ...e ENT Key to scroll through product selections Figure 6 30 TERRAIN DATA Turns the display of terrain data on or off and sets maximum range at which terrain is shown OBSTACLE DATA Turns the display of obstacle data on or off and sets maximum range at which obstacles are shown 6 Turn the small FMS Knob to scroll through options for each product ON OFF range settings 7 Press the ENT Key to select an ...

Страница 331: ...ow terrain and obstacle data in relation to the aircraft s current altitude without clutter from the basemap Aviation data airports VORs and other NAVAIDs can be displayed for reference Aircraft orientation on this map is always heading up unless there is no valid heading Two views are available relative to the position of the aircraft the 360 default display and the radar like ARC 120 display Map...

Страница 332: ...n Legend Map Range Rings Map Orientation Current Aircraft GPS derived GSL Altitude Red Terrain Above or Within 100 Below the Aircraft Altitude Black Terrain More than 1000 Below the Aircraft Altitude Red Lighted Obstacle Above or Within 100 Below Aircraft Altitude Yellow Lighted Obstacles Between 100 and 1000 Below Aircraft Altitude Figure 6 33 Terrain Proximity Page ARC View Yellow Terrain Betwee...

Страница 333: ...t Show Profile View or Hide Profile View choice dependent on current state and press the ENT Key Enabling Disabling Profile View Terrain on the Navigation Map when Profile View is enabled 1 Select the Navigation Map Page 2 Press the MAP Softkey 3 Press the TERRAIN Softkey PROFILE VIEW DISPLAY When the Profile View is enabled it is displayed in a window below the Navigation Map Altitude is shown al...

Страница 334: ...ft position to the end of the profile range The width of the Profile View Table 6 8 is determined by the phase of flight as annunciated on the HSI Refer to the Flight Instruments section for more information about flight phases Flight Phase Total Profile View Width Approach 0 6 nm Departure 0 6 nm Terminal 2 0 nm Enroute 4 0 nm Oceanic 4 0 nm Table 6 8 Profile View Width PROFILE PATH The Profile P...

Страница 335: ... Setup highlighted press the ENT Key Figure 6 35 4 Turn the small FMS Knob to select the Profile Group and press the ENT Key Figure 6 36 5 Turn the large FMS Knob or press the ENT Key to scroll through product selections Figure 6 37 PROFILE PATH Turns the display of the Profile Path on or off and sets maximum map range at which the Profile Path is shown 6 Turn the small FMS Knob to scroll through ...

Страница 336: ...151b certified Although the terrain and obstacle color map displays are the same TAWS B uses more sophisticated algorithms to assess aircraft distance from terrain and obstacles Terrain SVS does not provide the following Premature Descent Alerting PDA Excessive Descent Rate EDR Negative Climb Rate NCR 500 Foot Voice Callout alert VCO Terrain SVS requires the following components to operate properl...

Страница 337: ...NG TERRAIN SVS DATA Terrain SVS uses yellow caution and red warning to depict terrain and obstacles with heights greater than 200 feet above ground level AGL alerts relative to aircraft altitude Colors are adjusted automatically as the aircraft altitude changes The colors and symbols in Figure 6 38 and Tables 6 12 and 6 13 are used to represent terrain obstacles and potential impact points Figure ...

Страница 338: ...ing also affects the PFD Inset Map Terrain data can be selected for display independently of obstacle data however obstacles for which warnings and cautions are issued are shown when terrain is selected for display and the map range is within the setting limit Maps besides the Terrain SVS Page use settings based on those selected for the Navigation Map Page The maximum display ranges for obstacles...

Страница 339: ...cted flight path of the aircraft intersect the display automatically zooms in to the closest potential point of impact on the Terrain SVS Page Aircraft orientation on this map is always heading up unless there is no valid heading Two views are available relative to the position of the aircraft the 360 default display and the radar like ARC 120 display Map range is adjustable with the Joystick from...

Страница 340: ...s Map Orientation Current Aircraft GPS derived GSL Altitude Red Terrain Above or Within 100 Below the Aircraft Altitude Black Terrain More than 1000 Below the Aircraft Altitude Red Lighted Obstacle Above or Within 100 Below Aircraft Altitude Yellow Lighted Obstacles Between 100 and 1000 Below Aircraft Altitude Annunciation Window Figure 6 43 Terrain SVS Page ARC View Yellow Terrain Between 100 and...

Страница 341: ...e 6 11 shows Terrain SVS alert types with corresponding annunciations and voice alerts When an alert is issued annunciations appear on the PFD and MFD The Terrain SVS Alert Annunciation is shown to the upper left of the Altimeter on the PFD and below the Terrain Legend on the MFD If the Terrain SVS Page is not displayed at the time a pop up alert appears on the MFD To acknowledge the pop up alert ...

Страница 342: ... the MFD when terrain display is enabled Table 6 11 Terrain SVS Alerts Summary FORWARD LOOKING TERRAIN AVOIDANCE The Forward Looking Terrain Avoidance FLTA feature of Terrain SVS compares the aircraft s projected flight path with known terrain and obstacles in their respective databases and issues alerts as either a caution or a warning Reduced Required Terrain Clearance RTC and Reduced Required O...

Страница 343: ...annunciation TER INH is shown on the PFD and in the MFD terrain annunciation window FLTA alerts may also be manually inhibited Use discretion when inhibiting FLTA alerts as they should be enabled where appropriate Figure 6 47 Terrain SVS Alerting Disabled Terrain SVS Inhibited Annunciation Inhibiting enabling Terrain SVS alerting 1 Select the Terrain SVS Page 2 Press the INHIBIT Softkey to inhibit...

Страница 344: ... System Not Available is generated When sufficient GPS signal is returns and the aircraft is within the database coverage area the voice alert Terrain System Available is generated Alert Type PFD MFD Alert Annunciation Terrain SVS Page Center Banner Annunciation Voice Alert System Test in Progress TERRAIN TEST None System Test Pass None None Terrain System Test OK Terrain Alerting Inhibited None N...

Страница 345: ...ll inclusive and data may be inaccurate TAWS B uses information provided from the GPS receiver to provide a horizontal position and altitude GPS altitude is derived from satellite measurements GPS altitude is then converted to the height above geodetic sea level GSL which is the height above mean sea level MSL calculated geometrically GSL altitude is used to determine TAWS B alerts GSL altitude ac...

Страница 346: ...evel AGL alerts relative to aircraft altitude Colors are adjusted automatically as the aircraft altitude changes The colors and symbols in the figure and tables below are used to represent terrain obstacles and potential impact points Figure 6 48 Terrain Altitude Color Correlation for TAWS B Unlighted Obstacle Lighted Obstacle Obstacle Location 1000 AGL 1000 AGL 1000 AGL 1000 AGL Red obstacle is a...

Страница 347: ... Page Figure 6 49 TAWS B Icon and Legend The Navigation Map Page Setup Menu provides a means in addition to the softkeys for enabling disabling the display of terrain and obstacles The setup menu also controls the map range settings above which terrain and obstacle data are decluttered from the display If a map range larger than the map range setting is selected the data is removed from the map Fo...

Страница 348: ...e 6 51 5 Turn the large FMS Knob or press the ENT Key to scroll through product selections Figure 6 52 TERRAIN DATA Turns the display of terrain data on or off and sets maximum range at which terrain is shown OBSTACLE DATA Turns the display of obstacle data on or off and sets maximum range at which obstacles are shown 6 Turn the small FMS Knob to scroll through options for each product ON OFF rang...

Страница 349: ...entation on this map is always heading up unless there is no valid heading Two views are available relative to the position of the aircraft the 360 default display and the radar like ARC 120 display Map range is adjustable with the Joystick from 1 to 200 nm as indicated by the map range rings or arcs Displaying the TAWS B Page 1 Turn the large FMS Knob to select the Map Page Group 2 Turn the small...

Страница 350: ...low the Aircraft Altitude Black Terrain More than 1000 Below the Aircraft Altitude Red Lighted Obstacle Above or Within 100 Below Aircraft Altitude Annunciation Window Yellow Lighted Obstacles Between 100 and 1000 Below Aircraft Altitude Figure 6 54 TAWS B Page ARC View Yellow Terrain Between 100 and 1000 Below the Aircraft Altitude Red Terrain Above or Within 100 Below the Aircraft Altitude Black...

Страница 351: ...pes with corresponding annunciations and voice alerts When an alert is issued annunciations appear on the PFD and MFD The TAWS B Alert Annunciation is shown to the upper left of the Altimeter on the PFD and below the Terrain Legend on the MFD If the TAWS B Page is not displayed at the time a pop up alert appears on the MFD To acknowledge the pop up alert Press the CLR Key returns to the currently ...

Страница 352: ...l Up or Obstacle Ahead Pull Up Obstacle Ahead Pull Up Reduced Required Terrain Clearance Caution RTC or Caution Terrain Caution Terrain or Terrain Ahead Terrain Ahead Imminent Terrain Impact Caution ITI or Caution Terrain Caution Terrain or Terrain Ahead Terrain Ahead Reduced Required Obstacle Clearance Caution ROC or Caution Obstacle Caution Obstacle or Obstacle Ahead Obstacle Ahead Imminent Obst...

Страница 353: ...KING TERRAIN AVOIDANCE The Forward Looking Terrain Avoidance FLTA feature of TAWS B compares the aircraft s projected flight path with known terrain and obstacles in their respective databases and issues alerts as either a caution or a warning Reduced Required Terrain Clearance RTC and Reduced Required Obstacle Clearance ROC alerts are issued when the aircraft flight path is above terrain yet is p...

Страница 354: ...ts are automatically inhibited when the aircraft is less than 200 feet above the destination runway elevation while within 0 5 nm of the approach runway or the aircraft is between runway ends PREMATURE DESCENT ALERTING A Premature Descent Alert PDA is issued when the system detects that the aircraft is significantly below the normal approach path to a runway Figure 6 60 PDA alerting begins when th...

Страница 355: ...r details FIVE HUNDRED VOICE ALERT The purpose of the Five hundred voice alert is to provide an advisory alert of when the aircraft descends to within 500 feet above the terrain or runway threshold When the aircraft is within five nautical miles of an airport the Five Hundred voice alert is based on the nearest runway threshold elevation When the aircraft is more than five nautical miles of the ne...

Страница 356: ...egative Climb Rate NCR Sink Rate 0 100 200 300 400 500 600 700 800 900 1000 0 500 1000 1500 2000 2500 3000 3500 4000 4500 5000 5500 6000 6500 7000 Sink Rate FPM Height Above Terrain Feet DON T SINK or TOO LOW TERRAIN SYSTEM STATUS During power up TAWS B conducts a self test of its alerting capabilities The system test can also be manually initiated A voice alert is issued at test completion TAWS B...

Страница 357: ... the TAWS B Page The voice alert TAWS Not Available is generated Alert Type PFD MFD Alert Annunciation TAWS B Page Center Banner Annunciation Voice Alert System Test in progress TAWS TEST None System Test pass None None TAWS System Test Test OK TAWS B Alerting Inhibited None None No GPS position NO GPS POSITION TAWS Not Available Excessively degraded GPS signal or Out of database coverage area Non...

Страница 358: ...aft Traffic is displayed using the symbology shown in Table 6 17 TIS Symbol Description Non Threat Traffic Traffic Advisory TA Traffic Advisory Off Scale Table 6 17 TIS Traffic Symbols Traffic Advisories TA alert the crew to intruding aircraft When traffic meets the advisory criteria for the TA a solid yellow circle symbol is generated A TA which is detected but is outside the range of the map on ...

Страница 359: ...on is shown to indicate the feature is enabled for display Figure 6 65 and Table 6 19 Figure 6 65 TIS Traffic on the Navigation Map Page Traffic Advisory Traffic Status Banner Traffic Display Enabled Icon The Navigation Map Page Setup Menu provides a means in addition to the softkey for enabling disabling display of traffic The setup menu also controls the map range settings above which traffic da...

Страница 360: ... selections Figure 6 68 TRAFFIC Turns the display of traffic data on or off TRAFFIC MODE Selects the traffic mode for display select from All Traffic Displays all traffic TA ONLY Displays Traffic Alerts only TRAFFIC SMBL Selects the maximum range at which traffic symbols are shown TRAFFIC LBL Selects the maximum range at which traffic labels are shown with the option to turn off 6 Turn the small F...

Страница 361: ...craft is airborne TIS switches from Standby to Operating Mode and the G950 begins to display traffic information Refer to the System Status discussion for more information Displaying traffic on the Traffic Map Page 1 Turn the large FMS Knob to select the Map Page Group 2 Turn the small FMS Knob to select the Traffic Map Page 3 Confirm TIS is in Operating Mode Press the OPERATE Softkey to begin dis...

Страница 362: ...f a second TA appears on the display or if the number of TAs initially decreases and then subsequently increases another voice alert is generated Figure 6 70 Traffic Annunciation PFD Inset Map Displays When TA is Detected A TIS Not Available TNA voice alert is generated when the TIS service becomes unavailable or is out of range TIS may be unavailable in the radar coverage area due to the followin...

Страница 363: ...50 performs an automatic test of TIS during power up If TIS passes the test TIS enters Standby Mode on the ground or Operating Mode in the air If TIS fails the power up test an annunciation is shown in the center of the Traffic Map Page Traffic Map Page Center Banner Annunciation Description NO DATA Data is not being received from the transponder DATA FAILED Data is being received from the transpo...

Страница 364: ...ailed Once the aircraft is airborne TIS switches to Operating Mode and traffic information is displayed The mode can be changed manually using softkeys or the page menu Mode Traffic Mode Annunciation Traffic Map Page Traffic Display Status Icon Other Maps TIS Operating OPERATING TIS Standby STANDBY also shown in white in center of page TIS Failed FAIL See Table 6 20 for additional failure annuncia...

Страница 365: ... in hundreds of feet and altitude trend arrow climbing descending AGE MM SS Appears if traffic data is not refreshed within 6 seconds If after another 6 seconds data is not received traffic is removed from the display The quality of displayed traffic information is reduced as the age increases TRFC COAST The displayed data is not current 6 to 12 seconds since last message The quality of displayed ...

Страница 366: ...data link Traffic is displayed using the symbols shown in Table 6 21 TAS Symbol Description Non Threat Traffic Proximity Advisory PA Traffic Advisory TA Traffic Advisory Off Scale Table 6 21 TAS Symbol Description A Non threat Advisory shown as an open white diamond indicates that an intruding aircraft is at greater than 1200 feet relative altitude or the distance is beyond 5 nm A Proximity Adviso...

Страница 367: ...ENT Key Switching from standby mode to operating mode On the Traffic Page press the NORMAL Softkey Or 1 Press the MENU Key and turn the small FMS knob to select Normal Mode 2 Press the ENT Key The KTA 870 switches from Standby Mode to Operating Mode as necessary System Self Test 1 Set the range to 2 6 nm to display full traffic test pattern 2 Press the TEST Softkey 3 Self test takes approximately ...

Страница 368: ... to display a larger area or counter clockwise to display a smaller area Figure 6 72 Traffic Map Page Operating Mode Altitude Mode Non Threat Traffic 2500 Above Descending Proximity Advisory 900 Above Level Non Bearing Traffic Bearing Undetermined Distance 4 0 nm 500 Above Descending Traffic Advisory Off Scale 400 Below Level Traffic Display Range Ring Non Threat Traffic Altitude Not Reported Traf...

Страница 369: ...ximity Traffic Figure 6 73 TAS Traffic on Navigation Map Traffic Advisory TA Off Scale Banner Non Bearing Traffic Advisory Non Threat Traffic Traffic Enabled Icon Displaying traffic information PFD Inset Map 1 Press the INSET Softkey 2 Press the TRAFFIC Softkey to display traffic data on the inset map TRFC 1 3 Press the softkey again to display the traffic only inset TRFC 2 4 Press the softkey aga...

Страница 370: ... On the Traffic Page press the ALT MODE Softkey 2 Press one of the following Softkeys BELOW NORMAL ABOVE UNREST unrestricted 3 To return to the Traffic Page press the BACK Softkey Or 1 Press the MENU Key 2 Turn the small FMS Knob to select one of the following BELOW NORMAL ABOVE UNREST unrestricted 3 Press the ENT Softkey TRAFFIC MAP PAGE DISPLAY RANGE The display range on the Traffic Map Page can...

Страница 371: ...tions Figure 6 76 TRAFFIC Turns the display of traffic data on or off TRAFFIC MODE Selects the traffic mode for display select from All Traffic Displays all traffic TA PA Displays Traffic Alerts and Proximity Advisories TA ONLY Displays Traffic Alerts only TRAFFIC SMBL Selects the maximum range at which traffic symbols are shown TRAFFIC LBL Selects the maximum range at which traffic labels are sho...

Страница 372: ...peed on the PFD flashing for 5 seconds and remains displayed until no TAs are detected in the area The PFD Inset Map is automatically displayed with TA traffic A single Traffic voice alert is generated when the number of TAs increases while a previous TA remains active Figure 6 77 Traffic Annunciation PFD Inset Map Displays When TA is Detected SYSTEM STATUS The traffic mode is annunciated in the u...

Страница 373: ...tions The annunciations to indicate the status of traffic information appear in a banner at the lower left corner of maps on which traffic can be displayed Traffic Status Banner Annunciation Description TA OFF SCALE A Traffic Advisory is outside the selected display range Annunciation is removed when traffic comes within the selected display range TA X X XX System cannot determine bearing of Traff...

Страница 374: ...lot s Guide for the Pilatus PC 6 190 00870 02 Rev A 362 HAZARD AVOIDANCE SYSTEM OVERVIEW FLIGHT INSTRUMENTS EIS AUDIO PANEL CNS FLIGHT MANAGEMENT HAZARD AVOIDANCE AFCS ADDITIONAL FEATURES APPENDICES INDEX Blank Page ...

Страница 375: ...EC Fifty Five X Refer to the approved S TEC Fifty Five X Pilot s Operating Handbook POH for comprehensive list of annunciations and operating instructions In addition to the redundant status mode annunciations and or visual representations that are simultaneously displayed on both the G950 AFCS Status Box and or PFD and the S TEC Fifty Five X Autopilot Display and or Remote Annunciator Display the...

Страница 376: ...uide for the Pilatus PC 6 190 00870 02 Rev A 364 AUTOMATIC FLIGHT CONTROL SYSTEM SYSTEM OVERVIEW FLIGHT INSTRUMENTS EIS AUDIO PANEL CNS FLIGHT MANAGEMENT HAZARD AVOIDANCE AFCS ADDITIONAL FEATURES APPENDICES INDEX Blank Page ...

Страница 377: ...t has a SafeTaxi diagram available a close up view of the airport layout can be seen The ChartView and FliteCharts when installed provide on board electronic terminal procedures charts Electronic charts offer the convenience of rapid access to essential information Either ChartView or FliteCharts may be configured in the system but not both The AOPA and optional AC U KWIK Airport Directories offer...

Страница 378: ...arc seconds on each side is required for the operation of SVT Loss of any of the required data including temporary loss of the GPS signal will cause SVT to be disabled until the required data is restored The SVT terrain display shows land contours colors are consistent with those of the topographical map display large water features towers and other obstacles over 200 AGL that are included in the ...

Страница 379: ... displays the SVT feature softkeys The softkeys are labeled PATHWAY SYN TERR HRZN HDG and APTSIGNS The BACK Softkey returns to the previous level of softkeys Synthetic Terrain must be active before any other SVT feature may be activated HRZN HDG APTSIGNS and PATHWAY Softkeys are only available when the SYN TERR Softkey is activated gray with black characters After activating the SYN TERR Softkey t...

Страница 380: ...ss the SYN VIS Softkey 3 Press the SYN TERR Softkey The SVT display will cycle on or off with the SYN TERR Softkey Activating and deactivating Pathways 1 Press the PFD Softkey 2 Press the SYN VIS Softkey 3 Press the PATHWAY Softkey The Pathway feature will cycle on or off with the PATHWAY Softkey Activating and deactivating Horizon Headings 1 Press the PFD Softkey 2 Press the SYN VIS Softkey 3 Pre...

Страница 381: ... feet or one half full scale deviation on the HSI whichever is less The height is 200 feet or one half full scale deviation on the VDI whichever is less The altitude at which the pathway boxes are displayed is determined by the selected altitude during climb cruise and when the active leg is the final approach course prior to intercepting the glidepath glideslope During a descent except while on t...

Страница 382: ...ctive leg when leg sequencing is suspended and are not displayed on any portion of the flight plan leg that would lead to intercepting a leg in the wrong direction Departure and Enroute Prior to intercepting an active flight plan leg pathways are displayed as a series of boxes with pointers at each corner that point in the direction of the active waypoint Pathways are not displayed for the first l...

Страница 383: ... are shown inbound to the Missed Approach Point MAP along the published lateral and vertical descent path or at the selected altitude whichever is lower During an ILS approach the initial approach segment is displayed in magenta at the segment altitudes if GPS is selected as the navigation source on the CDI When switching to localizer inbound with LOC selected as the navigation source on the CDI p...

Страница 384: ... MAHP If the initial missed approach leg is defined by a course using other than GPS pathways are not displayed for that segment In this case the pathways displayed for the next leg may be outside the field of view and will be visible when the aircraft has turned in the direction of that leg Pathways are displayed along each segment including the path required to track course reversals that are pa...

Страница 385: ...st the pilot in maintaining desired altitudes and direction when navigating a flight plan When on course and altitude the FPM is aligned inside the pathway boxes as shown Figure 8 7 The FPM may also be used to identify a possible conflict with the aircraft flight path and distant terrain or obstacles Displayed terrain or obstacles in the aircraft s flight path extending above the FPM could indicat...

Страница 386: ...are displayed in three dimensions appearing larger as they are getting closer and smaller when they are further away Traffic symbols and coloring are consistent with that used for traffic displayed in the Inset map or MFD traffic page If the traffic altitude is unknown the traffic will not be displayed on the SVT display For more details refer to the traffic system discussion in the Hazard Avoidan...

Страница 387: ...ss of runway location with respect to the surrounding terrain All runway thresholds are depicted at their respective elevations as defined in the database In some situations where threshold elevations differ significantly crossing runways may appear to be layered As runways are displayed those within 45 degrees of the aircraft heading are outlined in white Other runways will be outlined in gray Wh...

Страница 388: ... looking Terrain Avoidance FLTA alerts and corresponds to the red and yellow X symbols on the Inset Map and MFD map displays For more detailed information regarding Terrain SVS and TAWS refer to the Hazard Avoidance Section In some instances a terrain or obstacle alert may be issued with no conflict shading displayed on the synthetic terrain In these cases the conflict is outside the SVT field of ...

Страница 389: ...rts Obstacle symbols appear in the perspective view with relative height above terrain and distance from the aircraft Unlike the Inset map and MFD moving map display obstacles on the synthetic terrain display do not change colors to warn of potential conflict with the aircraft s flight path until the obstacle is associated with an actual FLTA alert Obstacles greater than 1000 feet below the aircra...

Страница 390: ...the forward viewing area shown on the PFD Displaying field of view 1 While viewing the Navigation Map Page press the MENU Key to display the PAGE MENU 2 Turn the large FMS Knob to highlight Map Setup and press the ENT Key Figure 8 12 Option Menus Navigation Map Page OPTIONS Menu Map Setup Menu Map Group Field of View Option Field of View 3 Turn the FMS Knob to select the Map Group and press the EN...

Страница 391: ...UDIO PANEL CNS FLIGHT MANAGEMENT HAZARD AVOIDANCE AFCS ADDITIONAL FEATURES APPENDICES INDEX The following figure compares the PFD forward looking depiction with the MFD plan view and FIELD OF VIEW turned on Figure 8 13 PFD and MFD Field of View Comparison Lines Depict PFD Field of View SVT View on the PFD Field of View on the MFD ...

Страница 392: ...s and or complex ramp areas Airport Hot Spots are outlined to caution pilots of areas on an airport surface where positional awareness confusion or runway incursions happen most often Hot Spots are defined with a magenta circle or outline around the region of possible confusion Any map page that displays the navigation view can also show the SafeTaxi airport layout within the maximum configured ra...

Страница 393: ... decluttering level Pressing the DCLTR Softkey removes the taxiway markings and airport feature labels Pressing the DCLTR 1 Softkey removes VOR station ID the VOR symbol and intersection names if within the airport plan view Pressing the DCLTR 2 Softkey removes the airport runway layout unless the airport in view is part of an active route structure Pressing the DCLTR 3 Softkey cycles back to the ...

Страница 394: ...Group and press the ENT Key 4 Turn the large FMS Knob to scroll through the Aviation Group options to SAFETAXI 5 Turn the small FMS Knob to display the range of distances 6 Turn either FMS Knob to select the desired distance for maximum SafeTaxi display range 7 Press the ENT Key to complete the selection 8 Press the FMS Knob to return to the Navigation Map Page SAFETAXI Option Figure 8 16 MAP SETU...

Страница 395: ... is revised every 56 days SafeTaxi is always available for use after the expiration date When turning on the system the Power up Page indicates whether the databases are current out of date or not available Figure 8 17 Power up Page SafeTaxi Database SafeTaxi Database Power up Page Display Definition Normal operation SafeTaxi database is valid and within current cycle SafeTaxi database has expired...

Страница 396: ...the current database cycle SafeTaxi EXPIRES date 10 MAR 14 is the revision date for the next database cycle Figure 8 18 AUX System Status Page SafeTaxi Current Information SafeTaxi Data SafeTaxi information appears in cyan and yellow text The EFFECTIVE date appears in cyan when data is current and in yellow when the current date is before the effective date The EXPIRES date appears in cyan when da...

Страница 397: ...Page The EFFECTIVE date is the beginning date for this database cycle If the present date is before the effective date the EFFECTIVE date appears in yellow and the EXPIRES date appears in cyan The EXPIRES date is the revision date for the next database cycle NOT AVAILABLE indicates that SafeTaxi is not available on the database card or no database card is inserted Figure 8 19 AUX System Status Pag...

Страница 398: ...ol reaches a chart boundary line or inset box the aircraft symbol is removed from the display Figure 8 20 shows examples of off scale areas indicated by the grey shading Note the grey shading is for illustrative purposes only and will not appear on the published chart or MFD display These off scale areas appear on the chart to convey supplemental information However the depicted geographical posit...

Страница 399: ...ACK The chart selection softkeys shown below appear on the Airport Information Page Pressing the GO BACK Softkey reverts to the top level softkeys and previous page Pressing the CHRT OPT Softkey advances to the next level of softkeys ALL HEADER PLAN PROFILE MINIMUMS FIT WDTH FULL SCN and BACK While viewing the CHRT OPT Softkeys after 45 seconds of softkey inactivity the system reverts to the chart...

Страница 400: ...hart 3 Press the ENT Key to display the chart Navigation Map Page OPTIONS Menu Waypoint Airport Information Page OPTIONS Menu Figure 8 22 Option Menus When no terminal procedure chart is available for the nearest airport or the selected airport the banner CHART NOT AVAILABLE appears on the screen The CHART NOT AVAILABLE banner does not refer to the Jeppesen subscription but rather the availability...

Страница 401: ... or Alternate Minimums are available that page appears If Airport Information pages are unavailable the Approach Chart for the airport is shown Selecting a chart 1 While viewing the Navigation Map Page Flight Plan Page or Nearest Airports Page press the SHW CHRT Softkey The airport diagram or approach chart is displayed on the Airport Information Page 2 Press the FMS Knob to activate the cursor 3 ...

Страница 402: ...o scale and the aircraft position is within the boundaries of the chart The aircraft symbol is not displayed when the Aircraft Not Shown Icon appears Figure 8 29 If the Chart Scale Box displays a banner NOT TO SCALE the aircraft symbol is not shown The Aircraft Not Shown Icon may appear at certain times even if the chart is displayed to scale Pressing the CHRT Softkey switches between the ChartVie...

Страница 403: ...n of the aircraft is within the chart boundaries In the example shown the aircraft is turning onto Taxiway Romeo on the Charlotte NC KCLT airport Another source for additional airport information is from the INFO Box above the chart for certain airports This information source is not related to the INFO 1 or INFO 2 Softkey When the INFO Box is selected using the FMS Knob the G950 softkeys are blan...

Страница 404: ...TURES APPENDICES INDEX In the example shown in Figure 8 27 the Class B Chart is selected Pressing the ENT Key displays the Charlotte Class B Airspace Chart Figure 8 28 Figure 8 28 Airport Information Page Class B Chart Selected from INFO View Pressing the DP Softkey displays the Departure Procedure Chart if available Figure 8 29 Departure Information Page Chart Not To Scale Aircraft Not Shown Icon...

Страница 405: ...CS ADDITIONAL FEATURES APPENDICES INDEX Pressing the STAR Softkey displays the Standard Terminal Arrival Chart if available Change Range and Scroll Through the Chart With the Joystick Figure 8 30 Arrival Information Page Chart Not To Scale Aircraft Not Shown Icon Pressing the APR Softkey displays the approach chart for the airport if available Figure 8 31 Approach Information Page ...

Страница 406: ...XM Data Link Receiver is installed and the XM WX Satellite Weather subscription is current Figure 8 32 Weather Information Page WX Softkey Selected WX Info When Available NOTE A subdued softkey label indicates the function is disabled Recent NOTAMS applicable to the current ChartView cycle are included in the ChartView database Pressing the NOTAM Softkey shows the local NOTAM information for selec...

Страница 407: ...TIONAL FEATURES APPENDICES INDEX Figure 8 33 NOTAM Softkey Highlighted NOTAM Softkey Appears for Selected Airports Figure 8 34 Airport Information Page Local NOTAMs Local NOTAM on This Airport NOTAM Softkey Selected Pressing the NOTAM Softkey again removes the NOTAMS information Pressing the GO BACK Softkey reverts to the previous page Navigation Map Page Nearest Pages or Flight Plan Page ...

Страница 408: ...EL CNS FLIGHT MANAGEMENT HAZARD AVOIDANCE AFCS ADDITIONAL FEATURES APPENDICES INDEX CHART OPTIONS Pressing the CHRT OPT Softkey displays the next level of softkeys the chart options level Figure 8 21 Pressing the ALL Softkey shows the complete approach chart on the screen Figure 8 35 Approach Information Page ALL View Complete Chart Shown ...

Страница 409: ...OIDANCE AFCS ADDITIONAL FEATURES APPENDICES INDEX Pressing the HEADER Softkey shows the header view approach chart briefing strip on the screen Approach Chart Briefing Strip Figure 8 36 Approach Information Page Header View Pressing the PLAN Softkey shows the approach chart two dimensional plan view Figure 8 37 Approach Information Page Plan View Approach Chart Plan View ...

Страница 410: ...EX Pressing the PROFILE Softkey displays the approach chart descent profile strip Approach Chart Descent Profile Strip Figure 8 38 Approach Information Page Profile View Full Screen Width Pressing the MINIMUMS Softkey displays the minimum descent altitude visibility strip at the bottom of the approach chart Minimum Descent Altitude Visibility Strip Figure 8 39 Approach Information Page Minimums Vi...

Страница 411: ... FLIGHT MANAGEMENT HAZARD AVOIDANCE AFCS ADDITIONAL FEATURES APPENDICES INDEX If the chart scale has been adjusted to view a small area of the chart pressing the FIT WIDTH Softkey changes the chart size to fit the available screen width Press FIT WDTH Softkey to Show Full Chart Width Figure 8 40 Airport Information Page FIT WDTH Softkey Pressed ...

Страница 412: ...s AIRPORT INFO 2 Press the FMS Knob to activate the cursor 3 Turn the large FMS Knob to highlight the AIRPORT INFO RUNWAYS or FREQUENCIES Box INFO Box shown 4 Turn the small FMS Knob to select the INFO Box choices If multiple choices are available scroll to the desired choice with the large FMS Knob and press the ENT Key to complete the selection 5 Press the FMS Knob again to deactivate the cursor...

Страница 413: ...y using the page menu option Selecting full screen On or Off 1 While viewing a terminal chart press the MENU Key to display the Page Menu OPTIONS 2 Turn the large FMS Knob to highlight the Chart Setup Menu Option and press the ENT Key 3 Turn the large FMS Knob to move between the FULL SCREEN and COLOR SCHEME Options 4 Turn the small FMS Knob to choose between the On and Off Full Screen Options Fig...

Страница 414: ...he large FMS Knob to highlight the Chart Setup Menu Option and press the ENT Key Figure 8 43 Waypoint Information Page OPTIONS Menu 3 Turn the large FMS Knob to move to the COLOR SCHEME Option Figure 8 44 4 Turn the small FMS Knob to choose between Day Auto and Night Options 5 If Auto Mode is selected turn the large FMS Knob to select the percentage field Use the small FMS Knob to change the perce...

Страница 415: ...tus PC 6 403 ADDITIONAL FEATURES SYSTEM OVERVIEW FLIGHT INSTRUMENTS EIS AUDIO PANEL CNS FLIGHT MANAGEMENT HAZARD AVOIDANCE AFCS ADDITIONAL FEATURES APPENDICES INDEX Figure 8 44 Arrival Information Page Day View Figure 8 45 Arrival Information Page Night View ...

Страница 416: ... Blank Line system is not configured for ChartView Contact a Garmin authorized service center for configuration System is configured for ChartView but no chart database is installed Contact Jeppesen for a ChartView database Normal operation ChartView database is valid and within current cycle ChartView database is within 1 week after expiration date A new cycle is available for update ChartView da...

Страница 417: ...ised issue of ChartView is installed NOTE A subdued softkey label indicates the function is disabled Press the MFD1 DB Softkey to place the cursor in the DATABASE window Scroll through the listed information by turning the FMS Knob or pressing the ENT Key until the ChartView database information is shown The ChartView database cycle number shown in the figure 1403 is deciphered as follows 14 Indic...

Страница 418: ...sing the ChartView database Other possible AUX System Status page conditions are shown in Figure 8 48 The EXPIRES date in yellow is the revision date for the next database cycle The DISABLES date in yellow is the date that this database cycle is no longer viewable CYCLE NOT AVAILABLE in cyan indicates no ChartView data is available on the database card or no database card is inserted Figure 8 48 A...

Страница 419: ...off scale area depicted on some charts Figure 8 49 shows examples of off scale areas indicated by the grey shading Note these areas are not shaded on the published chart These off scale areas appear on the chart to convey supplemental information However the depicted geographical position of this information as it relates to the chart planview is not the actual geographic position Therefore when t...

Страница 420: ... GO BACK The chart selection softkeys appear on the Airport Information Page Pressing the GO BACK Softkey reverts to the top level softkeys and previous page Pressing the CHRT OPT Softkey displays the available terminal chart and advances to the next level of softkeys ALL FIT WDTH FULL SCN and BACK While viewing the CHRT OPT Softkeys after 45 seconds of softkey inactivity the system reverts to the...

Страница 421: ... OPTIONS Menu to Show Chart 3 Press the ENT Key to display the chart Navigation Map Page OPTIONS Menu Waypoint Airport Information Page OPTIONS Menu Figure 8 51 Option Menus When no terminal procedure chart is available the banner CHART NOT AVAILABLE appears on the screen The CHART NOT AVAILABLE banner does not refer to the FliteCharts subscription but rather the availability of a particular airpo...

Страница 422: ...ate Minimums are available that page appears If Airport Information pages are unavailable the Approach Chart for the airport is shown Selecting a chart 1 While viewing the Navigation Map Page Flight Plan Page or Nearest Airports Page press the SHW CHRT Softkey The airport diagram or approach chart is displayed on the Airport Information Page 2 Press the FMS Knob to activate the cursor 3 Turn the l...

Страница 423: ...sing the Joystick centers the chart on the screen The aircraft symbol is not shown on FliteCharts The Chart Scale Box displays a banner NOT TO SCALE and the Aircraft Not Shown Icon is displayed in the lower right corner of the screen Pressing the CHRT Softkey alternates between the FliteCharts diagram and the associated map in the WPT page group In the example shown the CHRT Softkey switches betwe...

Страница 424: ...the INFO 1 or INFO 2 Softkey has no effect Another source for additional airport information is from the INFO Box above the chart Figure 8 54 or to the right of the chart Figure 8 56 for certain airports This information source is not related to the INFO 1 or INFO 2 Softkey When the INFO Box is selected using the FMS Knob the G950 softkeys are blank The Charlotte NC airport has three additional ch...

Страница 425: ...DITIONAL FEATURES APPENDICES INDEX In the example shown in Figure 8 56 TAKE OFF MINIMUMS is selected Pressing the ENT Key displays the Take off Minimums and Departure Procedures Chart Figure 8 57 Figure 8 57 Airport Information Page TAKE OFF MINIMUMS Selected from INFO View Pressing the DP Softkey displays the Departure Procedure Chart if available Figure 8 58 Departure Information Page ...

Страница 426: ...UDIO PANEL CNS FLIGHT MANAGEMENT HAZARD AVOIDANCE AFCS ADDITIONAL FEATURES APPENDICES INDEX Pressing the STAR Softkey displays the Standard Terminal Arrival Chart if available Figure 8 59 Arrival Information Page Pressing the APR Softkey displays the approach chart for the airport if available Figure 8 60 Approach Information Page ...

Страница 427: ...Airport Taxi Diagram press the WX Softkey to display the information windows AIRPORT INFO 2 Press the FMS Knob to activate the cursor 3 Turn the large FMS Knob to highlight the INFO Box 4 Turn the small FMS Knob to select the INFO Box choices When the INFO Box is selected the G950 softkeys are blank If multiple choices are available scroll to the desired choice with the large FMS Knob and press th...

Страница 428: ...EL CNS FLIGHT MANAGEMENT HAZARD AVOIDANCE AFCS ADDITIONAL FEATURES APPENDICES INDEX CHART OPTIONS Pressing the CHRT OPT Softkey displays the next level of softkeys the chart options level Figure 8 50 Pressing the ALL Softkey shows the complete chart on the screen Complete Chart Shown Figure 8 62 Airport Information Page ALL View Selected ...

Страница 429: ... MANAGEMENT HAZARD AVOIDANCE AFCS ADDITIONAL FEATURES APPENDICES INDEX Pressing the FIT WIDTH Softkey fits the width of the chart in the display viewing area In the example shown the chart at close range is replaced with the full width chart Figure 8 63 Approach Information Page FIT WDTH Softkey Selected Press FIT WDTH Softkey to Show Full Chart Width ...

Страница 430: ...S ADDITIONAL FEATURES APPENDICES INDEX Pressing the FULL SCN Softkey alternates between removing and replacing the data window to the right Press FULL SCN Softkey to Switch Between Chart on Full Screen and Chart with Info Window Figure 8 64 Airport Information Page Full Screen and Info Window Pressing the BACK Softkey or waiting for 45 seconds reverts to the chart selection softkeys ...

Страница 431: ...y using the page menu option Selecting full screen On or Off 1 While viewing a terminal chart press the MENU Key to display the Page Menu OPTIONS 2 Turn the large FMS Knob to highlight the Chart Setup Menu Option and press the ENT Key 3 Turn the large FMS Knob to move between the FULL SCREEN and COLOR SCHEME Options 4 Turn the small FMS Knob to choose between the On and Off Full Screen Options Fig...

Страница 432: ...the large FMS Knob to highlight the Chart Setup Menu Option and press the ENT Key Figure 8 66 Waypoint Information Page OPTIONS Menu 3 Turn the large FMS Knob to move to the COLOR SCHEME Option Figure 8 67 4 Turn the small FMS Knob to choose between Day Auto and Night Options 5 If Auto Mode is selected turn the large FMS Knob to select the percentage field Use the small FMS Knob to change the perc...

Страница 433: ...us PC 6 421 ADDITIONAL FEATURES SYSTEM OVERVIEW FLIGHT INSTRUMENTS EIS AUDIO PANEL CNS FLIGHT MANAGEMENT HAZARD AVOIDANCE AFCS ADDITIONAL FEATURES APPENDICES INDEX Figure 8 67 Approach Information Page Day View Figure 8 68 Approach Information Page Night View ...

Страница 434: ... Garmin authorized service center for configuration System is configured for FliteCharts but no chart database is installed Refer to Updating Garmin Databases in Appendix B for the FliteCharts database Normal operation FliteCharts database is valid and within current cycle FliteCharts database is beyond the expiration date but still within the 180 day viewing period FliteCharts database has timed ...

Страница 435: ...unavailable until a revised issue of FliteCharts is installed NOTE A subdued softkey label indicates the function is disabled Press the MFD1 DB Softkey to place the cursor in the DATABASE window Scroll through the listed information by turning the FMS Knob or pressing the ENT Key until the FliteCharts database information is shown The FliteCharts database cycle number shown in the figure 1402 is d...

Страница 436: ...eeds the date the FliteCharts database becomes effective The EXPIRES date in yellow is the revision date for the next database cycle The DISABLES date in yellow is the date that this database cycle is no longer viewable NOT AVAILABLE in cyan indicate the FliteCharts database is not available on the database card or no database card is inserted Figure 8 71 AUX System Status Page FliteCharts Datbase...

Страница 437: ...ort Information Page by pressing the INFO Softkey until INFO 2 is displayed as shown in Figure 8 72 Both Airport Directories are available for downloading at flygarmin com However copy only one of the databases to the Supplemental Data Card The system cannot recognize both databases simultaneously Selecting the Airport Directory Page 1 Turn the large FMS Knob to select the WPT page group 2 Turn th...

Страница 438: ...Check fly garmin com for the current database The Airport Directory is always available for use after the expiration date When turning on the system the Power up Page indicates whether the databases are current out of date or not available Figure 8 73 Power up Page Airport Directory Database Airport Directory Database Power up Page Display Definition Normal operation Airport Directory database is ...

Страница 439: ...r 2014 D Indicates the data is for Airport Directory 1 Indicates the first issue of the Airport Directory database for the year The Airport Directory EFFECTIVE date 13 JAN 14 is the beginning date for the current database cycle The Airport Directory EXPIRES date 10 MAR 14 is the revision date for the next database cycle Figure 8 74 AUX System Status Page Airport Directory Current Information Airpo...

Страница 440: ...arge FMS Knob to select the AUX page group 2 Turn the small FMS Knob to select VIDEO and display the AUX VIDEO Page The video display softkeys shown below appear on the AUX VIDEO Page Figure 8 75 Video Display Softkeys Pressing the BACK Softkey returns to the Previous Level Softkeys SAT MAP ENGINE SETUP VID ZM VID ZM HIDE MAP CNTRST BRIGHT SAT RESET BACK CNTRST BRIGHT INPUT MAP ACTV VID ACTV Contr...

Страница 441: ... adjust display brightness in five percent increments from 0 to 100 3 Press the CNTRST or CNTRST to adjust display contrast in five percent increments from 0 to 100 4 Press the SAT or SAT to adjust display saturationin five percent increments from 0 to 100 5 If desired return the display to the default settings by pressing the RESET Softkey 6 Press the BACK Softkey to return to the previous softke...

Страница 442: ... to increase or decrease the range setting on the map display or zoom in and out on the video display While in the Split Screen mode pressing the MAP ACTV or VID ACTV Softkey determines which display the RANGE Knob adjusts Pressing the softkey to display MAP ACTV allows the RANGE Knob to control the range setting of the map display Pressing the softkey to display VID ACTV allows the RANGE Knob to ...

Страница 443: ...ot s Guide for the Pilatus PC 6 431 ADDITIONAL FEATURES SYSTEM OVERVIEW FLIGHT INSTRUMENTS EIS AUDIO PANEL CNS FLIGHT MANAGEMENT HAZARD AVOIDANCE AFCS ADDITIONAL FEATURES APPENDICES INDEX Figure 8 79 Zoom Window Current View Zoom Window ...

Страница 444: ...until deleted and message timer countdown is resumed Figure 8 80 Scheduler Utility Page Entering a scheduler message 1 Select the AUX Utility Page 2 Press the FMS Knob momentarily to activate the flashing cursor 3 Turn the large FMS Knob to highlight the first empty scheduler message naming field 4 Use the FMS Knob to enter the message text to be displayed in the Alerts Window and press the ENT Ke...

Страница 445: ...eduler message 1 Select the AUX Utility Page 2 Press the FMS Knob momentarily to activate the flashing cursor 3 Turn the large FMS Knob to highlight the name field of the scheduler message to be deleted 4 Press the CLR Key to clear the message text If the CLR Key is pressed again the message is restored 5 Press the ENT Key while the message line is cleared to clear the message time Scheduler messa...

Страница 446: ... checklists 1 From any page on the MFD press the CHKLIST Softkey or turn the large FMS Knob to select the Checklist Page 2 Turn the large FMS Knob to select the GROUP field 3 Turn the small FMS Knob to select the desired procedure and press the ENT Key 4 Turn the large FMS Knob to select the CHECKLIST field 5 Turn the FMS Knob to select the desired checklist and press the ENT Key The selected chec...

Страница 447: ...checkmark is placed in the box next to it The next line item is automatically highlighted for checking Either FMS Knob can be used to scroll through the checklist and select the desired checklist item Press the CLR Key or UNCHECK Softkey to remove a check mark from an item 5 When all checklist items have been checked Checklist Finished is displayed in green text at the bottom left of the checklist...

Страница 448: ...rd has been inserted NO CARD is displayed When data is being written to the SD card LOGGING DATA is displayed The csv file may be viewed with Microsoft Excel or other spreadsheet applications The following is a list of data parameters the G950 system is capable of logging for the Pilatus PC 6 aircraft Date Time GPS altitude MSL GPS altitude WGS84 datum Baro Corrected altitude feet Baro Correction ...

Страница 449: ...ATURES APPENDICES INDEX The file containing the recorded data will appear in the format shown in Figure 8 83 This file can be imported into most computer spreadsheet applications log_140210_104506_KIXD csv Local Date YYMMDD Local 24hr Time HHMMSS Nearest Airport A blank will be inserted if no airport is found Figure 8 83 Log File Format Data logging status can be monitored on the AUX UTILITY Page ...

Страница 450: ... invalid SVT data the PFD display reverts to the standard blue over brown attitude display SVT becomes disabled without the following data resources Attitude data Heading data GPS position data 9 Arc second Terrain data Obstacle data Terrain avoidance function is not available in test mode or failed The position of the aircraft exceeds the range of the terrain database REVERSIONARY MODE SVT can be...

Страница 451: ... indicating the direction to fly to correct the unusual attitude condition The display shows either a brown or blue colored bar at the top or bottom of the screen to represent earth or sky This is intended to prevent losing sight of the horizon during extreme pitch attitudes Figure 8 85 Unusual Attitude Display The blue colored bar is also displayed when terrain gradient is great enough to complet...

Страница 452: ...ot s Guide for the Pilatus PC 6 190 00870 02 Rev A 440 ADDITIONAL FEATURES SYSTEM OVERVIEW FLIGHT INSTRUMENTS EIS AUDIO PANEL CNS FLIGHT MANAGEMENT HAZARD AVOIDANCE AFCS ADDITIONAL FEATURES APPENDICES INDEX Blank Page ...

Страница 453: ...dow The Alerts Window displays text messages for up to 64 prioritized alert messages Pressing the ALERTS Softkey displays the Alerts Window Pressing the ALERTS Softkey a second time removes the Alerts Window from the display When the Alerts Window is displayed the FMS Knob can be used to scroll through the alert message list Softkey Annunciation During certain alerts the ALERTS Softkey may appear ...

Страница 454: ...Press the ANN TEST Softkey Or a Press the MENU Key b Highlight Enable Annunciator Test Mode and press the ENT Key Figure A 2 System Status Page Annunciation Tone Testing Select to Test Annunciation Tone ALERT LEVEL DEFINITIONS The G950 Alerting System uses four alert levels WARNING This level of alert requires immediate attention Warning alert text is shown in red in the Annunciation Window and is...

Страница 455: ...ashing ADVISORY Softkey annunciation see Figure A 3 Pressing the ADVISORY Softkey acknowledges the presence of the message advisory alert and displays the alert text message in the Alerts Window Message advisory voice alerts generated when the message advisory is issued do not repeat Figure A 3 Softkey Annunciation ALERTS Softkey Labels SAFE OPERATING ANNUNCIATIONS This level of alert provides gen...

Страница 456: ...fer pump inactive R FUEL FLOW Right external fuel transfer pump inactive L FUEL LOW Left fuel tank is low R FUEL LOW Right fuel tank is low OXY PRESS LOW Oxygen pressure is low SAFE OPERATING ANNUNCIATIONS Annunciation Window Text Alerts Window Message Audio Alert AUX F PUMP ON Auxiliary fuel pump is active None ANTI ICE ON Anti ice system on BATT DISCHARGE Alternate power source Battery in use EX...

Страница 457: ...l information regarding pilot responses to these annunciations Figure A 4 G950 System Failure Annunciations GDC 74A Air Data Computer GTX 33 Transponder OR GIA 63W Integrated Avionics Units GDC 74A Air Data Computer GEA 71 Engine Airframe Unit OR GIA 63W Integrated Avionics Unit GIA 63W Integrated Avionics Units GRS 77 AHRS OR GMU 44 Magnetometer GIA 63W Integrated Avionics Units GIA 63W Integrate...

Страница 458: ...PS signals are not present see POH Display system is not receiving airspeed input from air data computer System Annunciation Comment Display system is not receiving vertical speed input from the air data computer Display system is not receiving altitude input from the air data computer Display system is not receiving valid heading input from AHRS System is not receiving valid heading input from GM...

Страница 459: ...0 system should be serviced MFD1 SERVICE MFD1 needs service Return unit for repair MANIFEST PFD1 software mismatch Communication halted The PFD and or MFD has incorrect software installed The G950 system should be serviced MANIFEST MFD1 software mismatch Communication halted PFD1 CONFIG PFD1 configuration error Config service req d The PFD configuration settings do not match backup configuration m...

Страница 460: ... and or PFD detected a failure in the obstacle database Ensure that the data card is properly inserted Replace data card If problem persists the system should be serviced PFD1 DB ERR PFD1 obstacle database error exists MFD1 DB ERR MFD1 obstacle database missing The obstacle database is present on another LRU but is missing on the specified LRU PFD1 DB ERR PFD1 obstacle database missing MFD1 DB ERR...

Страница 461: ... database mismatch The PFD and MFD have different obstacle database versions or regions installed Check the AUX SYSTEM STATUS Page to determine versions or regions Also check the AUX SYSTEM STATUS Page for a database synchronization function not completed After synchronization is complete power must be turned off then on DB MISMATCH Airport Terrain database mismatch The PFD and MFD have different ...

Страница 462: ... GIA2 self test has detected a problem in the unit The system should be serviced GIA2 SERVICE GIA2 needs service Return the unit for repair HW MISMATCH GIA hardware mismatch GIA1 communication halted A GIA mismatch has been detected where only one is SBAS capable HW MISMATCH GIA hardware mismatch GIA2 communication halted MANIFEST GIA1 software mismatch communication halted The GIA1 and or GIA 2 h...

Страница 463: ...NGRADE Approach downgraded Vertical guidance generated by SBAS is unavailable use LNAV only minimums TRUE APR True north approach Change HDG refereence to TRUE Displayed after passing the first waypoint of a true north approach when the nav angle is set to AUTO GPS1 SERVICE GPS1 needs service Return unit for repair A failure has been detected in the GPS1 and or GPS2 receiver The receiver may still...

Страница 464: ...PS information to augment the lack of airspeed The G950 system should be serviced AHRS1 GPS AHRS1 using backup GPS source The 1 AHRS is using the backup GPS path Primary GPS path has failed The G950 system should be serviced when possible AHRS1 GPS AHRS1 not receiving any GPS information The 1 AHRS is not receiving any or any useful GPS information Check AFMS limitations The G950 system should be ...

Страница 465: ... GWX config error Config service req d GWX 68 70 configuration settings do not match those of the GDU configuration The G950 system should be serviced GWX FAIL GWX is inoperative The GDU is not recieving status packet from the GWX 68 70 or the GWX 68 70 is reporting a fault The GWX 68 70 radar system should be serviced GWX SERVICE Needs service Return unit for repair A failure has been detected in...

Страница 466: ... plan with current arrival or approach LOCKED FPL Cannot navigate locked flight plan This occurs when the pilot attempts to activate a stored flight plan that contains locked waypoint Remove locked waypoint from flight plan Update flight plan with current waypoint WPT ARRIVAL Arriving at waypoint xxxx Arriving at waypoint xxxx where xxxx is the waypoint name STEEP TURN Steep turn ahead A steep tur...

Страница 467: ...s displayed Do not use GPS to navigate to the selected non WGS84 waypoint TRAFFIC FAIL Traffic device has failed The system is no longer receiving data from the traffic system The traffic device should be serviced FAILED PATH A data path has failed A data path connected to the GDU or the GIA 63 W has failed MAG VAR WARN Large magnetic variance Verify all course angles The GDU s internal model cann...

Страница 468: ...has been imported but must be edited within the system before it can be activated for use User waypoint database full Not all loaded The flight plan file on the SD card contains user waypoints The quantity of stored user waypoints has exceeded system capacity therefore not all the user waypoints on the SD card have been imported Any flight plan user waypoints that were not imported are locked in t...

Страница 469: ...t Obstacle Impact Caution IOI TERRAIN CAUTION OBSTACLE Caution Obstacle Obstacle Annunciation is shown on the Terrain SVT Page and the Navigation Map Page when Terrain is enabled TERRAIN SVT SYSTEM STATUS ANNUNCIATIONS Alert Type PFD MFD Alert Annunciation Terrain SVS Page Center Banner Annunciation Aural Message System Test in progress TER TEST TERRAIN TEST None System Test pass None None Terrain...

Страница 470: ...le Ahead Pull Up Imminent Obstacle Impact Warning IOI PULL UP OBSTACLE AHEAD PULL UP or OBSTACLE PULL UP Obstacle Ahead Pull Up Obstacle Ahead Pull Up or Obstacle Obstacle Pull Up Pull Up Reduced Required Terrain Clearance Caution RTC TERRAIN CAUTION TERRAIN or TERRAIN AHEAD Caution Terrain Caution Terrain or Terrain Ahead Terrain Ahead Imminent Terrain Impact Caution ITI TERRAIN TERRAIN AHEAD or ...

Страница 471: ...e None No GPS position TAWS N A NO GPS POSITION TAWS Not Available Excessively degraded GPS signal or Out of database coverage area TAWS N A None TAWS Not Available TAWS B System Test Fail Terrain or Obstacle database unavailable or invalid Invalid software configuration or System audio fault TAWS FAIL TAWS FAIL TAWS System Failure MFD Terrain or Obstacle database unavailable or invalid TAWS B ope...

Страница 472: ... 870 passes a pilot initiated self test TAS System Test Fail Played when the optional KTA 870 fails a pilot initiated self test Traffic Traffic Advisory TA issued by the TIS system Also when additional TAs are issued by the optional KTA 870 system Traffic Traffic Played when a Traffic Advisory TA is issued with the optional KTA 870 TAS system Additional TAs Table A 2 Voice Alerts The gender of the...

Страница 473: ...ng It is the pilot s responsibility to remain familiar with all FAA regulatory and advisory guidance and information related to the use of databases in the National Airspace System Garmin equipment will only recognize and use databases that are obtained from Garmin or Jeppesen Databases obtained from Garmin or Jeppesen are assured compliance with all data quality requirements DQRs by virtue of a T...

Страница 474: ...ase must be installed from the Jeppesen or user supplied SD data card Contact Jeppesen www jeppesen com for subscription and update information NOTE After the navigation database is installed the card may be removed Updating the active navigation database not using the Dual Navigation Database or Automatic Database Synchronization Features 1 With the system OFF insert the SD card containing the ne...

Страница 475: ...he user upon on ground power up as to whether the database should be stored on the bottom SD card as the standby database If the user responds affirmatively the system will copy the navigation database from the top SD card to the bottom SD card As long as the bottom SD card remains in the card slot this standby navigation database will be available for the system to use as the active database as s...

Страница 476: ...ase Prompt 4 Press the YES Softkey The navigation database is copied to the SD card in the bottom card slot of the MFD 5 After the navigation database files are copied to the bottom SD card the display will appear as shown in Figure B 4 Figure B 4 Standby Navigation Database Update Complete 6 As instructed on the display press any key to continue The display will now appear as shown in Figure B 5 ...

Страница 477: ...w database is copied to the SD card in the bottom card slot of the PFD Progress can be monitored in the SYNC STATUS field When copying is finished Complete is displayed 13 Turn system power OFF 14 Remove the SD card from the top card slot of the MFD 15 Turn system power ON 16 Press the ENT Key to acknowledge the startup screen 17 Turn the large FMS Knob to select the AUX Page group on the MFD 18 T...

Страница 478: ...nternally in the displays a Supplemental Data Card containing identical database versions must be kept in each display unit The basemap database contains data for the topography and land features such as rivers lakes and towns It is updated only periodically with no set schedule There is no expiration date The terrain database contains the terrain mapping data These databases are updated periodica...

Страница 479: ...id database is automatically copied to each card in the system that does not already contain that database The following databases are checked and synchronized Basemap Safetaxi Airport Terrain Obstacle Airport Directory AOPA or AC U KWIK and Terrain This feature applies only to databases that are stored on the SD card that resides in the bottom slot of each display This feature does not apply to t...

Страница 480: ...tabases are now in use on the AUX System Status Page Figure B 8 If an error occurs during the synchronization an error message will be displayed followed by the affected display in the Sync Status section of the Database Window Figure B 9 If a synchronization completes on one display but an error occurs on another the error message will be displayed with the affected diaplay listed after it When a...

Страница 481: ...l Database SD Cards 010 00330 4A 4B 4C 4D 4E or 4F from the PFD and MFD In some cases it may be necessary to obtain an unlock code from Garmin in order to make the database product functional It may also be necessary to have the system configured by a Garmin authorized service facility in order to use some database features Updating Basemap SafeTaxi Airport Terrain Obstacle and Airport Directory D...

Страница 482: ...MFD1 DB Selected PFD1 DB Selected Updating Terrain FliteCharts and ChartView Databases 1 With system power OFF remove the Supplemental Data Card from the bottom card slot of the MFD and PFD 2 Copy the updated terrain database to each of the Supplemental Data Cards Copy the updated FliteCharts or ChartView database to one Supplemental Data Card 3 Insert the updated Supplemental Data Cards into the ...

Страница 483: ...rtup the system compares this version of the MV DB with that presently being used by the AHRS If the system determines the MV DB needs to be updated a prompt is displayed on the Navigation Map Page as shown in Figure B 12 Figure B 12 GRS1 Magnetic Field Variation Database Update Prompt Loading the magnetic field variation database update 1 With OK highlighted as seen in Figure B 12 press the ENT K...

Страница 484: ... Pilot s Guide for the Pilatus PC 6 190 00870 02 Rev A SYSTEM OVERVIEW FLIGHT INSTRUMENTS EIS AUDIO PANEL CNS FLIGHT MANAGEMENT HAZARD AVOIDANCE AFCS ADDITIONAL FEATURES APPENDICES INDEX 472 APPENDIX B Blank Page ...

Страница 485: ...t On Ground AOPA Aircraft Owners and Pilots Association AP Autopilot AP DISC Autopilot Disconnect APPR APR Approach APT Airport Aerodrome APTSIGNS Airport Signs ARINC Aeronautical Radio Incorporated ARSPC Airspace ARTCC Air Route Traffic Control Center ARV Arrival AS Airspeed ASB Aviation Support Branch ASOS Automated Surface Observing System ATC Air Traffic Control ATCRBS ATC Radar Beacon System ...

Страница 486: ...Steer CRSR Cursor CSC Current Speed Control CTA Control Area CTR Center CTRL Control Cumulative CUM The total of all legs in a flight plan CVR Cockpit Voice Recorder CVRG Coverage CWS Control Wheel Steering CYL Cylinder D ALT Density Altitude DB DBASE Database dBZ Decibels Z Radar Return DCLTR DECLTR Declutter DEC FUEL Decrease Fuel DEG Degree DEIC DEICE De icing DEP Departure Desired Track The de...

Страница 487: ...ted time it takes to reach the destination waypoint from the present position based upon current groundspeed ETA Estimated Time of Arrival ETE Estimated Time Enroute EXPIRD Expired F Degrees Fahrenheit FA Course From Fix to Altitude Leg FAA Federal Aviation Administration FAF Final Approach Fix FAIL Failure FC Course From Fix to Distance Leg FCC Federal Communication Commission FCST Forecast FD Fl...

Страница 488: ...ns from a magnetic compass or a properly set directional gyro HF High Frequency Hold Terminating at Fix Leg HFOM Horizontal Figure of Merit Hg Mercury HI High HI SENS High Sensitivity HM Hold with Manual Termination Leg Horizontal Figure of Merit A measure of the uncertainty in the aircraft s horizontal position hPa Hectopascal HPL Horizontal Protection Level HR Hour HRZN HDG Horizon Heading HSDB ...

Страница 489: ... Replaceable Unit LT Left LTNG Lightning LVL Level M Meter Middle Marker MMO VMO Maximum Speed Mach Number Mach number is the ratio of the true airspeed to the speed of sound MAG Magnetic MAG VAR Magnetic Variation MAHP Missed Approach Hold Point MAN IN Manifold Pressure inches Hg MAN SQ Manual Squelch MAP Missed Approach Point MASQ Master Avionics Squelch MAX Maximum MAXSPD Maximum Speed overspee...

Страница 490: ...RES PRESS Pressure PROC Procedure s Procedure Turn PROP Propeller PROX Proximity PSI Pounds per Square Inch PT Procedure Turn PTK Parallel Track PTT Push to Talk PWR Power QTY Quantity R Right Right Runway RA Resolution Advisory Radio Altimeter RAD Radial RA RAD ALT Radio Altimeter RAIM Receiver Autonomous Integrity Monitoring RAM Random Access Memory RAT Return Air Temperature RCVR Receiver REF R...

Страница 491: ...l Aerodrome Forecast TAS True Airspeed Traffic Advisory System TAT Total Air Temperature TAWS Terrain Awareness and Warning System TCA Terminal Control Area TCAS Traffic Alert Collision Avoidance System TEL Telephone TEMP Temperature TERM Terminal TF Track Between Two Fixes Leg TFR Temporary Flight Restriction TGT Target T HDG True Heading TIS Traffic Information Service TIT Turbine Inlet Temperat...

Страница 492: ...ent position and altitude to a defined target position and altitude based upon current groundspeed VFOM Vertical Figure of Merit VFR Visual Flight Rules VHF Very High Frequency VI Heading Vector to Intercept Leg VLOC VOR Localizer Receiver VM Heading Vector to Manual Termination Leg VMC Visual Meteorological Conditions VNAV VNV Vertical Navigation VOL Volume VOR VHF Omnidirectional Range VORTAC VH...

Страница 493: ...e EGNOS offers coverage of Europe parts of the Middle East and parts of northern Africa The Multi functional Satellite Augmentation System MSAS covers mainly Japan How does SBAS affect approach operations Both LNAV VNAV and LPV approaches use the accuracy of SBAS to include vertical glide path guidance capability The additional accuracy and vertical guidance capability allows improved instrument a...

Страница 494: ...approach departure or arrival waypoints is inserted into the flight plan along with a header line showing the title of the selected instrument procedure The original enroute portion of the flight plan remains active unless the instrument procedure is activated This may be done either when the procedure is loaded or at a later time Flight plans can also be stored with an approach a departure or an ...

Страница 495: ... flight plan waypoints when automatic sequencing is enabled i e no OBS or SUSP annunciation on the HSI For automatic sequencing to occur the aircraft must also cross the bisector of the turn being navigated The bisector is a line passing through the waypoint common to two flight plan legs at an equal angle from each leg How can a waypoint be skipped in an approach a departure or an arrival The G95...

Страница 496: ...tkey is selected after crossing the MAP All published missed approach procedures must be followed as indicated on the approach plate To execute the missed approach procedure prior to the MAP not recommended select the Active Flight Plan Page and use the ACT LEG Softkey to activate the missed approach portion of the procedure After a missed approach how can the same approach be re selected How can ...

Страница 497: ...errogator and accompanying data link to provide a five second update rate TIS and TAS TCAS have similar ranges TIS LIMITATIONS NOTE TIS is not intended to be used as a collision avoidance system and does not relieve the pilot of the responsibility to see and avoid other aircraft TIS shall not be used for avoidance maneuvers during instrument meteorological conditions IMC or when there is no visual...

Страница 498: ...ypically remain relatively accurate and may be used to assist in spotting traffic The following errors are common examples When the client or intruder aircraft maneuvers excessively or abruptly the tracking algorithm may report incorrect horizontal position until the maneuvering aircraft stabilizes When a rapidly closing intruder is on a course that intercepts the client aircraft course at a shall...

Страница 499: ...Private Airport Heliport NAVAIDS Item Symbol Intersection LOM compass locator at outer marker NDB non directional radio beacon VOR VOR DME VOR ILS VORTAC TACAN BASEMAP Item Symbol Interstate Highway State Highway US Highway National Highway City State Province Border International Border Road Railroad Latitude Longitude AIRSPACE BOUNDARIES Item Symbol ICAO Control Area Class B Airspace Mode C Towe...

Страница 500: ...hite X is shown over the symbol to indicate not available e g traffic symbol TRAFFIC Item Symbol Non threat Traffic Proximity Advisory Traffic Advisory Out of Range Traffic Advisory MISCELLANEOUS Item Symbol ARTCC Frequency or FSS Frequency Map Pointer when panning Elevation Pointer on Topography Scale when panning Measuring Pointer Wind Vector Overzoom Indicator User Waypoint Vertical Navigation ...

Страница 501: ... 100 ft below the aircraft altitude Yellow obstacle is between 100 ft and 1000 ft below the aircraft altitude Gray obstacle is more than 1000 ft below aircraft altitude Table G 1 Obstacle Colors TERRAIN AVOIDANCE COLORS AND SYMBOLS 1000 ft Aircraft Altitude 100 ft Threshold Terrain Above Aircraft Altitude Red terrain is above or within 100 ft below the aircraft altitude Yellow terrain is between 1...

Страница 502: ... Pilot s Guide for the Pilatus PC 6 190 00870 02 Rev A SYSTEM OVERVIEW FLIGHT INSTRUMENTS EIS AUDIO PANEL CNS FLIGHT MANAGEMENT HAZARD AVOIDANCE AFCS ADDITIONAL FEATURES APPENDICES INDEX 490 APPENDIX F Blank Page ...

Страница 503: ...ctivating 246 Loading 208 243 245 Removing 246 Approach box 411 Approach channel 208 243 APR softkey 245 253 Arc HSI 60 Arrival Alerts 40 Arrival procedure 192 206 239 241 267 269 278 Attitude and Heading Reference System AHRS 3 8 13 13 14 Attitude Indicator 50 54 Audio alerting system 442 Audio Panel 2 Audio Panel Fail Safe Operation 132 Automatic Flight Control System AFCS 363 Automatic squelch ...

Страница 504: ...435 Emergency Frequency 132 Endurance 89 ENGINE 26 Engine Indication System EIS 83 92 Entering Flight ID 116 Entertainment inputs 129 Estimated Position Error EPE 18 Export Flight Plan 456 F Field of View SVS 161 Flaps 84 86 89 Flight Data Logging 365 Flight ID 116 122 Flight plan Closest point to reference 224 Storing 482 FliteCharts 365 407 FliteCharts cycle 423 FliteCharts expiration 423 FliteC...

Страница 505: ...identifier 109 Multi Function Display MFD 2 Controls 19 20 Softkeys 25 N Navigation mode selection 107 Navigation NAV Database 189 231 232 Map 133 145 168 189 Navigation NAV Frequency Box 50 Navigation Source 64 66 Navigation Status Box 50 Nav radio selection 107 Nearest Airports 31 42 133 134 163 167 168 169 170 189 Page 168 169 170 Airspaces 31 40 183 185 Intersections 31 171 172 NDB 31 174 User...

Страница 506: ... Speaker 123 Split COM operation 128 STAB 305 Standby frequency 98 101 107 Standby frequency field 98 Standby Navigation Database 463 465 Stereo headsets 123 Stuck microphone 132 Sunrise Sunset 251 SVT troubleshooting 438 Symbols map 487 Synthetic Vision Technology SVT 54 365 366 System Annunciations 10 441 Message advisories 447 Power up 8 Time 38 System time 50 T TA 460 TAS 299 300 301 302 303 3...

Страница 507: ... 231 Speed Guidance 232 Vertical Deviation Indicator VDI 58 275 276 Vertical navigation Direct to 230 Vertical Scan 301 302 Vertical Speed Indicator VSI 50 58 276 Vertical Track alert 460 VFR code 121 Video settings 429 Video system 365 428 VNAV 191 455 VNV 274 Guidance Disabling 229 Enabling 229 VNV Indications PFD 73 Voice alerts 443 Voice Alerts TIS Traffic 75 350 360 Voltmeter 84 86 VOR Neares...

Страница 508: ...950 Pilot s Guide for the Pilatus PC 6 190 00870 02 Rev A I 6 INDEX SYSTEM OVERVIEW FLIGHT INSTRUMENTS EIS AUDIO PANEL CNS FLIGHT MANAGEMENT HAZARD AVOIDANCE AFCS ADDITIONAL FEATURES APPENDICES INDEX Blank Page ...

Страница 509: ......

Страница 510: ...urope Ltd Liberty House Hounsdown Business Park Southampton Hampshire SO40 9LR U K p 44 0 23 8052 4000 f 44 0 23 8052 4004 Aviation Support 44 0 87 0850 1243 Garmin Corporation No 68 Jangshu 2nd Road Shijr Taipei County Taiwan p 886 02 2642 9199 f 886 02 2642 9099 www garmin com Pilatus PC 6 G950 Integrated Avionics System Pilot s Guide G950 Pilot s Guide Pilatus PC 6 190 00870 02 Revision A ...

Отзывы:

Похожие инструкции для G950