61
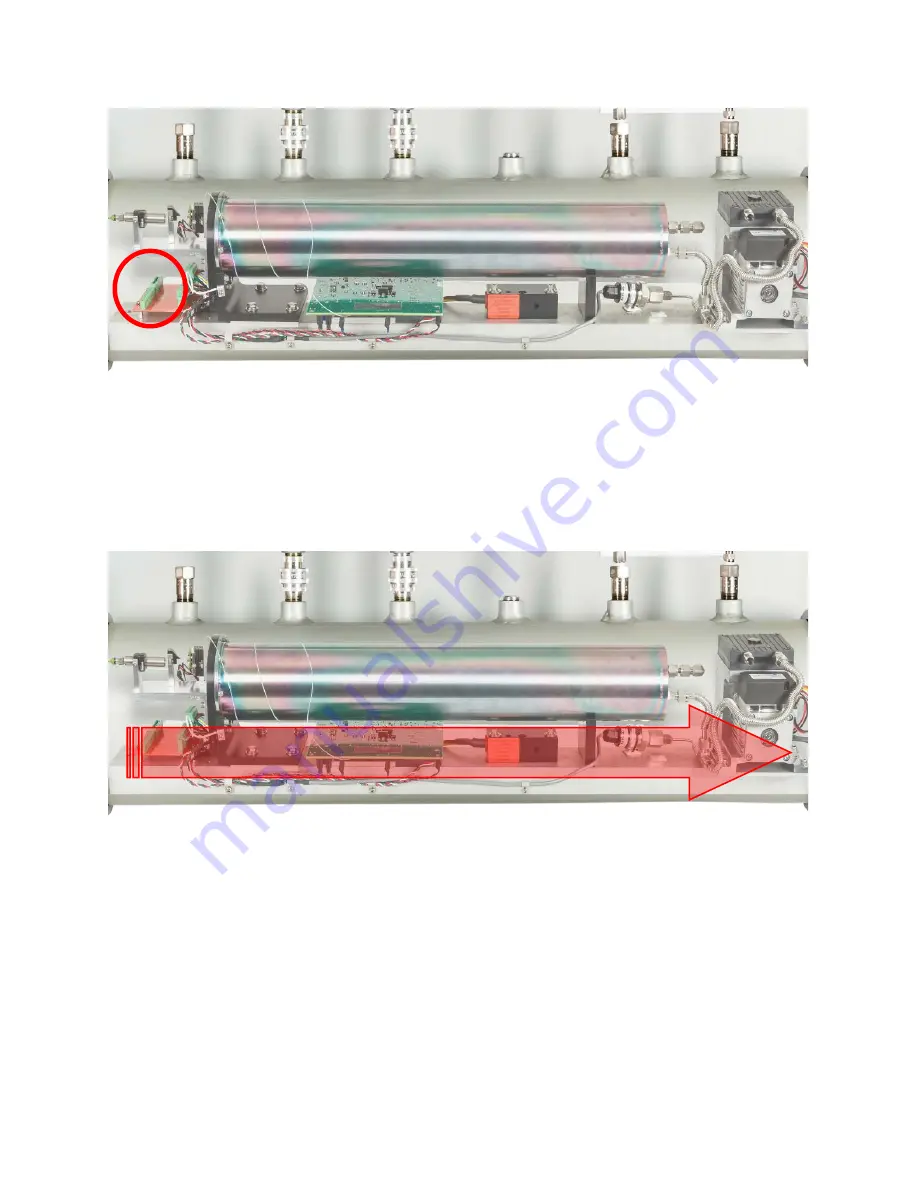
Figure 47: Wiring Connections
7.
Using the small flathead screwdriver, loosen the screws holding the wiring connectors in
place.
8.
Disconnect the wiring connectors from the board by gently pulling on them.
9.
Carefully slide the component rail out of the enclosure towards the side with the vacuum
pump, see Figure 56. The component rail will only slide as much as the attached tubing and
fittings will allow, approximately 6-8 inches.
Figure 48: Initial Sliding Direction
10.
Identify the fittings connecting the components on the rail to the rest of the enclosure, see
Figure 57. Make a note of these connections in order to ensure correct reassembly later. A
flashlight may be helpful at this point if one is available.


