TX140 S2
Upgrade and Maintenance Manual
59
Basic hardware procedures
Ê
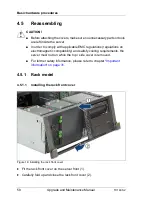
Secure the rack front cover to the chassis with two screws on either side
(see figure
8 on page 53
).
Ê
Insert and slide the ID card into its slot until it locks in place (see close-up in
figure
6 on page 52
).
4.5.1.2
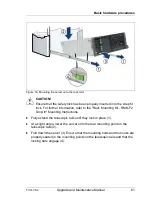
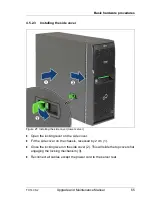
Installing the top cover
Figure 15: Installing the top cover (rack server)
Ê
Check if the locking lever on the top cover is open.
Ê
Lower the top cover onto the chassis, recessed by 2 cm (1).
Ê
Close the locking lever on the top cover (2). This will slide the top cover shut
engaging the locking mechanism (3).
Содержание PRIMERGY TX140 S2
Страница 30: ...30 Upgrade and Maintenance Manual TX140 S2 Before you start ...
Страница 98: ...98 Upgrade and Maintenance Manual TX140 S2 Basic software procedures ...
Страница 120: ...120 Upgrade and Maintenance Manual TX140 S2 Power supply ...
Страница 148: ...148 Upgrade and Maintenance Manual TX140 S2 Hard disk drives solid state drives ...
Страница 158: ...158 Upgrade and Maintenance Manual TX140 S2 System fan and air duct ...
Страница 208: ...208 Upgrade and Maintenance Manual TX140 S2 Expansion cards and backup units ...
Страница 216: ...216 Upgrade and Maintenance Manual TX140 S2 Main memory ...
Страница 314: ...314 Upgrade and Maintenance Manual TX140 S2 Cabling ...
Страница 332: ...332 Upgrade and Maintenance Manual TX140 S2 Appendix ...


