11
11. After the training bike is assembled, inspect it to make sure that it is assembled correctly and that it
functions properly. Make sure that all parts are properly tightened before you use the training bike.
Extra parts may be included. Place a mat beneath the training bike to protect the floor.
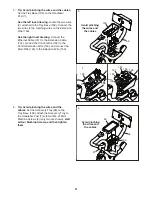
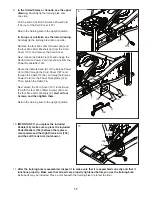
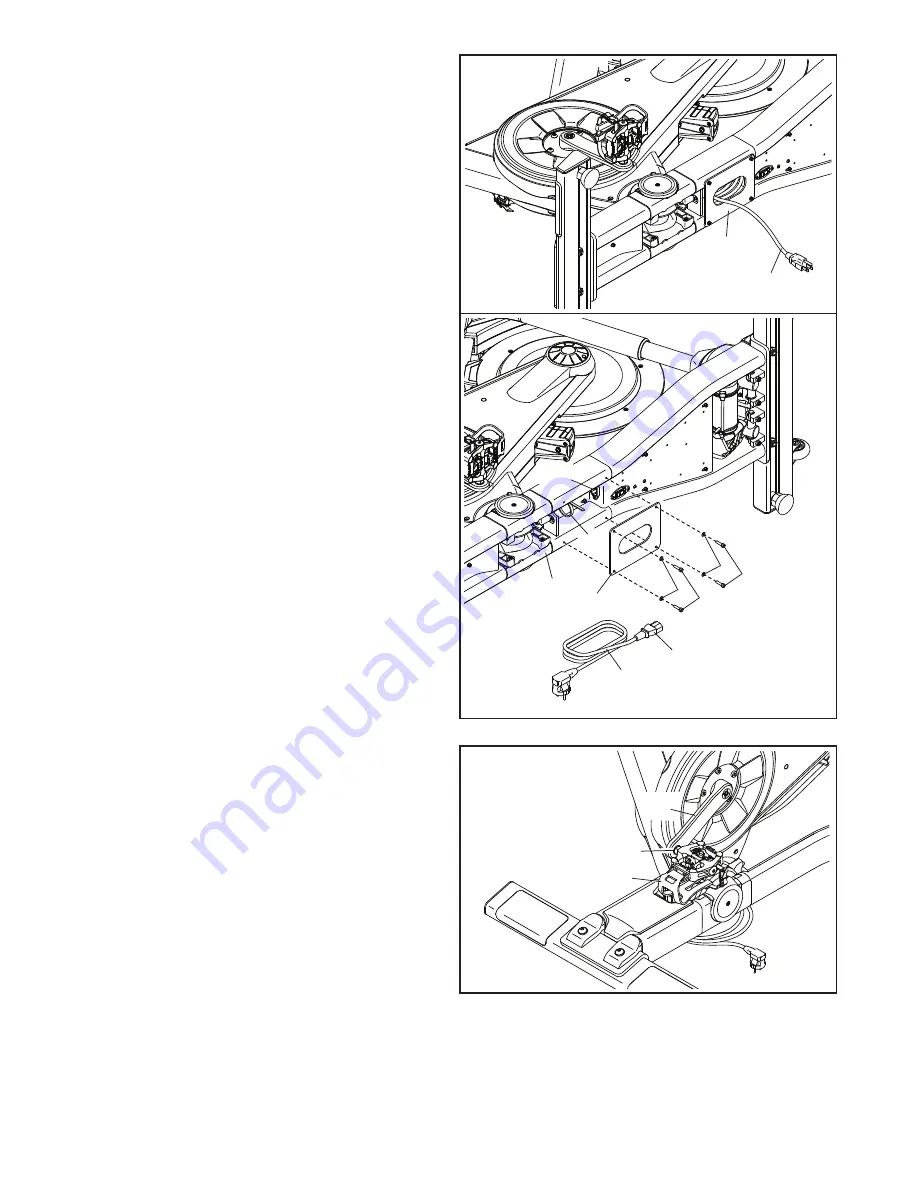
9. In the United States or Canada, see the upper
drawing. Carefully tip the training bike onto
one side.
Pull the end of the North America Power Cord
(154) out of the Cord Cover (107).
Return the training bike to the upright position.
In Europe or Australia, see the lower drawing.
Carefully tip the training bike onto one side.
Remove the four M4 x 16mm Screws (83) and
the four M4 x 8mm Washers (8) from the Cord
Cover (107), and remove the Cord Cover.
Next, loosen the Cable Tie (55) and unplug the
North America Power Cord (not shown) from the
Power Receptacle (143).
Route the indicated end (D) of the Europe Power
Cord (159) through the Cord Cover (107) and
through the Cable Tie (55), and plug the Europe
Power Cord into the Power Receptacle (143).
Then, tighten the Cable Tie.
Next, attach the Cord Cover (107) to the Base
(2) with the four M4 x 16mm Screws (83) and
the four M4 x 8mm Washers (8); start all four
Screws, and then tighten them.
Return the training bike to the upright position.
10. IMPORTANT: If you replace the included
Pedals (56), make sure to place the included
Pedal Washers (162) between the replace-
ment pedals and the Right Crank Arm (105)
and the Left Crank Arm (not shown).
107
154
9
56
162
105
107
159
8
D
2
83
143
55
8 83
10
Содержание CoachBike b22.7
Страница 31: ...31 NOTES ...


