19
HOW TO SET UP THE CONSOLE
Before the training bike can be used, you must set up
the console. When the console is turned on for the first
time, a tour presentation will guide you through the
console features and assist you to set up the console.
1. Connect to your network.
For iFit workouts and several other features of
the console to be available to users, the console
must be connected to a network with either a wired
connection or a wireless connection. Follow the
prompts on the screen to connect the console
to your network. Note: An ethernet receptacle is
located on the underside of the training bike.
2. Customize settings.
Follow the prompts on the screen to set the desired
unit of measurement, time zone, and other settings.
Note: To change these settings later, see HOW
TO CHANGE CLUB OWNER SETTINGS on
page 26.
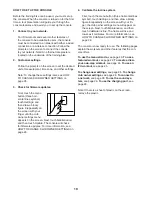
3. Check for firmware updates.
First, touch the menu
button (three hori-
zontal lines symbol),
touch Settings, and
then draw a blocky
figure 8 repeatedly on
the screen with your
finger until the club
owner settings menu
appears on the screen. Next, touch Maintenance,
and then touch Update. The console will check
for firmware updates. For more information, see
HOW TO CHANGE CLUB OWNER SETTINGS on
page 26.
4. Calibrate the incline system.
First, touch the menu button (three horizontal lines
symbol), touch Settings, and then draw a blocky
figure 8 repeatedly on the screen with your fin-
ger; the club owner settings menu will appear on
the screen. Next, touch Maintenance, and then
touch Calibrate Incline. The frame will rise and
lower as it calibrates. For more information, see
HOW TO CHANGE CLUB OWNER SETTINGS on
page 26.
The console is now ready for use. The following pages
explain the workouts and other features that the con-
sole offers.
To use the manual mode, see page 20. To use a
featured workout, see page 22. To create a draw-
your-own-map workout, see page 24. To use an
iFit workout, see page 25.
To change user settings, see page 26. To change
club owner settings, see page 26. To connect to
a network, see page 28. To use the sound sys-
tem, see page 29. To use the charging port, see
page 29.
Note: If there is a sheet of plastic on the screen,
remove the plastic.
Содержание CoachBike b22.7
Страница 31: ...31 NOTES ...

