


49
7 LEVELING PRESETS
A METHOD FOR LEVELING
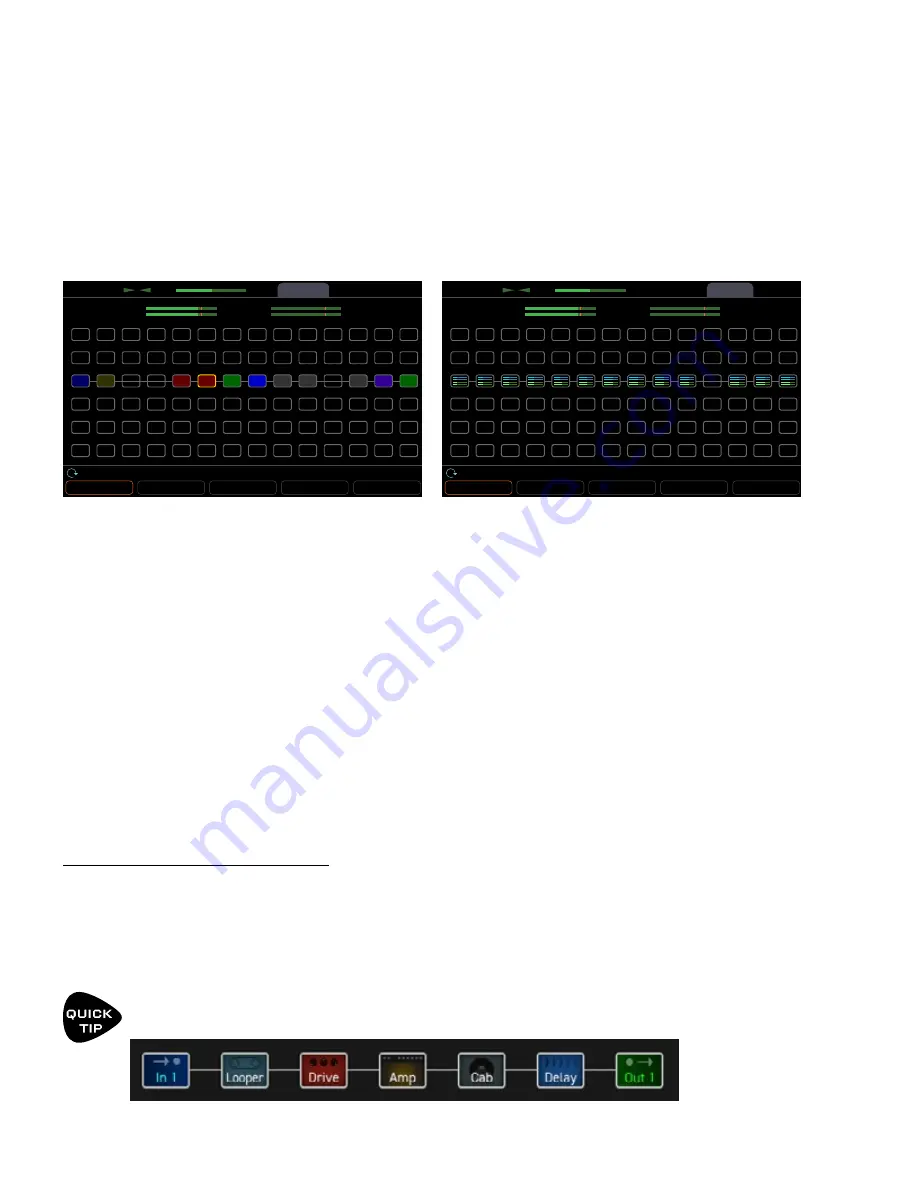
The new ZOOM view of the grid provides an excellent environment for leveling presets, scenes, and channels.
As you page between the Edit and Meters pages of the Layout (grid), you can see block names as well as block
input and output level meters (blue and green, respectively). More importantly, while the grid is zoomed out, you
can see larger VU meters for Out 1 and Out 2 at the top of the display. The scale of these meters is -20 to +10 dB
with a red line at 0. (This is the internal level, NOT a dBu reading.) These meters are great for setting levels.
To set levels, play your guitar and watch the VU meters. Remembering the rule of thumb — and assuming no
exceptions — adjust the output level of the Amp block by selecting the block and turning the Block Level knob (C)
until the level hovers around at the red line (see tip below about using the Looper). Different types of playing and
different amp models and settings will activate the meter in different ways. Play consistently. Play chords and
“chugs” — bass content may push the meters harder. If you want to compare the levels of two presets/scenes/
channels, play the same type of material while watching the meters. Remember that whenever you adjust Drive,
Master or other amp tone settings, you may need to revisit this process.
If you have two Amp blocks you may find it easier to adjust levels in a single block which sums their outputs, such
as a Mixer, Volume block, or Cab.
The Layout view allows you to change Scenes (knob A) and Channels (knob B), so you can compare and adjust
everything all within a single page.
Remember this common sense principle: you must also use your ears. When you use the meters, a punchy clean
amp may end up sounding louder overall than an overdriven amp with a ton of low end.
LEADS AND LOUDER SOUNDS
You now have a sense of how to normalize the level across presets, scenes, and channels, but what if you
specifically want some tones to be louder or quieter than others? A good approach is to begin with the loudest
sound and make the other sounds quieter. This helps ensure that you will have plenty of headroom and avoid
clipping. It’s OK for certain tones to be very quiet: the Axe-Fx III has an extremely low noise floor and does not
suffer internally from the kinds of problems which plague analog gear at lower than “optimal” levels.
Make it easier to adjust levels by using the Looper block to “play” while you operate the level controls.
Place the looper between the input and your first block.
Tools
Meters
Layout
CPU
1L
1R
47.5 %
ZOOM
BYPASS
DELETE
CABLE
CONTROLLERS
Scene: 1
Channel
Block Level
Row
Column
Edit
1L
1R
Tools
Meters
Layout
CPU
1L
1R
47.5%
ZOOM
BYPASS
DELETE
CABLE
CONTROLLERS
Scene: 1
Channel
Block Level
Row
Column
Edit
1L
1R
IN 1
CMP
WAH
PHR
DRV
AMP
CAB
DLY
CHO
FLG
ROT
REV
OUT 1
The zoomed out grid shows VU meters atop the screen.
Page right to the Meters page for block meters.
Содержание Axe-Fx III
Страница 1: ...Manual Version 1 0g for Axe Fx III Firmware 1 x...
Страница 2: ...Inside Front Cover...
Страница 6: ...iv...
Страница 117: ...111 11 The Tuner This page intentionally left blank for proper page facing when printing...
Страница 151: ...BACK COVER...


