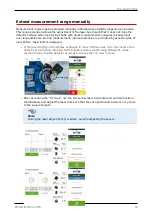
The sensALIGN 5 sensor laser beam adjustment LED on the front of its housing
blinks green.
l
Repeat step 3 taking measurements in as many positions and over as wide an angle as
possible. Coupling results (
1
) will be displayed if measurements have been taken in at
least three positions over at least 60° rotation.
l
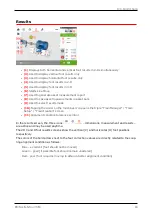
After taking sufficient measurement positions, tap
to proceed to results.
l
Tap
to view results.
Note
If only one shaft is not easily rotatable while the other can be freely rotated,
always mount the sensor on the nonrotatable shaft (use the magnetic sliding
bracket ALI 2.230). Do NOT mount the laser on the not-easily-rotatable shaft,
even if this means setting up your laser and sensor opposite to the way you nor-
mally would for alignment purposes. You can always invert the movable and sta-
tionary machines by using the 'rotate machine view' functionality.
Enter all dimensions in accordance with your actual set-up, following the normal
orientation of the laser and sensor in the dimensions screen.
56
Version:2.3
On-board help
Содержание PRUFTECHNIK ROTALIGN touchEX
Страница 1: ...ROTALIGN touch EX On board help ...
Страница 2: ...ROTALIGN touch EX On board help Version 2 3 Edition 03 2020 Part No DOC 52 202 EN ...
Страница 11: ...This page intentionally left blank ...
Страница 13: ...12 Version 2 3 On board help ...
Страница 19: ...Information on the sensor and laser may be found in the related topic below 18 Version 2 3 On board help ...
Страница 43: ...42 Version 2 3 On board help ...
Страница 87: ...Note If no template is selected all template list options are unavailable 86 Version 2 3 On board help ...
Страница 137: ...136 Version 2 3 On board help ...
Страница 161: ...This page intentionally left blank ...


