l
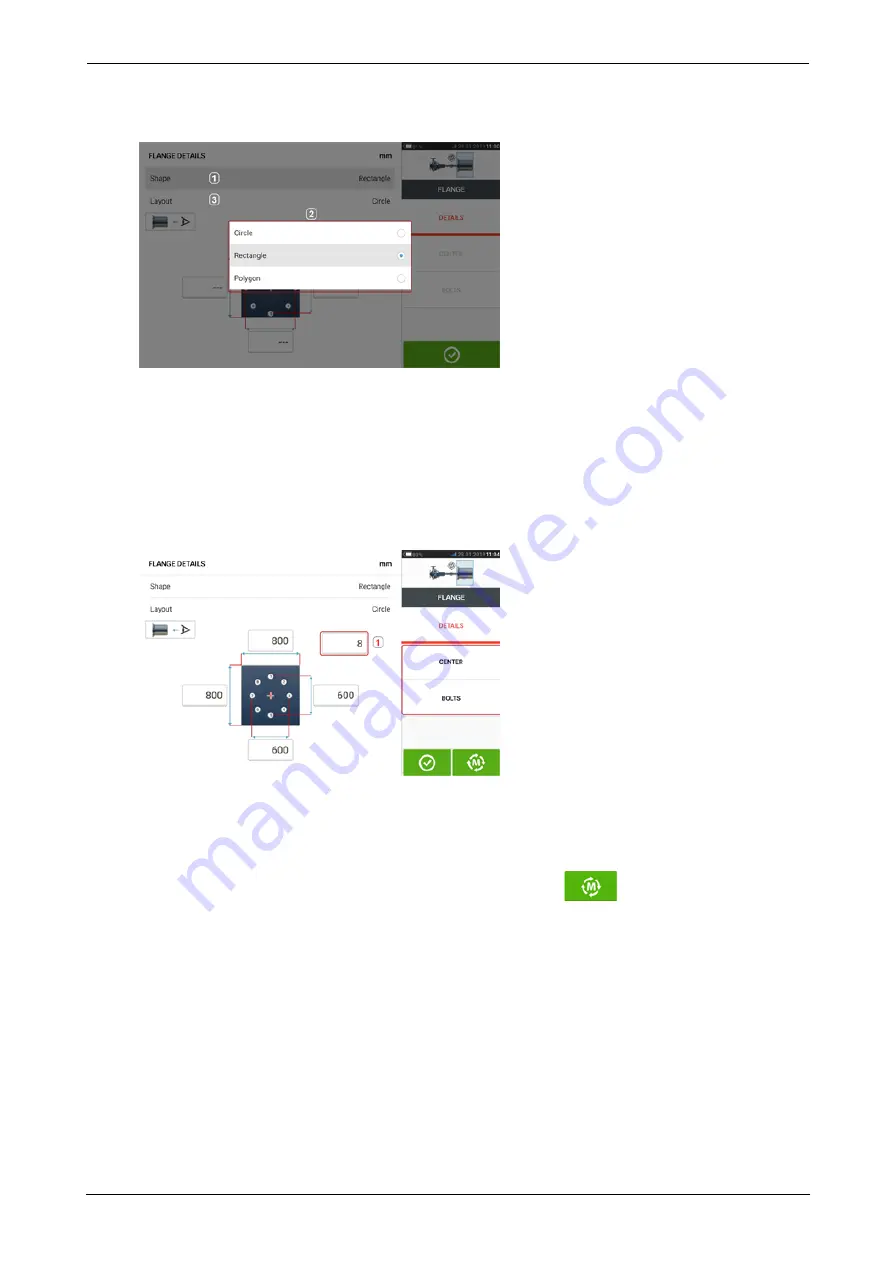
Tap 'Flange' to access the "Flange details" screen where the flange may be edited.
l
Tap the 'Shape' area [
1
] to select the shape of the flange from the pop-up menu [
2
] that
appears. In the above example, the selected shape of the flange is "Rectangle".
l
Tap the 'Layout' area [
3
] to select the pattern formed by the bolts from the pop-up menu
that appears.
l
Tap the respective value boxes then use the onscreen keyboard to enter flange dimen-
sions and bolt pattern lengths. The number of bolts is edited by tapping [
1
] then entering
the value directly. After entering the dimensions, tap the displayed flange area to close
the onscreen keyboard.
'Center' is used to define the exact location of the center of the shafts and is expressed
in X,Y coordinates.
'Bolts' is used to define the exact position of the bolts on the flange, which are also
expressed in X,Y coordinates.
l
After all the required dimensions have been entered, tap
to proceed with meas-
uring.
The following measurement procedures are available for vertical flanged machines:
"Vertical flanged machines – vertiSWEEP" on page 110 (default measure mode )
"Vertical flanged machines – Static clock" on page 113
ROTALIGN touch EX
109
On-board help
Содержание PRUFTECHNIK ROTALIGN touchEX
Страница 1: ...ROTALIGN touch EX On board help ...
Страница 2: ...ROTALIGN touch EX On board help Version 2 3 Edition 03 2020 Part No DOC 52 202 EN ...
Страница 11: ...This page intentionally left blank ...
Страница 13: ...12 Version 2 3 On board help ...
Страница 19: ...Information on the sensor and laser may be found in the related topic below 18 Version 2 3 On board help ...
Страница 43: ...42 Version 2 3 On board help ...
Страница 87: ...Note If no template is selected all template list options are unavailable 86 Version 2 3 On board help ...
Страница 137: ...136 Version 2 3 On board help ...
Страница 161: ...This page intentionally left blank ...


