29.3.3
Comparative measurement
For thermographic inspections of electrical installations a special method is used,
which is based on comparison of different objects, so-called
measurement with a
reference
. This simply means that you compare the three phases with each other.
This method needs systematic scanning of the three phases in parallel in order to
assess whether a point differs from the normal temperature pattern.
A normal temperature pattern means that current carrying components have a given
operation temperature shown in a certain color (or gray tone) on the display, which
is usually identical for all three phases under symmetrical load. Minor differences in
the color might occur in the current path, for example, at the junction of two different
materials, at increasing or decreasing conductor areas or on circuit breakers where
the current path is encapsulated.
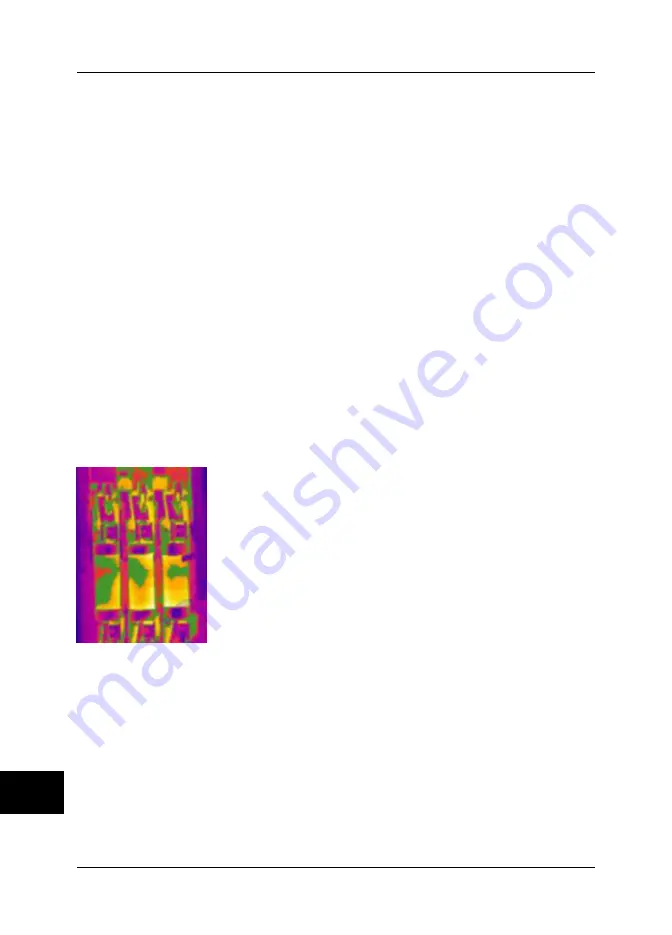
The image below shows three fuses, the temperatures of which are very close to each
other. The inserted isotherm actually shows less than +2°C (+3.6°F) temperature
difference between the phases.
Different colors are usually the result if the phases are carrying an unsymmetrical
load. This difference in colors does not represent any overheating since this does not
occur locally but is spread along the whole phase.
10713203;a3
Figure 29.6 An isotherm in an infrared image of a fusebox
A ‘real’ hot spot, on the other hand, shows a rising temperature as you look closer
to the source of the heat. See the image below, where the profile (line) shows a
steadily increasing temperature up to about +93°C (+199°F) at the hot spot.
29
238
Publ. No. 1558550 Rev. a557 – ENGLISH (EN) – October 7, 2011
29 – Introduction to thermographic inspections of electrical installations
Содержание B6 series
Страница 2: ......
Страница 4: ......
Страница 6: ......
Страница 8: ......
Страница 9: ...User s manual Publ No 1558550 Rev a557 ENGLISH EN October 7 2011...
Страница 12: ...INTENTIONALLY LEFT BLANK xii Publ No 1558550 Rev a557 ENGLISH EN October 7 2011...
Страница 22: ...INTENTIONALLY LEFT BLANK 1 4 Publ No 1558550 Rev a557 ENGLISH EN October 7 2011 1 Warnings Cautions...
Страница 24: ...INTENTIONALLY LEFT BLANK 2 6 Publ No 1558550 Rev a557 ENGLISH EN October 7 2011 2 Notice to user...
Страница 26: ...INTENTIONALLY LEFT BLANK 3 8 Publ No 1558550 Rev a557 ENGLISH EN October 7 2011 3 Customer help...
Страница 28: ...INTENTIONALLY LEFT BLANK 4 10 Publ No 1558550 Rev a557 ENGLISH EN October 7 2011 4 Documentation updates...
Страница 36: ...INTENTIONALLY LEFT BLANK 7 18 Publ No 1558550 Rev a557 ENGLISH EN October 7 2011 7 Quick Start Guide...
Страница 60: ...INTENTIONALLY LEFT BLANK 12 42 Publ No 1558550 Rev a557 ENGLISH EN October 7 2011 12 Pairing Bluetooth devices...
Страница 86: ...INTENTIONALLY LEFT BLANK 13 68 Publ No 1558550 Rev a557 ENGLISH EN October 7 2011 13 Handling the camera...
Страница 112: ...INTENTIONALLY LEFT BLANK 15 94 Publ No 1558550 Rev a557 ENGLISH EN October 7 2011 15 Working with fusion...
Страница 124: ...INTENTIONALLY LEFT BLANK 16 106 Publ No 1558550 Rev a557 ENGLISH EN October 7 2011 16 Working with measurement tools...
Страница 142: ...INTENTIONALLY LEFT BLANK 19 124 Publ No 1558550 Rev a557 ENGLISH EN October 7 2011 19 Annotating images...
Страница 144: ...INTENTIONALLY LEFT BLANK 20 126 Publ No 1558550 Rev a557 ENGLISH EN October 7 2011 20 Programming the camera...
Страница 172: ...INTENTIONALLY LEFT BLANK 23 154 Publ No 1558550 Rev a557 ENGLISH EN October 7 2011 23 Cleaning the camera...
Страница 192: ...it 26 174 Publ No 1558550 Rev a557 ENGLISH EN October 7 2011 26 Dimensional drawings...
Страница 198: ...INTENTIONALLY LEFT BLANK 26 180 Publ No 1558550 Rev a557 ENGLISH EN October 7 2011 26 Dimensional drawings...
Страница 204: ...INTENTIONALLY LEFT BLANK 27 186 Publ No 1558550 Rev a557 ENGLISH EN October 7 2011 27 Application examples...
Страница 323: ...INTENTIONALLY LEFT BLANK 36 Publ No 1558550 Rev a557 ENGLISH EN October 7 2011 305 36 Emissivity tables...
Страница 325: ......


