23
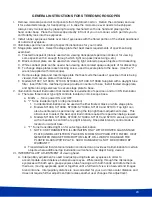
GENERAL INSTRUCTIONS FOR STEREO MICROSCOPES
I. Remove microscope and all components from Styrofoam carton. Retain the container, and use
it for extended storage, for transporting, or in case the microscope ever needs to be shipped.
Always carry microscope by grasping focusing mechanism with one hand and placing other
hand under base. Place the microscope directly in front of you in a manner, which permits you to
comfortably look into the eyepieces.
II.
Install rubber eyepiece shields over top of eyepieces with the flared portion of the shield positioned
at outside of eyepiece.
III.
Illuminate specimen according to specific instructions for your model.
IV. Stage plate selection: Select the stage plate that best meets requirements of specimen being
examined.
A.
Frosted transparent plate is used when viewing transparent specimen slides or for viewing
some specimen thin enough through which light can pass (insect wings, etc.)
B. Black contrast plate can be used when viewing light colored opaque objects or for dissecting.
C. White contrast plate can be used when viewing dark colored opaque objects of for dissecting.
D.
To change stage plates loosen locking screw, used to secure plate to the base. (Use the “L”
wrench supplied with microscope).
E. Remove stage plate and Insert stage plate that best suits the needs of specimen that is being
viewed, then secure plate with setscrew.
F.
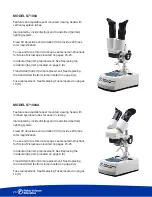
Models S71007, S71007A, S71008, S71008A, S71009, S71009A Supplied with a daylight blue
filter. Insert filter into machined groove provided in center of base. Install frosted stage plate,
and tighten locking setscrew to secure stage plate to base.
V. Illumination: Select illumination that meets the requirements of specimen and turn ON illuminator.
A.
There are three rocker type light controls located on microscope base.
a.
MAIN = Turns power ON and OFF
b.
“I” Turns incidental light on (top illumination)
1. Incidental illumination can be used with either frosted, black or white stage plate.
2.
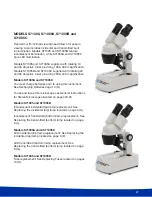
Models S71008, S71008A, S71009, S71009A, S71010 and S71013: Top light can
also be centered on specimen by using the top light beam adjustment screw. This
allows user to select the best spot illumination required for specimen being viewed.
3.
Models S71008, S71008A, S71009, S71009A, S71010 and S71013 are also provided
with a rheostat to control the top light intensity. Rheostat intensity control knob is
located on side of base.
c. “T” Turns transmitted light on for sub-stage illumination.
1.
NOTE: USE TRANSMITTED ILLUMINATION ONLY WITH FROSTED GLASS STAGE
PLATE (AND BLUE FILTER IN PLACE ON MODELS SUPPLIED WITH FILTER). HEAT
GENERATED IN BASE FROM BOTTOM LIGHT WILL WARP OR DAMAGE THE
PLASTIC BLACK/WHITE PLATE. SUCH DAMAGE WILL NOT BE COVERED BY
WARRANTY.
d. Transmitted and Incidental illumination combined can provide extra illumination for certain
objects where additional top illumination will enhance the object being viewed.
VI.
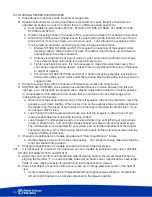
INTERPUPILLARY ADJUSTMENT of viewing head.
A.
Interpupillary adjustment is used to adjust spacing between eyepieces in order to
accommodate varied distance between users eyes. While looking through the microscope
eyepieces with both eyes, grasp eyepiece tube housings with both hands and rotate them on
their axis, moving eyepieces apart or together until a full field of view is observed and images
blend into one. Interpupillary distance is now corrected for your own inter-ocular distance and
does not require further adjustment later unless another user changes this adjustment.
Содержание S7001B
Страница 1: ...Microscope Instruction Manual...


