T
T
a
a
b
b
l
l
e
e
o
o
f
f
C
C
o
o
n
n
t
t
e
e
n
n
t
t
C
C
h
h
a
a
p
p
t
t
e
e
r
r
1
1
7
7
Introduction
7
Gladius Smart Characteristics.............................................................................................. 7
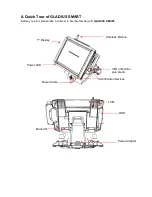
A Quick Tour of GLADIUS SMART ...................................................................................... 9
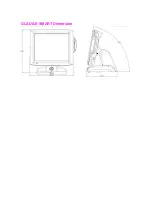
GLADIUS SMART Dimension ..................................................................................... 10
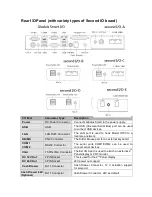
Rear I/O Panel (with variety types of Second IO board) ..................................................... 11
Packing List ....................................................................................................................... 12
How to Use This Manual.................................................................................................... 13
C
C
h
h
a
a
p
p
t
t
e
e
r
r
2
2
1
1
4
4
Hardware Setup
14
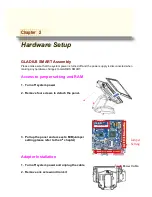
GLADIUS SMART Assembly ............................................................................................. 14
Access to jumper setting and RAM ............................................................................. 14
1.
Turn off system power.................................................................................. 14
2.
Remove four screws to detach the panel...................................................... 14
3.
Pull up the panel and access to M/B(Jumper setting please refer to the 4
th
chapter) 14
Adapter Installation ..................................................................................................... 14
1.
Turn off system power and unplug the cable ................................................ 14
2.
Remove one screw and iron kit .................................................................... 14
3.
Change the adapter under the terminal and beware of the direction............. 15
4.
Fix with a iron kit and one screw................................................................... 15
5.
Link the DC power connector to terminal...................................................... 15
2.5” Hard Disk Drive Installation.................................................................................. 15
Magnetic Card Reader Installation .............................................................................. 16
VFD Customer Display Installation.............................................................................. 17
Cash Drawer Installation ............................................................................................. 18
C
C
h
h
a
a
p
p
t
t
e
e
r
r
3
3
1
1
9
9
Software Setup
19
Driver Download from FEC Website Model ....................................................................... 19
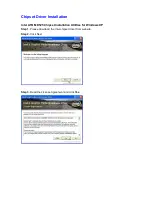
Chipset Driver Installation .................................................................................................. 20
VGA Driver Installation....................................................................................................... 21
LAN Driver Installation ....................................................................................................... 23
Audio Driver Installation ..................................................................................................... 24
ELO Touch Installation....................................................................................................... 25
ELO Control Panel............................................................................................................. 28
EETI TouchKit Tools Installation ........................................................................................ 31
TouchKit Control Panel ...................................................................................................... 34
Wireless LAN Driver Installation......................................................................................... 35
C
C
h
h
a
a
p
p
t
t
e
e
r
r
4
4
3
3
7
7
Содержание Gladius Smart FH-5251
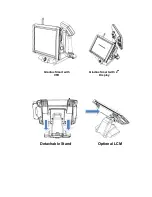
Страница 8: ...Detachable Stand Optional LCM Gladius Smart with VFD Gladius Smart with 2nd Display...
Страница 10: ...GLADIUS SMART Dimension...
Страница 27: ...Step 6 Select Auto detect Elo devices and click Next Step 7 Click Calibrate Elo Touchscreen monitors...
Страница 33: ...After the system finish rebooting follow the directions to calibrate the Touch screen...


