10
HOW TO TRANSPORT THE APPLIANCE
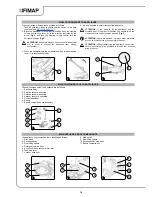
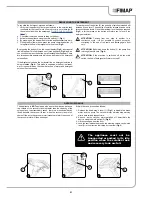
To safety transport the appliance, proceed as follows:
1. Take all necessary steps to ensure that the device is in a safe
condition (see “
MACHINE SAFETY
’”).
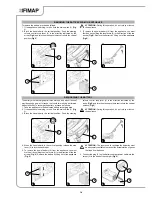
2. Block the handlebar in the horizontal position. Push the steering
column control stop lever (1) in the direction indicated by the
arrow (
Fig.1
) and turn the steering column control into the
horizontal position (
Fig.2
).
ATTENTION:
during this process, keep the control handlebar
still, in order to prevent the appliance from moving
accidentally.
3. When the handlebar is in the horizontal position, release the stop
lever (1) to lock the handlebar.
4. It is now possible to safely transport the appliance.
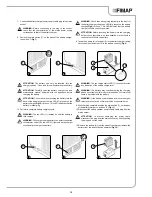
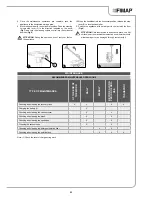
ATTENTION:
If you need to lift the appliance, use the
moulded front (2) and rear (3) handles. The handle (4) on the
steering column control can also be used
(
Fig.3
)
.
ATTENTION:
Users are advised to always wear protective
gloves, to avoid the risk of serious injury to hands.
ATTENTION:
When transporting the appliance on vehicles,
secure it according to the directives in force so that it cannot
slide or tip over.
MAIN COMPONENTS OF THE APPLIANCE
MAIN APPLIANCE BODY COMPONENTS
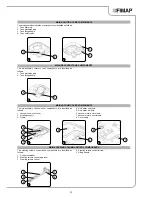
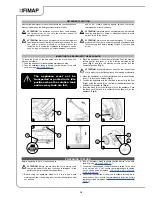
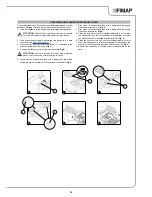
The basic components of the appliance are as follows:
1. Appliance body.
2. Solution tank pre-assembly.
3. Solution tank pre-assembly.
4. Vacuum cover pre-assembly.
5. Control handlebar.
6. Battery.
7. Battery charger base pre-assembly.
The appliance body components are identified as follows:
1. Disc brush.
2. Squeegee body.
3. Rear lifting handle.
4.
Detergent solution filter.
5. Air vacuum hose vacuum motor inlet.
6. Tank stop lever.
7. Vacuum hose duct.
8. Main switch.
9. Rear lifting handle
10. Squeegee body stop knob.
11. Battery compartment.
1
3
2
1
2
4
3
5
4
6
2
3
7
1
2
4
11
5
10
9
8
1
7
3
6
3
1
1
2


