


Maestro Navigator 3.5.3.doc
106
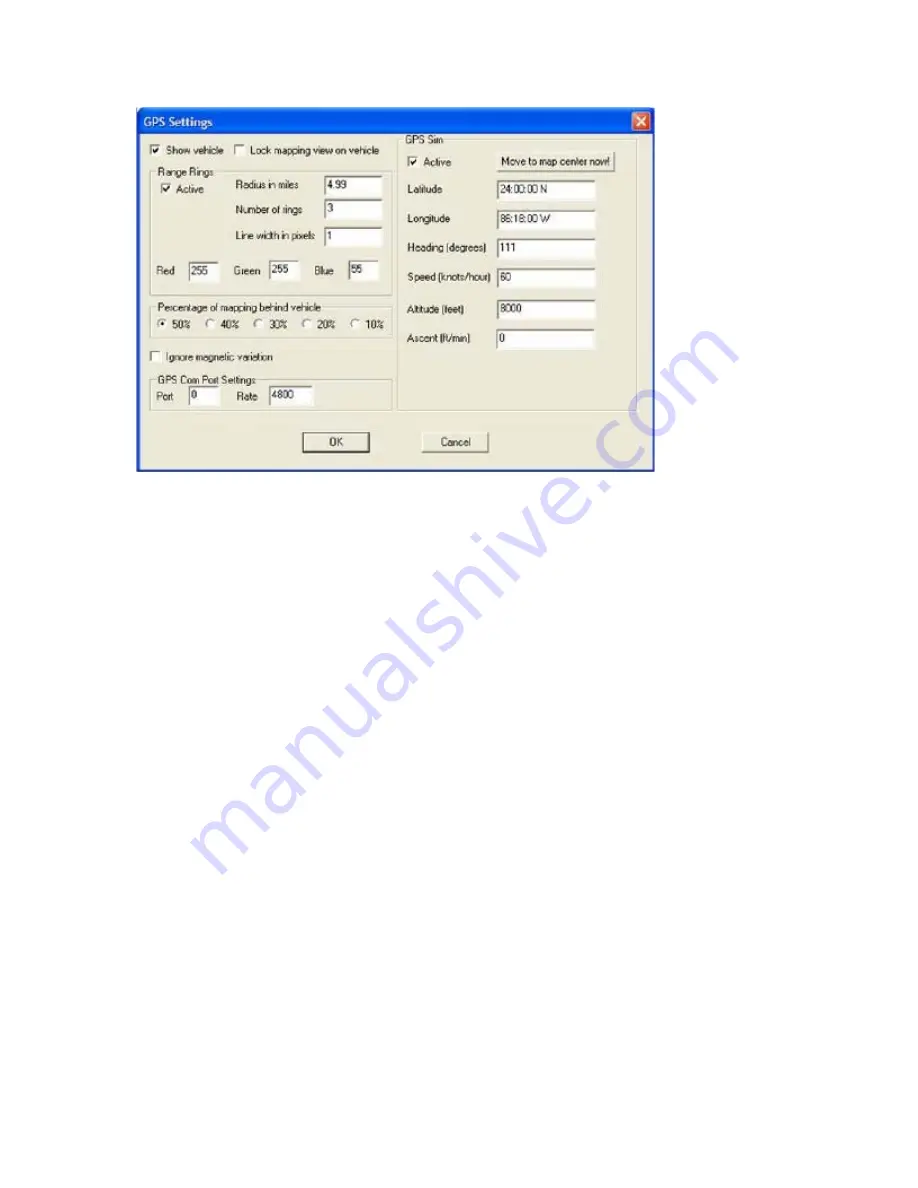
Show vehicle:
Check
Show
vehicle to place a boat shaped icon at your current
position.
Lock mapping view on vehicle:
Check here to center the map on your vessel’s
position.
Range Rings:
These options allow you to configure the rings that appear around the
vessel.
Check the
Active
box to display range rings.
Radius in nm
defines the distance between the rings.
Number of rings
defines how many rings are displayed.
Line width in pixels
defines the thickness of each ring, with a maximum width of 4
pixels.
The values entered in the
Red, Green,
and
Blue
fields combine to give the color for the
rings. A value of 255 in all three boxes results in purely white rings, while a value of 0 in
all three boxes results in purely black rings.
Percentage of mapping behind vehicle:
Controls where the vessel icon will appear on
the map. At 50% the vessel icon will remain in the center of the map, while at 40% you
will have 40% of the mapping will be behind the boat and 60% forward. This allows
positioning the vessel icon on the moving map so that the amount of weather data
viewable in front of your current location can be maximized.
GPS Sim:
In order for the XM WX Weather receiver to acquire your vessel’s position
from Maestro Navigator, the
Active
box must be checked. Once this is done, your
vessel’s position, heading, speed, altitude and ascent are displayed in the fields below.
Содержание Maestro
Страница 1: ...User s Manual TM IS0270 rev A ecr 8171 3 2010 ...
Страница 2: ......
Страница 8: ......
Страница 50: ......
Страница 68: ......
Страница 86: ...Maestro Navigator 3 5 3 doc 82 ...
Страница 90: ......
Страница 94: ...Maestro Navigator 3 5 3 doc 90 ...
Страница 122: ......
Страница 140: ......
Страница 142: ......


