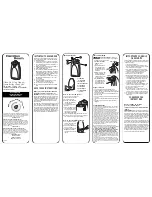
manualshive.com logo in svg
background image

Fig. 2

5  COURTESY LIGHT

- The courtesy light stays lighted for 2 minutes after the end of 

the manoeuvre (cannot be modified). 

Fig. 3

OPEN A

OTHER SAFETY DEVICES

6 CONNECTIONS

IMPORTANT: Before attempting any work on the board 

(connections, maintenance), always cut off power.

- To prevent any electric noise whatever, use separate sheaths 

for powering the network, signals and accessories.

- The D064 operator has a cable with a two-pole plug for 230 

Vac power supply.

- To connect the external controls, safety devices and signals, 

break open the pre-holed element (Fig. 2 ref. 

).

- To connect the safety edge, break open the pre-holed ele-

ment (Fig. 2 ref. 

).

- Make the electrical connections, referring to Fig. 3.

If the 

STOP

 input is not used, jumper connect the input 

to the terminal  

.

If  the  photocells  are  not  used,  connect  the 

FSW  

input to terminal 

-TX FSW

.

Input status LEDS

The automated system stopped and at rest is indicated 

in bold for each input.

STOP


During the opening manoeuvre, the 


anti-crushing device causes an immediate 


stop. During the closing manoeuvre, it opens 


the door.

If, during closure, an obstacle is detected more than 

three consecutive times, the automated system 

considers this distance as the new closing contact point 

and goes into closed status. To restore the correct 

positions, remove the obstacle and command a new 

cycle: at the next closure, the automated system will 

advance at low speed until it detects the contact point.

LD

Meaning

OFF

ON

1

Input status OPEN

Not enabled

Enabled

2

Input status STOP

Enabled

Not Enabled

3

Input status FSW

Safety devices engaged

Safety devices disengaged

Содержание D064

Страница 1: ...D064...

Страница 2: ...ust not encroach public areas dedicated to pedestrian or vehicular transport Check the efficiency of the door bearings and joints Make sure that the door is friction free If necessary clean and lubric...

Страница 3: ...contact with moving parts Install the fixed control points at a minimum height of 150 cm clear of the door movement area but in a position enabling visual control of that area Cable 2 x 0 5 mm2 TX ph...

Страница 4: ...ONLY FOR EXTERNAL MECHANICAL RELEASE 4 5 1 3 2...

Страница 5: ...max 20 cm max 40 cm 15 20 OPTIONAL ONLY FOR EXTERNAL MECHANICAL RELEASE 6 7 7 8 9 J K L...

Страница 6: ...top Fsw CLOSED Opens No effect 2 No effect OPENING Locks Locks 2 No effect 1 OPEN Closes No effect 2 No effect 1 CLOSING Reverses motion Locks 2 Reverses motion LOCKED Closes No effect 2 No effect 1 S...

Страница 7: ...input is not used jumper connect the input to the terminal If the photocells are not used connect the FSW input to terminal TX FSW Input status LEDS The automated system stopped and at rest is indica...

Страница 8: ...unit independently determines the movement parameters If the procedure is not correctly concluded e g due to excessive friction during door movement the unit signals a fault status the SET UP LED flas...

Страница 9: ...y During these 5 seconds in order to lighten the load on the release system you can send OPEN pulses within a time interval of 2 seconds from each other in order to reverse the carriage One pulse corr...

Страница 10: ...within which time the code of another radio control must be transmitted 6 The LED lights up on steady beam for 2 seconds indicating memory storage executed and then resumes flashing for 5 sec during...

Страница 11: ...perform any movement STOP command enabled The automated system opens the door but does not close it FSW safety devices engaged The Fail Safe function is enabled but the NC contact of the devices conne...

Страница 12: ...gging and shearing 16 Use of at least one indicator light e g FAACLIGHT is recommended for every system as well as a warning sign adequately secured to the frame structure in addition to the devices m...

Отзывы: