C850
9
532015 - Rev.B
T
ranslation of the original instructions
ENGLISH
5.4 INSTALLING THE RACK
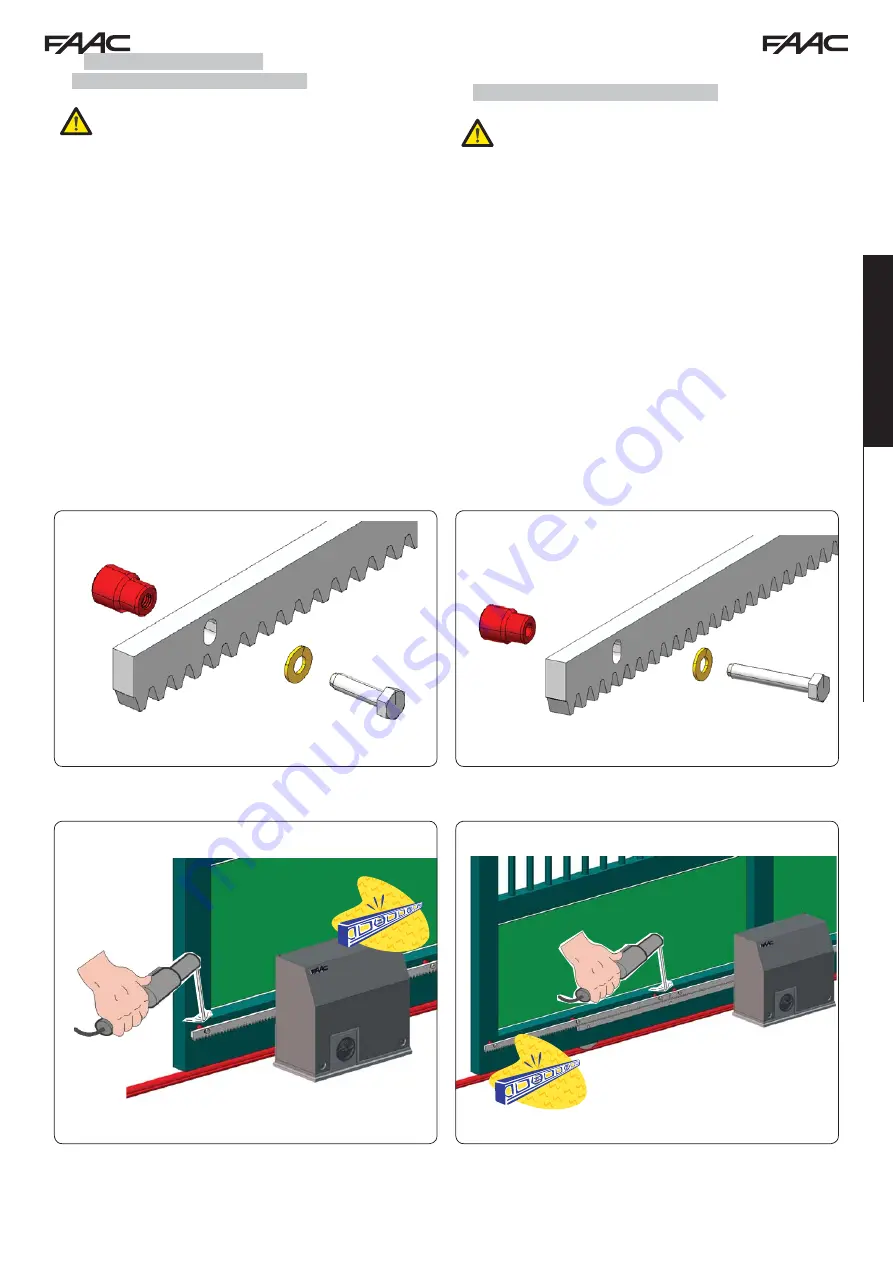
5.4.1 WELD-ON STEEL RACK (Fig. 13)
Before installing the rack, release the gearmotor,
as described in paragraph 8.
1. Install the three threaded pawls on the rack element,
positioning them on top of the slot. In this way the play on the
slot will make it possible to make future adjustments.
2. Manually set the leaf in closing position.
3. Evenly rest the first section of the rack on the pinion and weld the
threaded pawl to the gate, as shown in Fig. 15.
4. Manually move the gate, ensuring that the rack is NOT resting on
the pinion (leave 1.5 mm of clearance) and weld the second
and third pawls.
5. Draw up another rack element to the previous one using a piece
of rack to mesh the teeth of the two elements, as shown in
Fig. 16.
6. Manually move the gate and weld the three threaded pawls, con-
tinuing until the gate is completely covered.
5.4.2 SCREW-ON STEEL RACK (Fig. 14)
Before installing the rack, release the gearmotor,
as described in paragraph 8.
1. Manually set the leaf in closing position.
2. Rest the first piece of rack level on the pinion and place the spacer
between the rack and the gate, positioning it on top of the
slot. In this way the play on the slot will make it possible to
make future adjustments.
3. Mark the drilling point on the gate. Drill 6.5 mm Ø hole and thread
using an 8 mm Ø male. Tighten the bolt.
4. Manually move the gate, ensuring that the rack is NOT resting
on the pinion (leave 1.5 mm of clearance) and repeat the
operations from point 3.
5. Draw up another rack element to the previous one using a piece
of rack to mesh the teeth of the two elements, as shown in
Fig. 16.
6. Manually move the gate and, as for the first element, proceed with
securing until the gate is completely covered.
Fig. 13
Fig. 14
Fig. 15
Fig. 16


