Room Scheduling System • Room Agent Installation and Configuration
25
3.
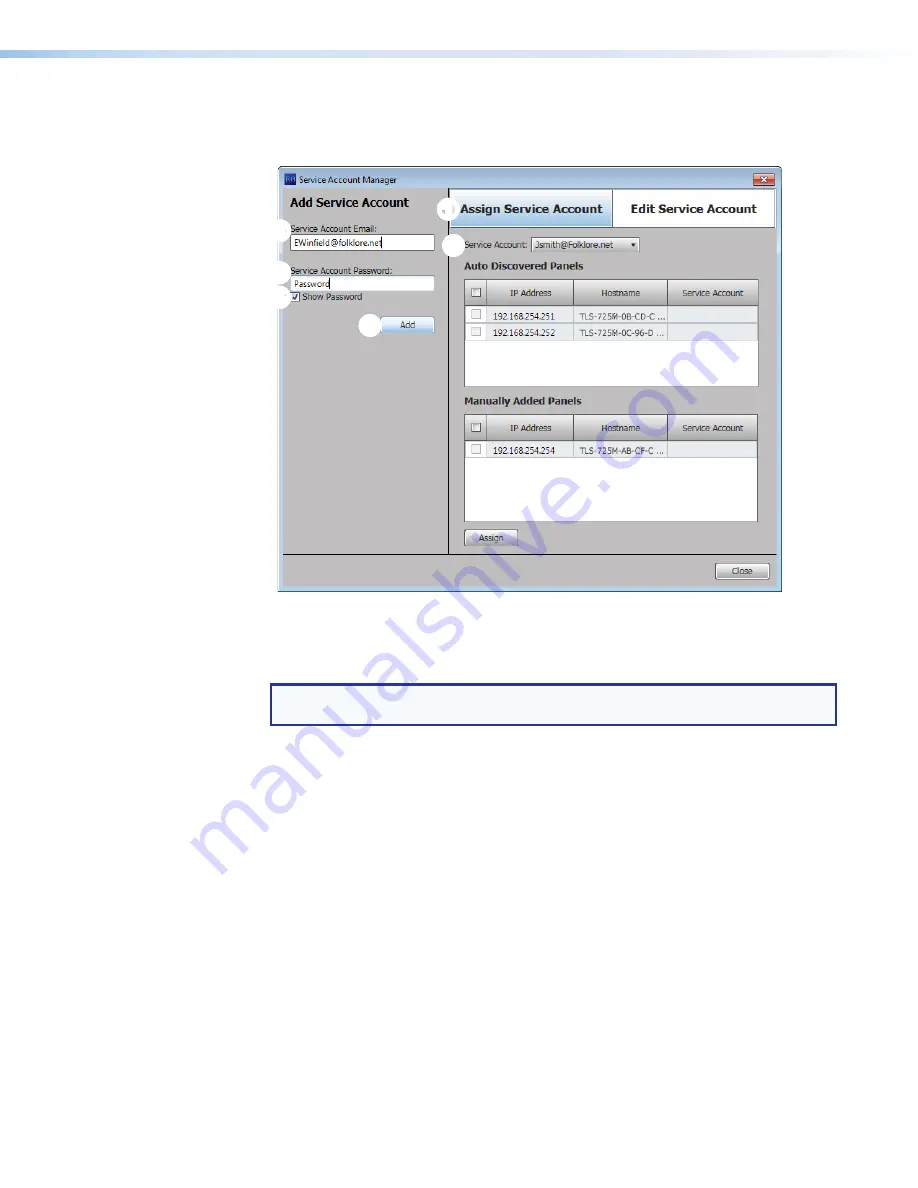
Click the
Service
Account
Manager
button (see
,
2
on the previous page).
The
Service
Account
Manager
dialog box opens with the
Assign
Service
Account
tab selected (see figure 23,
1
).
2
2
2
2
2
2
2
2
2
2
3
3
3
3
3
3
3
3
3
3
4
4
4
4
4
4
4
4
4
4
1
1
1
1
1
1
1
1
1
1
6
6
6
6
6
6
6
6
6
6
5
5
5
5
5
5
5
5
5
5
Figure 23.
Add Service Accounts
4.
Enter a valid
Service
Account
address (
2
).
5.
Enter the
Service
Account
Password
(
3
).
TIP:
The
Service
Account
Password
field is normally masked (
•••
). Select the
Show
Password
checkbox (
4
) to see the password characters as you type.
6.
Click
Add
(
5
). The
Add
Service
Account
area displays the message
Service
Account
has
been
added
and
is
ready
to
be
assigned
to
panels
. The account is
added to the
Service
Account
drop-down list (
6
).
7.
Repeat steps 4 through 6 for each service account.
Содержание TLP Pro 520M
Страница 6: ...Room Scheduling System Contents vi ...


