DVS 510 Series • Reference Information
111
3.
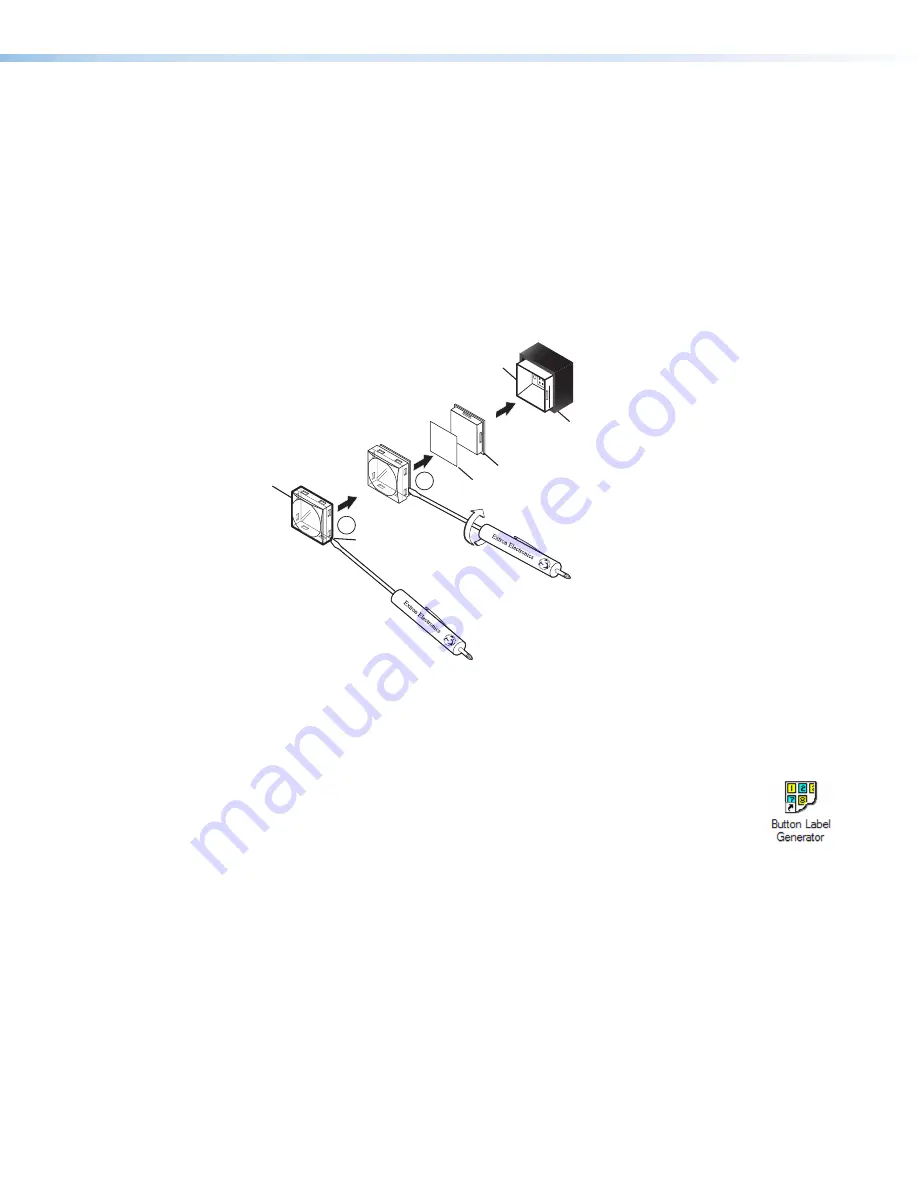
Locate the small corner notch on the lens cap, and slide the screwdriver between the
lens cap and the diffuser.
4.
Using a rotating motion of the screwdriver, carefully pry the two pieces apart (see
figure 48,
3
).
5.
Lift out the transparent square label that you want to replace. You may need to use the
small screwdriver to gently pry the label out.
6.
Insert one of the new labels you created in step 1 into the clear button cap, align the
white backing plate with the cap, and firmly snap it into place.
7.
Gently, but firmly, press the reassembled button into its space on the DVS front panel,
until it snaps into place.
8.
Repeat steps 1 through 7 as needed to relabel other buttons.
2
3
TEXT
Separating the two-
piece button here at
the corner.
Pry the two
pieces apart.
Diffuser
Plunger
Base
Button Label
Clear Lens
Notch
Figure 48.
Replacing a Button Label
Creating Labels Using the Button Label Generator
The Button Label Generator software creates labels that you can place inside the
transparent covers of the front panel buttons. You can create labels with names,
alphanumeric characters, icons, and even colored bitmaps for easy and intuitive
input and output selection (see
on the previous
page for procedures for removing and replacing the button covers).
The program is contained on the same DVD as the Signal Processing
Products Control Program, and is installed automatically when you install the control
software. By default, the software installation creates a directory for the program at
C:\Program Files\Extron\ButtonLabelGenerator
. The
Button
Label
Generator
icon is placed in the
Extron
Electronics
group or folder.


