109
Chapter 5 Advanced Usage
Network Tethering (iOS device only)
A tablet POS system is a POS system that uses a tablet computer in which the POS application is installed. If the
tablet communicates via Wi-Fi, the communication may become unstable depending on the radio wave
condition in the shop or store and it may cause the POS system to malfunction.
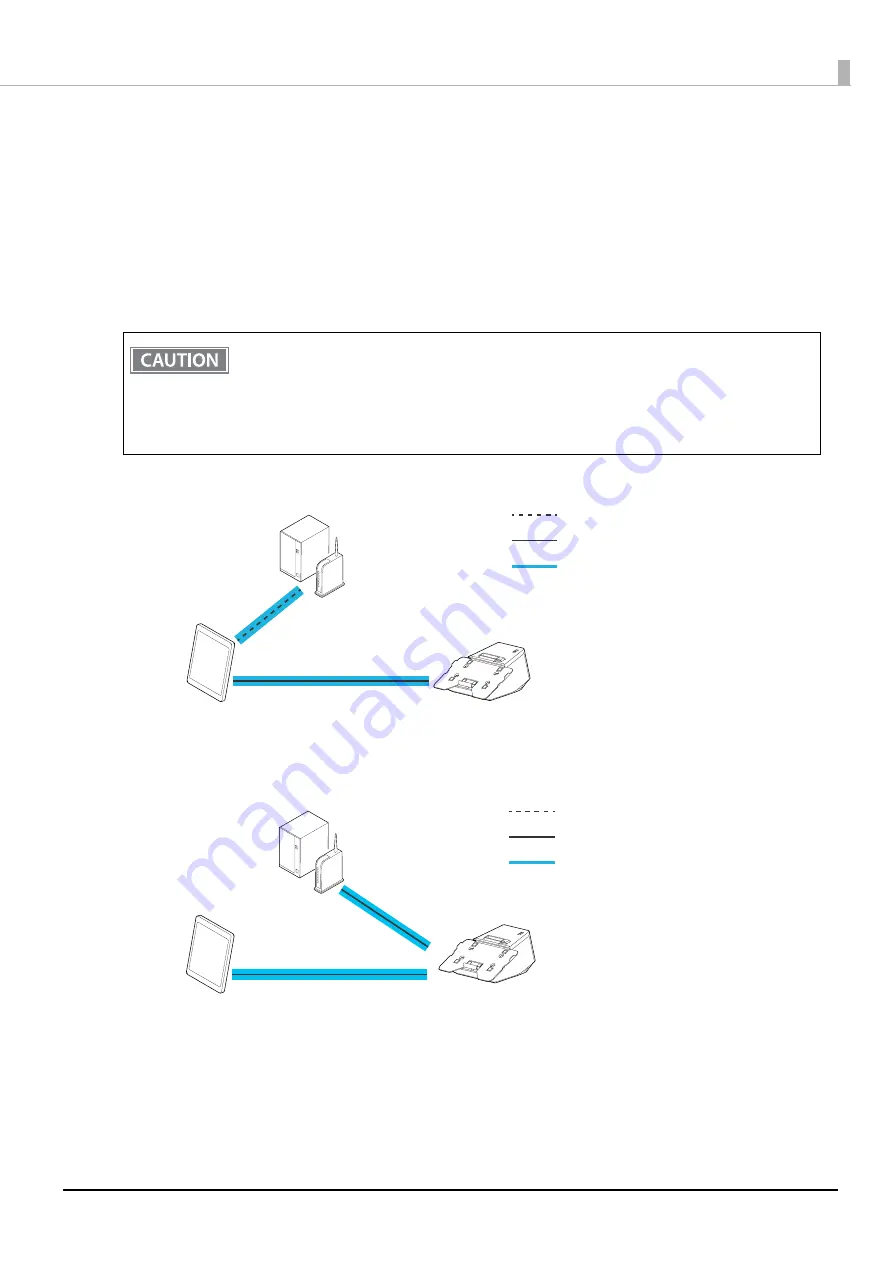
The network tethering provides network function to an iOS device that is connected to the printer using a
Lightning to USB cable. This enables stable and reliable operation of the POS system. In addition, the iOS
device can be charged at the same time.
Enable the network tethering of the printer to use the function.
❏
For Wi-Fi Communication (Not using the Network tethering)
❏
For Wired LAN Communication (Using the Network tethering)
•
If the network tethering is enabled and an iOS device is connected to the USB-A Device Charging
connector (white connector) on the printer that is connected to a wired network, the iOS device
can communicate over the wired network using the tethering function instead of Wi-Fi
communication.
•
The speed of the wired network communication using the network tethering is about 1.5 Mbps.
Depending on the environment, the speed may slower than Wi-Fi communication.
Wireless communication
Wired communication
Internet connection path
iOS device
(POS application)
Wired (Lightning)
Wireless (Wi-Fi)
Router / Web server
Printer
•
Charged by the printer
•
Communication with the printer
via USB
Wireless communication
Wired communication
Internet connection path
iOS device
(POS application)
Wired (Lightning)
Router / Web server
Printer
Wired (Wired LAN)
•
Charged by the printer
•
Communication with the printer
via USB
•
Communication with the printer
via LAN
Содержание TM m30II-SL
Страница 38: ...38 Chapter 2 Setup of the Tablet 6 Turn over the printer 7 Remove the bottom cover ...
Страница 47: ...47 Chapter 2 Setup of the Tablet 3 Replace the tablet table and then secure the table with the screws ...
Страница 54: ...54 Chapter 3 Setup of the Printer 5 Remove the bottom cover 6 Remove the side covers 7 Remove the rear cover ...
Страница 56: ...56 Chapter 3 Setup of the Printer 10 Attach the rear cover 11 Attach the side covers ...


