81
3.
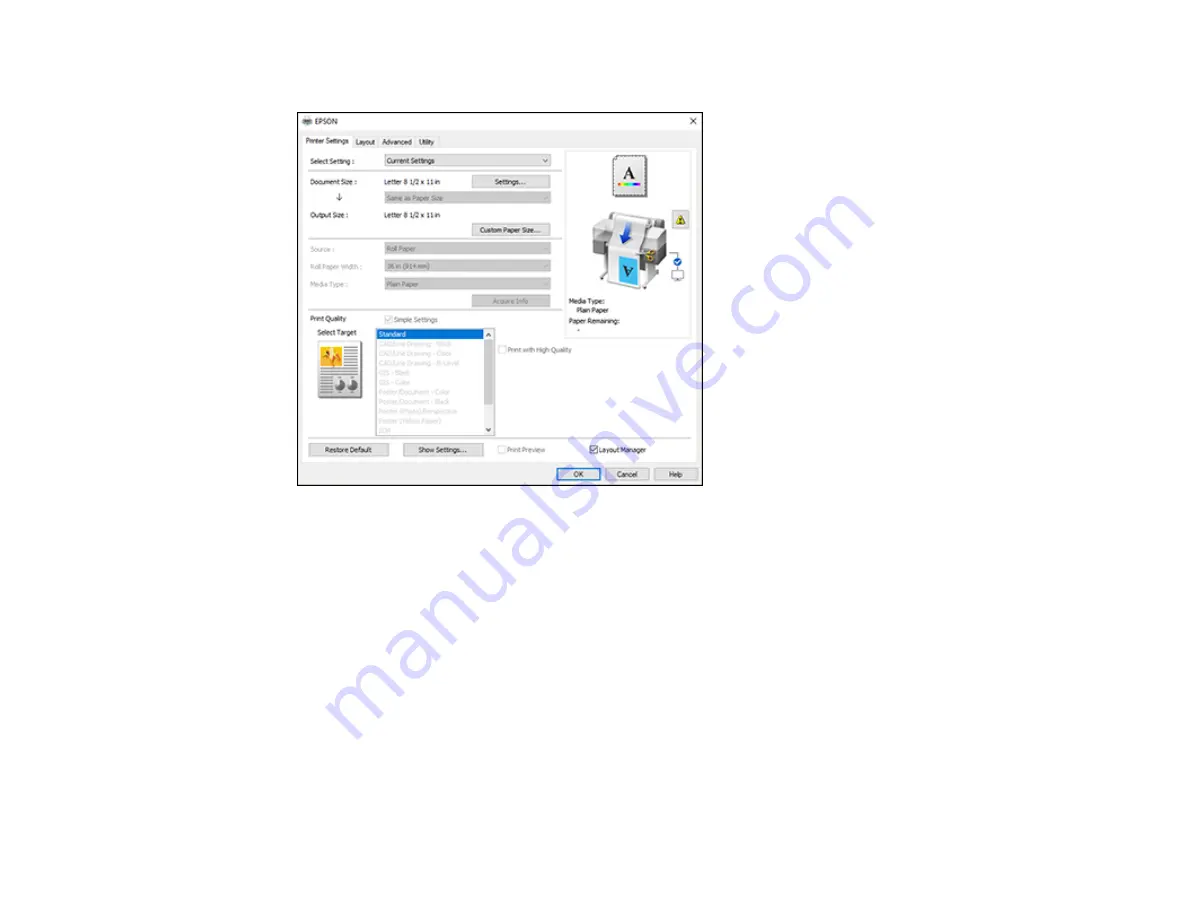
Select the
Layout Manager
checkbox on the Printer Settings tab.
4.
Choose an option for the
Document Size
setting that matches the size of the document in your
application.
5.
Click
OK
and then click
, if necessary.
The Layout Manager screen opens and displays one page in the layout.
6.
Leave the Layout Manager screen open and repeat steps 1 to 4 to arrange additional print data. The
pages are added to the Layout Manager screen.
7.
Do the following to arrange objects on the Layout Manager screen:
• Drag pages to move and resize them.
• Use the tool buttons and the Object menu to align and rotate pages.
• Resize and replace whole pages in the Preference or Arrangement Settings screens.
Note:
See the Layout Manager screen help for details.
Содержание SureColor T2170
Страница 1: ...Epson SureColor T2170 T3170 T5170 User s Guide ...
Страница 2: ......
Страница 23: ...23 1 Make sure you have all of these items for assembly 1 Left mounting bracket ...
Страница 59: ...59 4 Tilt back the auto sheet feeder and pull the paper support extensions all the way out and upward ...
Страница 60: ...60 5 Slide the edge guides out 6 Load paper printable side up into the auto sheet feeder ...
Страница 62: ...62 1 Slide out the edge guides and remove the paper from the auto sheet feeder ...
Страница 63: ...63 2 Fold down and push in the paper support extensions and close the auto sheet feeder ...
Страница 78: ...78 You can also place the same print data multiple times as shown here ...
Страница 79: ...79 You can place print data in different sizes and orientations to maximize media usage as shown here ...
Страница 148: ...148 You see a window like this 4 Click Print The nozzle pattern prints ...