Using Micro-adjustment
1.
2.
3.
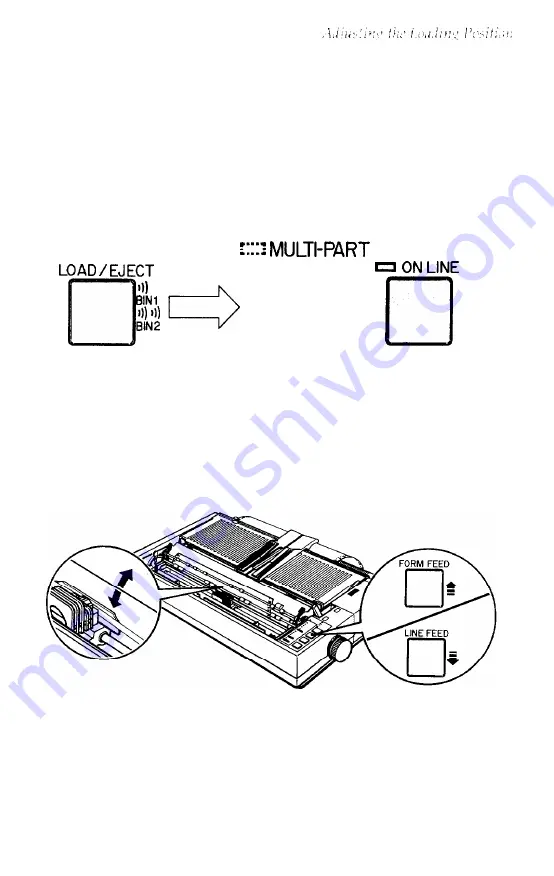
Make sure that the printer is turned on and that either a single
sheet or continuous paper is ready to be loaded.
Press the
LOAD/EJECT
button to feed paper to the loading
position. Then press the
ON LINE
button; the
MULTI-PART
light
begins to blink
Note: You
can use the
FORM FEED
and
LINE FEED
buttons for
micro-adjustment only while the
MULTI-PART
light is blinking.
Press the
FORM FEED
button to feed
the
paper forward or the
LINE FEED
button to feed the paper backward.
Using the Printer
3-15
Содержание LQ-1050
Страница 1: ......
Страница 2: ...EPSON LQ 850 950 1050 User s Manual ...
Страница 19: ...4 Remove th 5 Slide the print head to the middle of the printer Setting Up the Printer 1 5 ...
Страница 20: ...6 Remove the left and right locking tabs 7 Attach the printer cover unit 1 6 Setting Up the Printer ...
Страница 56: ...uide cover and remove the paper guide 3 Open the paper g 4 Attach the paper rest 2 8 Paper Handling ...
Страница 67: ...4 Push the paper release lever back to the single sheet position 5 Lift the paper Paper Handling 2 19 ...
Страница 111: ......
Страница 115: ...Epson Extended Graphics ODE 0 1 23456789ABCDEF 0 1 2 3 4 5 6 7 8 9 A B C D E F Using the Printer 3 33 ...
Страница 162: ...7 Raise the cut sheet feeder s paper path guide and attach the printer cover 5 6 Using the Printer Options ...
Страница 223: ...Chapter 6 Maintenance Cleaning the Printer 6 2 Replacing the Ribbon 6 4 Transporting the Printer 6 9 Maintenance 6 1 ...
Страница 230: ...8 Reattach the 6 8 Maintenance ...
Страница 234: ...9 Fit the printer back into the white packing material and then back into its original box 6 12 Maintenance ...
Страница 330: ...Appendix Proportional Width Table A 2 Character Tables A 6 A l ...
Страница 336: ...Epson Extended Graphics Character Table A 7 ...
Страница 352: ...EPSON L Q 8 5 0 9 5 0 1 0 5 0 Quick Reference ...
Страница 356: ...EPSON Printed in Japan 90 01 40 0 ...


