For example, if you wish to send 1632 columns of graphics data,
should be 96 and should be 6 because 1632 = 96 + (6 x 256).
The printer interprets the number of bytes specified by and
as
graphics data, no matter what codes they are. This means that you
must be sure to supply enough bytes of graphics data or the printer
will stop and wait for more data and will seem to be locked. If, on
the other hand, you supply too much graphics data, the excess will
be interpreted and printed as regular text.
A Simple Graphics Program
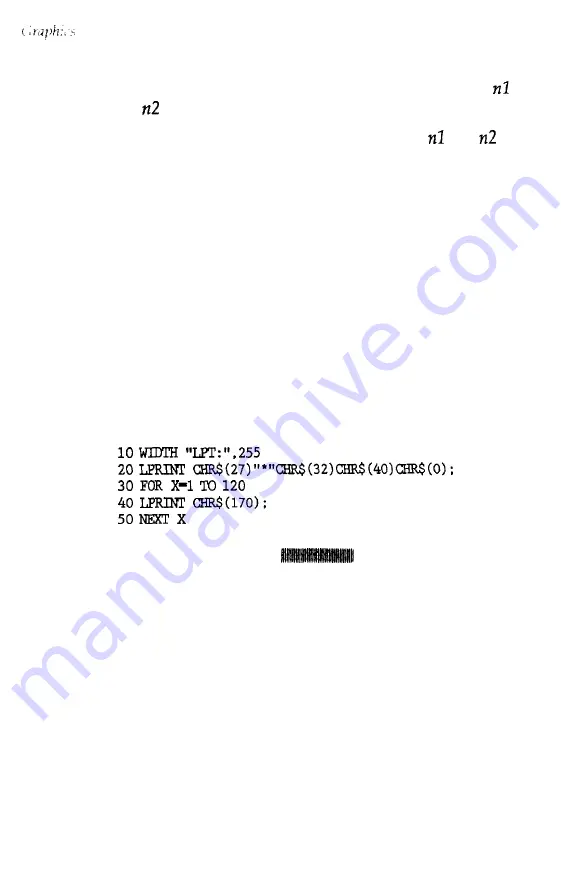
This first program is just a simple example to show you how the
graphics command, column reservation numbers, and data can be
used in a BASIC program.
Type in and run the following program. Be especially careful to
include both semicolons. The program produces the printout you
see below:
Line 20 selects single-density 24-pin graphics mode (mode 32) and
also reserves 40 columns for graphics. Since 24-pin graphics requires
three bytes of data for each column, line 30 begins a loop to supply
120 bytes of data. Line 40 contains the number 170, which produces
the first pin pattern shown in the section on pin labels, and line 50
ends the loop.
4-16
Software and Graphics
Содержание LQ-1050
Страница 1: ......
Страница 2: ...EPSON LQ 850 950 1050 User s Manual ...
Страница 19: ...4 Remove th 5 Slide the print head to the middle of the printer Setting Up the Printer 1 5 ...
Страница 20: ...6 Remove the left and right locking tabs 7 Attach the printer cover unit 1 6 Setting Up the Printer ...
Страница 56: ...uide cover and remove the paper guide 3 Open the paper g 4 Attach the paper rest 2 8 Paper Handling ...
Страница 67: ...4 Push the paper release lever back to the single sheet position 5 Lift the paper Paper Handling 2 19 ...
Страница 111: ......
Страница 115: ...Epson Extended Graphics ODE 0 1 23456789ABCDEF 0 1 2 3 4 5 6 7 8 9 A B C D E F Using the Printer 3 33 ...
Страница 162: ...7 Raise the cut sheet feeder s paper path guide and attach the printer cover 5 6 Using the Printer Options ...
Страница 223: ...Chapter 6 Maintenance Cleaning the Printer 6 2 Replacing the Ribbon 6 4 Transporting the Printer 6 9 Maintenance 6 1 ...
Страница 230: ...8 Reattach the 6 8 Maintenance ...
Страница 234: ...9 Fit the printer back into the white packing material and then back into its original box 6 12 Maintenance ...
Страница 330: ...Appendix Proportional Width Table A 2 Character Tables A 6 A l ...
Страница 336: ...Epson Extended Graphics Character Table A 7 ...
Страница 352: ...EPSON L Q 8 5 0 9 5 0 1 0 5 0 Quick Reference ...
Страница 356: ...EPSON Printed in Japan 90 01 40 0 ...


