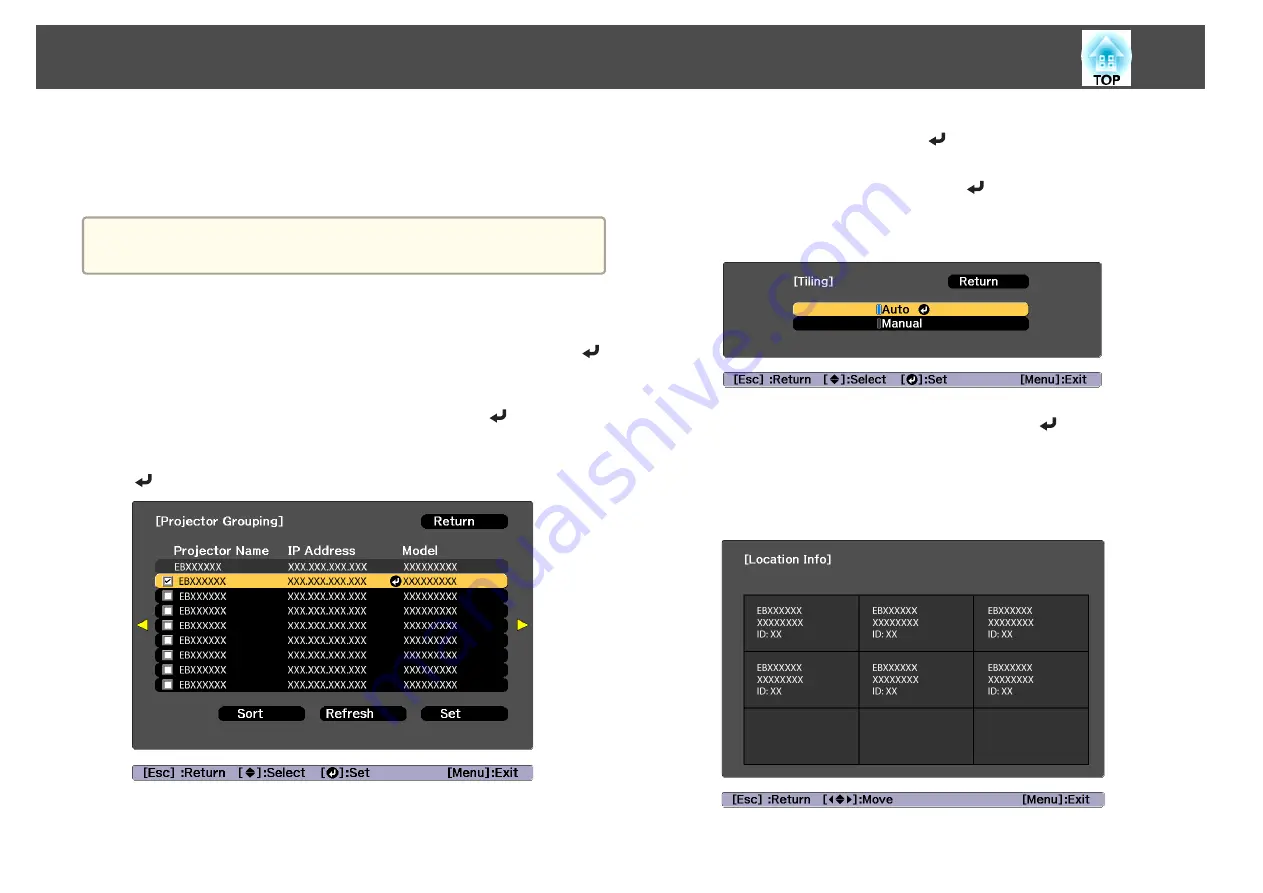
Performing tiling automatically
Automatically sets the arrangement for the projectors being used. You can
make settings by operating only the master projector.
a
Location Setup is performed using the camera built into the front of
the projector. Do not block the camera or the projected images.
a
Press the [Menu] button while projecting.
b
Select
Multi-Projection
from
Extended
, and then press the [
]
button.
c
Select
Projector Grouping
, and then press the [
] button.
d
Select the projectors that will be used for tiling, and then press the
[
] button.
(1)
Select the projectors you want to use to enter a checkmark.
Select
Refresh
to update the list. Select
Sort
to sort the projector order.
(2)
Select
Set
, and then press the [
] button.
e
Select
Tiling
, and then press the [
] button.
f
Select
Tiling
. Select
Auto
, and then press the [Esc] button.
g
Select
Location Setup
, and then press the [
] button.
The image is positioned automatically.
When the message "Assign IDs to projectors that have been located.
Do you want to continue?" is displayed, select
Yes
.
When setup is complete, the following screen is displayed.
Multi-Projection Function
85
Содержание EB-L25000U
Страница 1: ...User s Guide ...
Страница 13: ...Introduction This chapter explains the names for each part ...
Страница 24: ...Preparing the Projector This chapter explains how to install the projector and connect projection sources ...
Страница 49: ...Basic Usage This chapter explains how to project and adjust images ...
Страница 114: ...Security Functions 114 ...
Страница 115: ...Configuration Menu This chapter explains how to use the Configuration menu and its functions ...
Страница 146: ...Troubleshooting This chapter explains how to identify problems and what to do if a problem is found ...
Страница 186: ...m To complete the adjustment press the Menu button Image Maintenance 186 ...
Страница 187: ...Appendix ...
Страница 222: ...790 395 146 299 378 5 A Center of lens 860 475 738 754 633 936 646 710 Units mm Appearance 222 ...


