


10
www.enelx.com
Phone: +1-844-584-2329
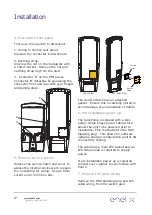
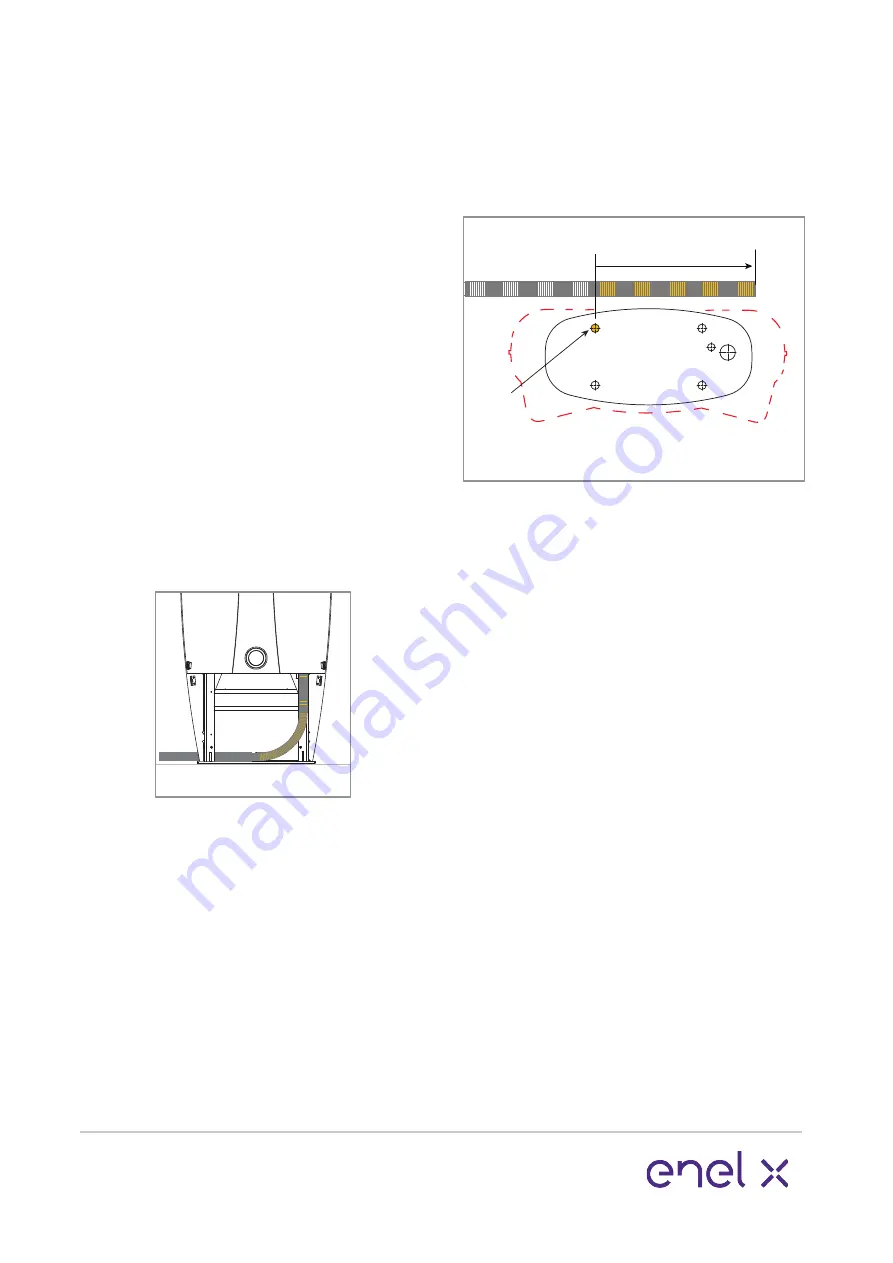
Figure 7.
Top view
1 metre/3 feet
Not to scale
Back
left
fixing
point
Fixing points.
Use 4x 5/8-11 studs, protruding 1.2-1.6
inches above the surface. If the studs
protrude more than this it will be
impossible to remove and replace the
radiator if required.
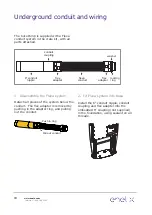
Ethernet cable hole:
If hardwiring in the ethernet, use the hole
referenced in Figure 5.
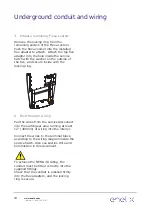
If power via conduit is being supplied to
the JuicePump above ground, the conduit
will enter the JuicePump via the back
radiator panel on the left hand side as
shown in Figure 6.
Use the JuicePump template (supplied in
the crate kit) or or measure as per Figure
5, to ensure the fixing points are correct.
Locate mounting studs and conduit within
0.05” (1.25mm) tolerance.
To ensure the correct seal is
maintained into the JuicePump, only use
Flexa 1-1/4 inch ROHRflex conduit,
order code 0237.202.036 (not sup
-
plied) to bring power cabling into the
JuicePump.
Figure 6.
Leave at least 1 metre/3 feet of power
cabling from the back left fixing point, for
installation as shown in Figure 7.
Prior to installation the conduit and wiring
will require trimming.
Above ground power preparation
Содержание JuicePump
Страница 1: ...50kW DC RT www enelx com Phone 1 844 584 2329 Installation Manual TRI93 50 01 UL ...
Страница 2: ......


