5.
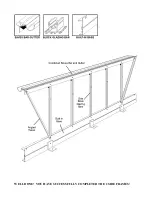
The bottom built in base cill of the sides attaches to the corner bars in a similar way. Undo
the nuts and bolts inserted in the gable end assembly, move the built in base cill under the
corner bar so that the elongated hole in the vertical flange of the built in base cill lines up with
the bolt slot in the corner bar. Move the bolts down the slot into the slotted hole, put a nut on
and tighten up, ensuring that the corner bar is pushed right down into the angle of the built in
base cill. Do the same at the other 3 bottom corners.
6.
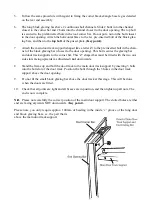
The ridge bar is fitted next, but first you must thread the glazing beading into the 2 grooves on
the ridge.
(Key point).
Lift the ridge bar up to the apex and standing on a pair of sturdy and
safely placed stepladders push the ridge into the small gap between the roof corners so that
the 2 flanges which form the angle of the roof are tight up against the inside edge of the cor-
ner bars. The vertical part of the ridge is outside and pointing skywards. Undo the nuts and
bolts previously inserted during the gable end assembly and push them upwards into the slot-
ted holes of the ridge. Tighten the nuts.
7.
The roof block glazing bars can now be attached to the structure
but first you must slide the
glazing beading into the bars and trim to suit
.
(Key point).
Attach the bars firstly at the ridge, sliding a bolt into the bolt slot of the roof glazing bars and
placing the bolt through the holes in the flanges of the ridge. Put a nut on and immediately
prior to tightening ensure that the roof block glazing bar is pushed up hard against the ridge.
Do not attach the bottom of the bars to the eave until all the roof block glazing bars are bolted
to the ridge.
(Key point).
8.
Now attach the bottom of the roof block glazing bars to the eave/gutter bar into the holes in
the upper flange. Start
with the middle bars
either side of the ridge.
You will need to insert
2 extra bolts into the
bolt channel on every
bar and a 3rd extra bolt
in the bars onto which
the roof vent will close.
Содержание 7'5" WIDE TITAN
Страница 1: ......
Страница 2: ......
Страница 3: ......
Страница 9: ...WELL DONE YOU HAVE SUCCESSFULLY COMPLETED THE 2 SIDE FRAMES ...
Страница 11: ...REAR END ASSEMBLY ...
Страница 16: ...DOOR END ASSEMBLY ...
Страница 32: ...ELITE 1806 ...


