background image

16

CN

EL 9000 HP 

系列

产品说明书

日期:05-31-2011

6.11  串联和并联连接

多台负载可以并联,但也不是完全支持。意思是,并联时
电流不会自动分配。故用户需注意正确控制产品。

并联操作时,通过控制板或接口卡(数字或模拟)对并
联中所有产品的

U,I,P

R

调节成相同数值,从而达到平

均分配的效果。

注意!本系列产品不可串联!否则产品会受损。

操作产品


6.9 

报警管理器

报警管理器由两部分组成:第一,最新的报警信息显示
并保留于屏幕上(见图

7.2

),直到被用户确认才清除;第

二,三种不同的报警信息存储在一个内部错误缓冲区内。
因为首次出现的报警被认为是重要的,当有更多错误出现
时会被推向错误缓冲区的末尾而不是被覆盖。

如果缓冲区已满,只要没被数字接口卡输入的指令读取,
最后输进去的报警信息被最新的信息覆盖。读出缓冲器会
腾空本区域,也自动确认显示屏上的报警信息。

错误缓冲器存储三种可能输入的错误代码和状态代码,告
诉用户错误仍然运行还是已经消除。关于更多信息请参考
接口卡的使用说明。

显示器也显示指示错误的状态。目的在于告诉用户在他不
在的这个时间段出现了一个或多个报警信息,特别是只持
续很短时间的报警信息,如尖峰电压产生的过压。用户要
么按下

Input on/off(4) 

按钮确认他已发现这个报警指示,

要么通过通讯工具读取错误缓冲器。

注意:

在遥控或外控模式下出现的报警不显示于屏幕,

因为已显示了控制模式的状态。因此只需在离开这些模
式时确认一下或者当错误被指令读取后不用做任何动作。

6.10  终端控制区域和优先顺序

控制区域是指产品被控制的区域。这有可能在产品本身(
手工控制),可能通过模拟接口(外部控制)或通过接口卡
(遥控)。为防止用户一次性从两个区域访问负载器而设
置了优先顺序。适用如下:

模拟接口具有最高优先权,数字接口第二,手动控制最
低。意思是如果产品被设为遥控,则不可用开关和旋钮
设置模式和设定值。如果在遥控运行同时转换到外控,遥
控状态将被重设,负载只能通过模拟输入控制。为了将此
报告给电脑上运行的软件,尝试访问和控制负载器,控制
区域内部设为“

local

”。在“

local

”状态下负载器能通过

电脑读取(即:监控)。

 13. 

电流控制模式下的电池测试操作

Содержание 33200246

Страница 1: ...EL 9000 HP 80V 160V 400V 750V 75A 150A 300A 600A 7200W EL 9080 600 HP 33 200 246 EL 9160 300 HP 33 200 247 EL 9400 150 HP 33 200 248 EL 9750 75 HP 33 200 251 电子负载系列 Electronic Load Series ...

Страница 2: ......

Страница 3: ...律后果 安全须知 请仅在铭板标示电压下操作本仪器 请勿将任何机械零件 特别是金属件 插入仪器内 否 则将有触电危险或损坏仪器 请避免在仪器周围使用任何液体物质 因有可能进入仪 器内部并损坏它 请勿将高于负载额定电压的电压源连接到负载上 比如 80V型号的负载 不能连接高于100V的电压源 160V 型号不能连接高于180V的电压源 400V的产品不能连 接460V电压源 从后板插槽上安装接口卡时 请遵循一般防静电规则 接口卡只能在仪器完全关闭 电源开关关闭 后插入和 取出 当连接其它电压源或电池 或者使用模拟接口时 总是 先查看应用设备的各项限定值和标称值 DC输入端无保险丝熔断保护 ...

Страница 4: ...5 6 接口卡插槽 10 6 操作 11 6 1 显示 11 6 2 操作按钮 12 6 3 打开电源 13 6 4 打开input on off开关 13 6 5 调节设定值 13 6 6 预选调整模式 13 6 7 Level A和Level B的使用 14 6 7 1 Level A 14 6 7 2 Level B 14 6 7 3 Level A B 脉动操作 14 6 7 4 升 降时间 15 6 8 电池测试模式 15 6 9 报警管理器 16 6 10 终端控制区域和优先顺序 16 6 11 串联和并联连接 16 6 12 System Bus的功能 16 6 12 1 两象限操作 16 6 12 2 选择调整速度 16 6 12 3 横向调整 两象限操作 16 6 12 4 远程感测 Remote sense 17 6 12 5 System Bus 终端系统总线各引脚分...

Страница 5: ... 用户籍USB能即刻连到电脑 上 并控制多达4台 或更多 产品 无需重新配置整个 总线系统 就可在现有CAN总线端应用负载 根据特定 EL9000 HP产品选择合适的地址范围和传输速度 使之 达到最佳适合状态 主要功能一览 在0 100 范围设置 U I P 和 R 以容量和时间计数进行电池测试 可 拔 插 式 接 口 卡 CAN USB RS232 IEEE GPIB Ethernet LAN 外控用模拟接口 带可调脉宽和可调升 降时间的两组设定值间的脉动 操作 在50µs 100s时间范围内的可调占空比 随时间 在 30µs 200ms时间范围内可调上升时间 2 技术规格 2 1 控制面板 型号 显示器 80个字符 两行显示的LCD 运行元素 2个旋钮 2 个旋转开关 1个按钮 显示格式 标称值决定可调范围 只要当前运行操作模式允许 可一次性显示实际值和设 定值 电压值显示 分辨率 4...

Страница 6: ... 0 300Ω 显示分辨率 10mΩ 10mΩ 100mΩ 100mΩ 精确度 动态值 电流上升和下降时间 级别 时间 脉动操作 上升 下降时间 精确度 触发输入 电池测试功能 模式 电池保护 显示 显示 模拟接口 设定值输入 监控输入 控制信号 错误信号 输出 制冷 类型 环境温度 端子 负荷输入 系统总线 模拟接口 尺寸 W x H x D 重量 支持的接口卡 产品编号 33 200 246 33 200 247 33 200 248 33 200 251 关于技术规格请参考章节 模拟接口 上升和下降时间定义在标称值的10 90 和 90 10 之间 所有指定误差的单体数值都为典型值 精确度是在不考虑温差或元件老化条件下由实际值 比如 输出电压 和调整后设定值之间的差异而定义的 1 1 Unom 7200W 随温度降额 115V 230V 可转换 50 60Hz T2 5A Pnom的...

Страница 7: ...7 CN EL 9000 HP 系列 产品说明书 日期 05 31 2011 关于产品 3 外观 3 1 前视图 图 1 ...

Страница 8: ...8 CN EL 9000 HP 系列 产品说明书 日期 05 31 2011 关于产品 3 2 后视图 图 2 ...

Страница 9: ...显示屏上的错误只有通过 Input on off 按钮确认或通 过远程指令读取后才清除 内部错误缓冲区内存有3种不 同报警功能 在读出后清除 4 6 动态特性和稳定准则 本电子负载特征在于由内部调整线路高带宽形成的短暂 电流升降时间 如果负载连上带有自身调整线路的测试源 如电源 可 能出现调整不稳定现象 这个不稳定性是整个系统 馈源 和电子负载 在特定频率下的相数和增益余量太少而形成 的 180 相位位移在 0dB的放大条件下 会导致振荡或 不稳定 如果连接线是高导电性的或电感 电容性的 无调整线路的使用源 如 电池 也可能出现相同情况 此不稳定性不是负载的误操作造成 而是整个系统的动 作 改善后的相和增益余量可解决此问题 特别是在负载 直流输入端直接装个电容的方法 建议用1µF 比较低的 系统可用100µF电容 4 7 温度特性 高功率电子负载为改良版 故在更高环境温度下 功率降 额钱 ...

Страница 10: ...n V I in A 5 安装 5 1 目检 收到本产品后 请检查是否有外观受损痕迹 如有 请不 要操作本产品 应立即联系您的供应商 5 2 与市电的连接 使用随附于产品的电源线与市电相连 电源插座为IEC320型10A插座 电源线长1 5m 导体直 径为 3 x 0 75mm 本产品装有5x20mm的保险丝 T2 5A 从后面板可拆装 更换 5 3 直流输入端 负载器的输入端位于产品后面 在此处用螺丝固定与任 何馈源的连接 请随时注意设备的正确极性 仅允许连 接直流电压 产品的输入端并无容丝装置 为避免馈源损坏负载器 应 随时注意电子负载器的标称值 如有必要 特别是在给电 池放电时 可在负载器和馈源之间加装一额外的保险丝 负载线的直径随输入电流而定 我们建议这样使用 150A 2 x 16mm 或至少1 x 50mm 300A 2 x 50mm 或至少1 x 150mm 600A 2 x...

Страница 11: ...示实际电压值 图 4 显示屏右半边的这部分内容指示不同的操作模式和错误 种类 图 5 当负载器通过可选接口卡设置在远程控制模式下 Remote mode 时出现这部分内容 在模式则可能为Level A B 和 A B 图 6 文本External mode表示负载的控制已经转到模拟接口 在此模式下不可在本机对设定值进行调节 详情请见章节 8 模拟接口 图 7 1 操作产品 文本 Overvoltage 或 Overtemperature 显示错误状态 如果负载变热 过温错误出现 负载输入关闭并持续到 错误消失为止 负载冷却后又自动打开 如果直流输入的过压极限被超越 见 2 技术规格 过压错误出现 本错误持续关闭负载输入 直到排除错误 后再重新启动负载 报警管理器 错误指示一直显示于屏幕上 直至用 Input on off 按钮 确认为止 目的在于告知用户报警是存在还是已经消除 例如 图 7...

Страница 12: ...转至Level B的设定值 相关数值即刻生效 并能被更改 A B 关闭负载 激活脉冲模式 频率受控 自动在 Level A和B间转换 Battery 关闭负载 激活电池测试模式 Setup 关闭负载 激活设置菜单 在此处设置产品和 接口卡 如果装有的话 更多关于操作模式的内容请参考章节 6 7 LevelA和Level B的使用 Input on off 4 按钮 用于激活 连线 和关闭 断线 负载操作 如果在电池测试模式下按下本按钮 负载设 为 断线 计时停止 负载设为 连线 时 计时继续 负载激活操作可因某些原因被阻止 比如 过压或其它错 误出现 或负载由模拟或数字接口 接口卡 远程控制 也用于确认显示屏上的报警指示 按下本按钮 显示的 错误信息被清除 只要报警没有工作 按钮可照常使用 在远程操作下 即由数字接口卡控制模式下 按住按钮 3s 可将远程操作强行恢复至默认模式 Select...

Страница 13: ... 限流 只要馈源 能输出电流 功率设定值另外限定消耗功率 影响最大 电流 功率限制优先于电流限制 如果Keep set values参数被设为no 手动转换至CC调 整模式可将功率设定值恢复至其标称值 电流设定值为 0 如果是yes 保留调整最小的设定值 详情见 7 1 设 置菜单 CV 是指恒压 此时可调节电压 电流和功率设定值 在此模式下 接载太多馈源会引起输出电压爆跌 输入 电压会被调整并限定为调节值 如果馈源能输出大于负 载能吸收的电流 则不能达到电压极限 如果Keep set values参数被设为no 手动转换至CV模 式可将电压 电流和功率设定值恢复至标称值 如果是 yes 保留调整最小的设定值 详情见 7 1 设置菜单 注意 CV调整不能与电池测试模式一起使用 如果选了 电池测试 显示屏会出现错误信息 注意 指定给CV调整模式的电压设定值在除CV模式外的 任何其它模式都要设...

Страница 14: ...vel Control设置被替 代 用指令可进行更改 6 7 2 Level B 用Level Control 3 选择器选择了Level B后 负载转到 手动操作 这个模式与LevelA下的操作一样 只是Level B的设定值在转换后立即设定 Level B模式下负载可通过接口转换至电脑遥控 以便像 手动操作一样控制和监视 转换至遥控模式后 当前选择的Level Control设置被替 代 用指令可进行更改 6 7 3 Level A B 脉动操作 这个模式结合A和B的两组设定值 和各自可调脉宽 时 间 在一定时间段内 生成的信号在A和B两组数间自动 产生设定值跃变 设定值跃变的升 降时间可调 脉动操 作只适合应用属于被选调整模式的设定值 其它设定值 保持不变 详情请参考图11和12 A的脉冲时间对应A的设定值 脉冲时间总和形成一个时 间段t 它代表一定频率 f 1 t 脉冲时间在50µ...

Страница 15: ...池测试模式能让用户将电池连到负载对电池定义放电 测量平均电流 计算累计时间 然后将消耗容量以AH显 示出来 电压监控和可调欠压一起关闭Ulow极限 防止 电池过放 这个极限需调整至少一次 如果测试过程中 超过极限 负载输入自动关闭 计时器终止 电池不再 输出电流 如果极限大于电池电压 测试则不能开始 选择调整模式 可在任何时候更改调整模式 即使正在运行测试也可以 该操作可重设整个测试 包括计时器和Ah值 使用 测试之前和测试过程中都可进行调整模式设定值的调节 欠压会关闭Ulow极限 用Selection 5 选定设定值 用 Setting 6 调节 显示器以小时 分 秒 HH MM SS 的 格式显示累计时间 以Ah为单位显示消耗容量 计算Ah值 安培小时值 吸取的电荷 是最后两次测得的输入电流的平 均值乘以所用时间而计算出来的 开始 暂停 停止测试 按下Input on off 4 按钮...

Страница 16: ...空本区域 也自动确认显示屏上的报警信息 错误缓冲器存储三种可能输入的错误代码和状态代码 告 诉用户错误仍然运行还是已经消除 关于更多信息请参考 接口卡的使用说明 显示器也显示指示错误的状态 目的在于告诉用户在他不 在的这个时间段出现了一个或多个报警信息 特别是只持 续很短时间的报警信息 如尖峰电压产生的过压 用户要 么按下Input on off 4 按钮确认他已发现这个报警指示 要么通过通讯工具读取错误缓冲器 注意 在遥控或外控模式下出现的报警不显示于屏幕 因为已显示了控制模式的状态 因此只需在离开这些模 式时确认一下或者当错误被指令读取后不用做任何动作 6 10 终端控制区域和优先顺序 控制区域是指产品被控制的区域 这有可能在产品本身 手工控制 可能通过模拟接口 外部控制 或通过接口卡 遥控 为防止用户一次性从两个区域访问负载器而设 置了优先顺序 适用如下 模拟接口具有最高优先权 数字...

Страница 17: ...件下运行 在给出最小调整时间内进入动态 见 2 2 各产品型号详细规格 章节 动态值 如需要更好的调整动态 可将负载转至快速调整 这需在 终端System Bus 系统总线的第7引脚 FastReg 和第6引 脚 AGnd 上完成 如果这些引脚被短路 快速调整启动 默认状态时为慢速调整 只有在负载完全与主电源断开后 才可改变此设置 6 12 3 横向调整 两象限操作 使用两象限操作 即 负载与电源一起操作 必须使用 系统总线 从而负载可控制电源 在终端系统总线的引 脚2 I Cross 和3 I Cross Rtn 连上一电阻 0 25W 以 便向电源与负载间注入横向电流 本电流影响负载和电 源持久运行 并更快速地进行设定值的更改 下列运用 R 0 横向电流为负载标称电流的10 R 无穷值 横向电流 0 默认 通过电阻的改变可对横向电流在负载标称电流的0至10 之间持续调节 实际上 本操作...

Страница 18: ...线终端装用户指定电 阻 先确保本设置设为no RS232 Baud rate 可能性设置 9600 Bd 19200 Bd 38400 Bd 57600 Bd 默认设置 57600 Bd 属于 RS232接口卡IF R1 解释 使用串行RS232接口卡IF R1时决定串行数据传 输的波特率 传输速度 确保串联的另外一端以相同波 特率操作 7 产品配置 7 1 设置菜单 除非在遥控模式 通过接口卡 或外控模式 模拟接口 运行 中 用Level 3 选择器可随时启动设置菜单 负载在设置 过程中不可进行正常负载操作 显示屏根据安装的接口卡显示一定数量的参数 这些参 数可由Selection 5 选定并由Selection 6 改变 显示屏 右边的两个三角形指示出还有更多参数 显示屏第一行 进一步显示安装卡的型号 如 IF U1 图 14 第二行接着显示由Selection 5 选择的所有参数 这...

Страница 19: ...用模拟接口前或期间选择阻 值范围 13引脚 R Range 用于在两组范围间转换 Pin 13 Low 使用阻值范围2 Pin 13 High 使用阻值范围1 默认 Rem SB输入端 远程待机 引脚8 可替代Input on off 4 按钮 意思是 您可使用本引脚在任何时间关闭 或打开负载器 即使没有通过模拟接口将负载器设置为 外部控制 只要本引脚固定于0V 负载器输入永久为 关闭状态 也无法用Input on off 4 按钮或接口卡的 远程控制打开 VREF输出端用于生成VSEL CSEL PSEL和RSEL设定 值 举例 如果只需要CC调整模式 VSEL设定输入 必须固定为0V 通过0 10V外部源或可调电位器 GND 和VREF 滑动开关至CSEL 给PSEL VREF和CSEL 供电 见下表 Level A B模式下可调升 降时间和脉宽此时失效 如 果期望得到某种形式的振幅 ...

Страница 20: ...控 制 但可将它直接固定于VREF输出或通过可调电位器固 定 从而在0 至100 之间调节 Remote和R active输 入脚必须固定在辅机的GND脚上 从而启动外控模式 输入关闭 图18显示了模拟接口远程关闭输出的模拟接口连线图 此 功能可随时使用 不需用Remote引脚启动外控 可通过 各种不同接触件 如三极管 继电器 开关等实现与其它 应用设备的结合操作 再次断开触点 如果输出在关闭 远程控制 前是开的 此时可再次打开输出 或者允许从 前板手动打开输出 DGND REM SB REMOTE 图 18 外控模式的转换 外控模式的转换在产品即将由外部模拟信号控制时才需 求 如果使用模拟主辅机操作 则只要将辅机转换至外 控模式即可 转换通过极端器或开关来实现 注意 需先给出所有设定值 内阻设定值除外 如果内阻 控制激活的话 设定值也可100 地连到引脚 DGND REM SB DGND...

Страница 21: ... 精确度典型值为0 1 10 CMON AO 实际电流值 0 10V 对应0 100 的I Nom 对AGND断路时有保护功能 AO 当 I max 5mA时 精确度典型值为0 1 对AGND断路时有保护功能 DI 选择 R on R off 1 R 调整 关 LOW ULow 1V U范围 0 30V R 调整 开 HIGH UHigh 4V 或断开 I max 1mA 5V时 DI 选择阻值范围4 Rmax 阻值范围 2 LOW ULow 1V U Low to High typ 3V Rmax 阻值范围 1 HIGH UHigh 4V 或断开 发送器 集电极对DGND DI 触发输入3 触发器 A B LOW ULow 1V 触发器 B A HIGH UHigh 4V 或断开 DO 过温 过压 OT 或 OVP HIGH UHigh 4V 准开集上拉至 15V 无 OT 或 OVP ...

Страница 22: ...议 不同卡的设置 接口卡要求不同的至少设置一次的设置参数 详情见章 节 7 产品配置 关于接口卡的更多信息和技术规格可参考其用户指导说 明 特点 通过其中一接口卡和所供LabView VIs软件控制电子负载 器要遵循产品操作条件和各标称值 应检查设定值的合理 性 如有必要应更正或者强行改为标称值 LabView 我们提供现成的LabView VIs接口卡软件 它不支持电子 负载的所有功能 但在不断开发和增强其功能 在其它环境下的编程 数字通讯接口在除LabView外的其它IDEs也能普遍应用 这个通讯协议不遵从任何标准 只代表通讯的最低级别 在此等别下错误设置和错误设定值的安全级别较低 有可 能导致产品的误动作 请严格按照准则强制性地执行 关于通讯协议的详细信息可参考接口卡用户指导说明 应用举例 下列这些图片显示通过电脑控制一台或多台负载器的多种 应用的几种 这同样应用于与电源混合配置 图...

Страница 23: ... CN EL 9000 HP 系列 产品说明书 日期 05 31 2011 10 附件 10 1 其它附件和选项功能 注意 关于选项功能和附件详情请见各个产品操作说明 书 可供下列附件 a USB 至 模拟接口UTA12 经USB 电脑面 和产品内置模拟接口远程控制 b 数字接口卡 还配USB RS232 CAN GPIB IEEE 仅SCPI 或以太 网 LAN SCPI 用可插拔式数字接口卡 操作产品 ...

Страница 24: ......

Страница 25: ... voltages higher than 100VDC 80V model or 180VDC 160V model or 460VDC 400V model In order to equip interface cards into the slot at the rear the common ESD provisions have to be followed The interface card may only be plugged and unplugged while the unit is completely switched off mains switch OFF Always observe limit and nominal values of the device when connecting a voltage source or battery as ...

Страница 26: ...3 6 2 Operating elements 34 6 3 Switching power on 35 6 4 Switching the DC input on off 35 6 5 Adjusting the set values 35 6 6 Preselecting the regulation mode 35 6 7 Usage of Level A and Level B 36 6 7 1 Level A 36 6 7 2 Level B 37 6 7 3 Level A B pulsed operation 37 6 7 4 Rise fall time 38 6 8 The battery test mode 38 6 9 Alarm management 39 6 10 Control locations and priorities 39 6 11 Series a...

Страница 27: ...can plug and use up to four or more devices to a standard PC without the need of additional hardware At CAN you can implement the devices into existing CAN bus systems without the need to reconfigure the whole bus system Address range and transmissions speed can be selected for the particular EL9000 HP unit so it fits best The main functions at a glance Set U I P and R each 0 100 Battery test with...

Страница 28: ...perature Terminals Load input System Bus Analogue interface Dimensions W x H x D Weight Supported interface cards Article number 33 200 246 33 200 247 33 200 248 33 200 251 for technical specification see section Analogue interface Rise and fall time are defined at 10 90 and 90 10 of the nominal value All single values which specify a tolerance are typical values 2 x 40 characters illuminated curr...

Страница 29: ...29 EN Instruction Manual EL 9000 HP Series Date 05 31 2011 About the device 3 Design 3 1 Front view Figure 1 ...

Страница 30: ...30 EN Instruction Manual EL 9000 HP Series Date 05 31 2011 About the device 3 2 Rear view Figure 2 ...

Страница 31: ...are permanently running At higher temperatures the RPM will increase and result in a certain noise de velopment In case of overheating the device is automatically swit ched offline standby After cooling down to the allowed temperature range it is automatically switching online again The error remains indicated in the display until it is ack nowledged by using the Input on off button or read out by...

Страница 32: ...eries The cross section of the load cables depend on the cur rent input We recommend to use at 150A 2 x 16mm or at least 1 x 50mm at 300A 2 x 50mm or at least 1 x 150mm at 600A 2 x 150mm per cable flexible wire The inputs und are not grounded so that one of them may be grounded if necessary Attention When grounding one of the input poles always check if one of the output poles of the source eg pow...

Страница 33: ...d This is possible in the modes Level A B and A B Figure 6 The text External mode indicates that the control of the load was switched to the analogue interface The set values can not be adjusted at the device anymore in this mode For detailed information see section 8 The analogue interface Figure 3 Figure 7 1 Handling the device The texts Overvoltage or Overtemperature indicate the status of an e...

Страница 34: ...anation of the selector positions A Switches to the set values of Level A These values become instantly active and can be changed now B Switches to the set values of Level B These values become instantly active and can be changed now A B Switches the load offline and activates the pulsed mode frequency controlled automatic changeover between level A and B Battery Switches the load offline and acti...

Страница 35: ... mode are not shown and can not be selected changed Set values can be selected and adjusted as long as the display does not show the status texts External mode or Remote mode a Selecting the set value to adjust In the operation modes A B A B and Battery the set value to change is selected by rotating Selection 5 In the setup menu position Setup it is used to select a different setup parameter Also...

Страница 36: ... remote control from a PC and via the interface in order to control and monitor it like during manual operation When changing to remote control the currently selected Level Control setting is taken over and can then be changed by a command Handling the device The manual changeover to regulation mode CV can reset the set values of voltage power and current to their no minal values if the parameter ...

Страница 37: ...put is set to on 6 7 2 Level B When selecting Level B with the selector Level Con trol 3 the load is switched to manual operation This mode works the same way as Level A with the difference that the set values of Level B are used now and instantly set after switching In Level B mode the load can be switched to remote control from a PC and via the interface in order to control and monitor it like d...

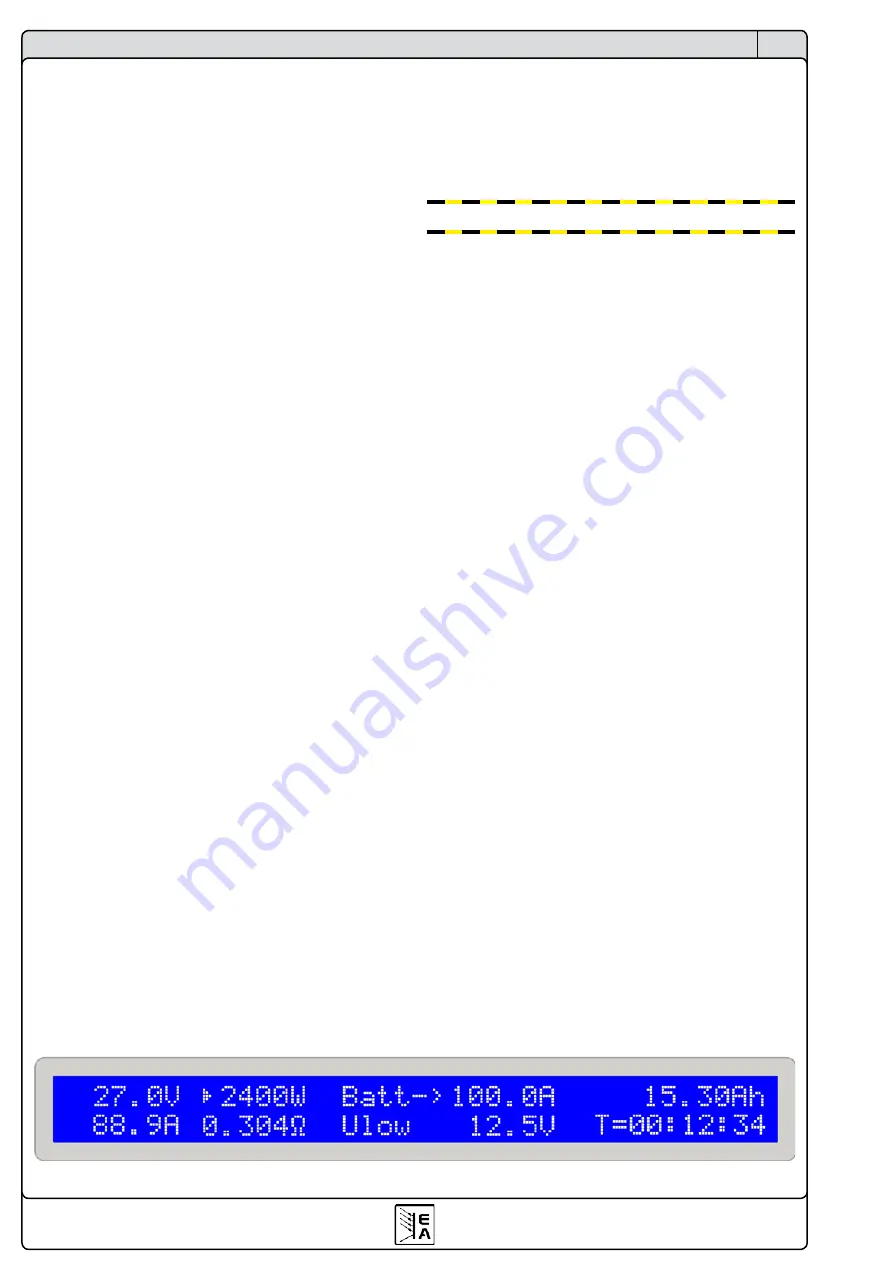
Страница 38: ...example a pulse width of 100ms for A and B and a rise fall time of 100ms creates a triangle shaped signal with a period time of 200ms This might be wanted in certain applications and is thus not limited or influenced by the device 6 8 The battery test mode Introduction The battery test mode enables the user to connect a battery to the load and discharge it definedly The average current is measured...

Страница 39: ...d regulation mode are set to default values in order to let the test mode work correctly Hence the setting Keep set values is ineffective here The example in figure 13 shows that the current of 100A can not be reached because the power limitation has become active example of a 2400W model A note about the time display The time display is not 100 exact The deviation of the displayed time to the act...

Страница 40: ... is required it can be ac tivated by switching the load to fast regulation This is done at the terminal System Bus Pin 7 FastReg and 6 AGnd If these pins are shorted the fast regulation becomes active By default the slow regulation is active Changing this configuration must only happen while the load is completely switched off from the mains 6 12 3 Crossflow adjustment two quadrant operation Using...

Страница 41: ... when using the serial RS232 interface card IF R1 Make sure that the other end of the serial connection operates at the same baudrate 7 Device configuration 7 1 The setup menu The setup menu can activated anytime by the selector Level 3 except during remote control mode by interface card or external mode analogue interface While the load is in setup no normal load operation is possible The display...

Страница 42: ...you can select the resistance range before or while using the analogue interface Pin 13 R Range is used to switch between the two ranges Pin 13 Low Resistance range 2 is used Pin 13 High Resistance range 1 is used default the input Rem SB Remote Standby Pin 8 overlays the pushbutton Input on off 4 That means that you can switch the load input off or on with this pin at any time even if the load wa...

Страница 43: ...ntrol by pin Remote It can be combined with other applications and can be realised by various contacts like transistors relays switches etc Opening the contact again will either switch the output on if it was on before switching off remote control or enable switching it on again manually on the front panel DGND REM SB REMOTE Figure 18 Switching to external control Switching to external control is ...

Страница 44: ... 0 100 of I Nom Short circuit proof against AGND AO Accuracy typically 0 1 at I Max 5mA Short circuit proof against AGND DI Selection R on R off 1 R regulation off LOW U Low 1V U range 0 30V R regulation on HIGH U High 4V or open I Max 1mA at 5V DI Select resistance range 4 RMax resistance range 2 LOW U Low 1V U Low to High typ 3V RMax resistance range 1 HIGH U High 4V or open Sender open collecto...

Страница 45: ...s and the supplied LabView VIs follow the operating conditions and nominal values of the device Set values are checked for plausibility and are corrected if necessary or forced to nominal values LabView We provide ready to use LabView VIs for the interface cards These do not support all of the features of the electronic load but are constantly under development and enhancement Programming in other...

Страница 46: ...ible in seperate instruction manuals Following accessories are optionally available a USB to Analogue interface UTA12 Galvanically isolated remote control via USB on PC side and the device internal analogue interface b Digital interface cards Pluggable and retrofittable digital interface cards for USB RS232 CAN GPIB IEEE SCPI only or Ethernet LAN SCPI language are available ...

Отзывы: