15
Getting started
EATON TFX INSTALLATION AND OPERATION MANUAL
6046279-001
September 2019
www.eaton.com
4.3 Activation of the device
The device features an integrated eSIM card. On delivery,
the eSIM card already has an eSIM profile with all the
necessary communication settings. Before you can use
the device, you must activate the device. You can do so at
www.eaton.com/tfxactivation.
After activation, the TFX device is assigned to your Data
platform account and the activation of the eSIM card is
triggered.
INFORMATION
If you do not have or do not have access to administrator
login credentials, contact the salesperson responsible for
you or our service support. See chapter Service
and support.
INFORMATION
Activation of the eSIM card can take up to one working day.
When activation has been completed, you receive a
confirmation by email.
4.4 Configuring the device
The device is delivered with a basic Eaton-default
configuration. Customize the configuration according to your
needs by defining the CAN messages to be logged.
You can use the CAN interface or the Data platform to
transfer a new device configuration to the device. In
the following, configuration using the CAN interface is
described. For more detailed information on configuration
via the Data platform, see chapter Configuration update.
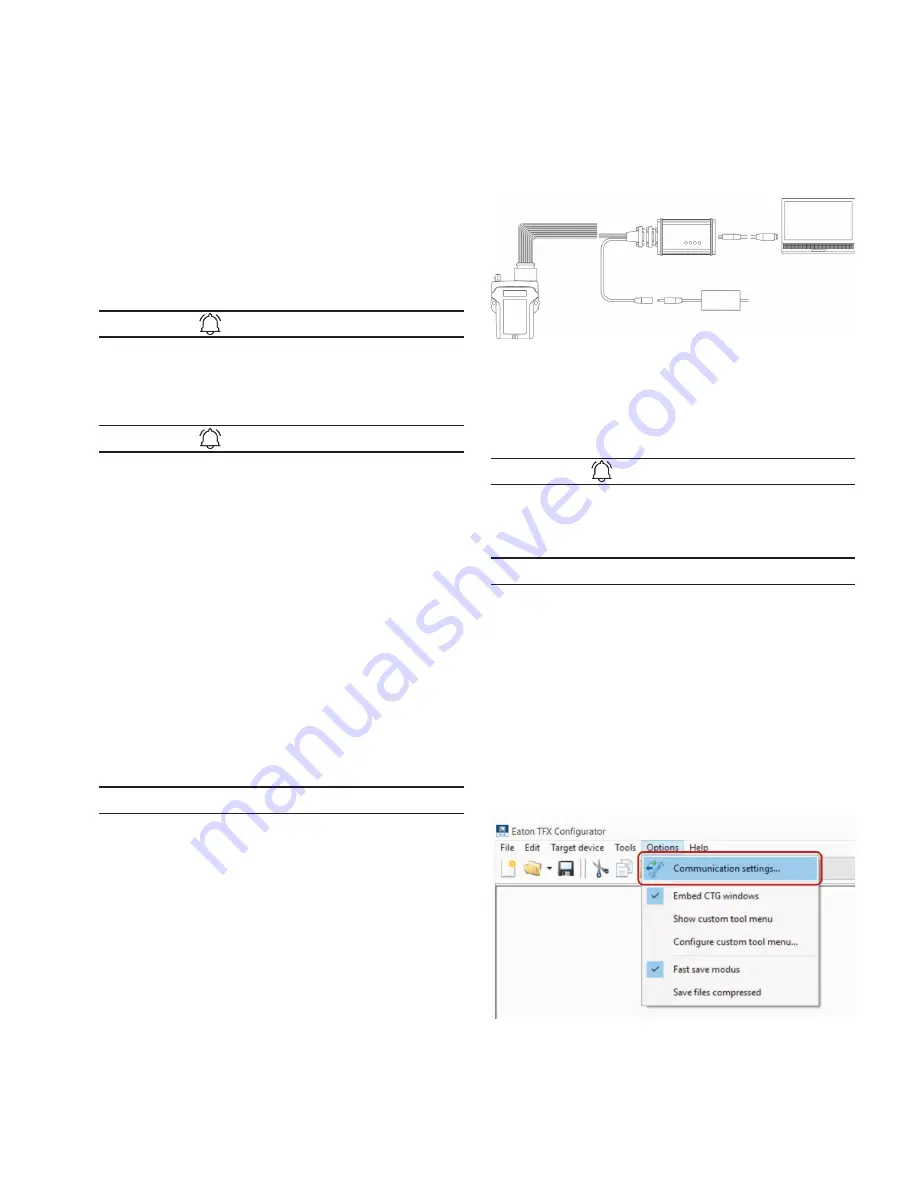
4.4.1 Connecting the device to the PC
To configure the device with a PC, you must connect it with
the PC. For this please use the TFX service tool from the
Starter Kit as CAN - PC gateway.
NOTICE
Risk of property damage
Pay attention that the USB plug is correctly aligned to the
USB port on the computer before being plugged in and that
it is plugged in without using excessive force. Incorrect
alignment during connection or the use of excessive force
could cause damage to the USB port.
1. Connect the TFX Support Tool to a PC using the cable
USB connection cable, USB-A to USB-B, 2 m.
2. Place a CAN bus termination on the D-Sub connector
of the TFX Support Tool.
3. Use the cable Start cable for main plug connector
with the CAN1 plug to connect the TFX to the
CAN-bus termination of the TFX Support Tool.
4. Use the cable Start cable for main plug connector
and the power supply unit from the starter kit to
connect the TFX to the power grid.
3
3
The ON LED lights up in constant green.
Fig 6. Connection of the TFX to a PC using the TFX SERVICE TOOL
4.4.2 Definition of communication settings
Before you can start using the device, you must define the
communication settings.
INFORMATION
Install the USB driver pack (contained within the installer
package) before you connect the device to a PC using a
USB port. See chapter Installing software.
NOTICE
Risk of property damage
Pay attention that the USB plug is correctly aligned to the
USB port on the computer before being plugged in and that
it is plugged in without using excessive force. Incorrect
alignment during connection or the use of excessive force
could cause damage to the USB port.
1. Connect the device to a PC. See chapter Connecting
the device to the PC
2. Start the EATON Configurator software.
3. Click on O
ptions
>
C
ommuniCation
s
ettings
in the menu.
3
3
The window
C
ommuniCation
s
ettings
opens.
4. In the
C
ommuniCation
g
ateway
area, go to the
g
ateway
D
eviCe
list and select the device TFX
s
erviCe
t
ool
.
Содержание TFX CAN link mobile 3311 Variant
Страница 1: ...TFX Installation and Operation Manual ...


