EATON
Powerware
®
ConnectUPS
t
Web/SNMP Adapter (E Model) Quick Start Instructions 164950186 Rev A
6
NOTE
The supplied external power supply MUST be used with
the Powerware 9150 UPS. DO NOT plug the DC power cable
into the serial cable.
5.
Insert the external power supply cord into the power inlet on
the ConnectUPS-E (labeled “12 VDC”).
6.
Plug one end of the detachable power cord into the external
power supply.
7.
Plug the other end of the power cord into a UPS-protected
receptacle.
8.
Replace the UPS front cover.
9.
Connect an active Ethernet cable (supplied) to the network
connector on the ConnectUPS-E.
10.
To configure the adapter locally using the supplied serial cable,
continue to the following section, “Connect the Adapter.”
To configure the adapter remotely through a network using a
Web browser or Telnet (or similar) utility, refer to the
ConnectUPS Web/SNMP Card User’s Guide
PDF on the
Software Suite CD.
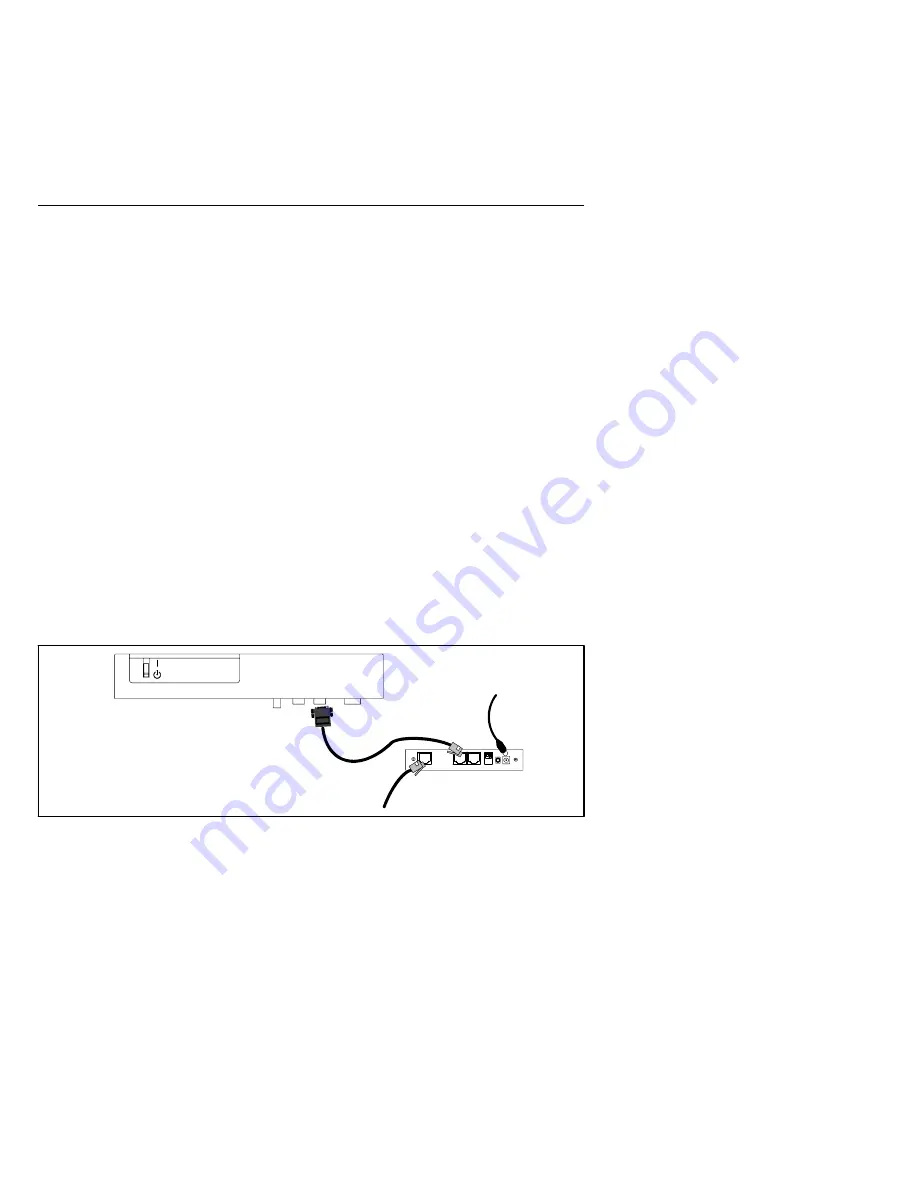
Female Male
To LAN port
External power supply to
ConnectUPS-E power inlet
and UPS-protected receptacle
Cable labeled “PC” to
UPS communication port
and ConnectUPS-E UPS port
Powerware 9150 UPS
Figure 8.
Alternate Installation with a Powerware 9150 UPS