manualshive.com logo in svg
background image

Figure 11.

Enter Configuration Password

EATON

Powerware

®

ConnectUPS

t

Web/SNMP Adapter (E Model) Quick Start Instructions 164950186 Rev A

8

7.

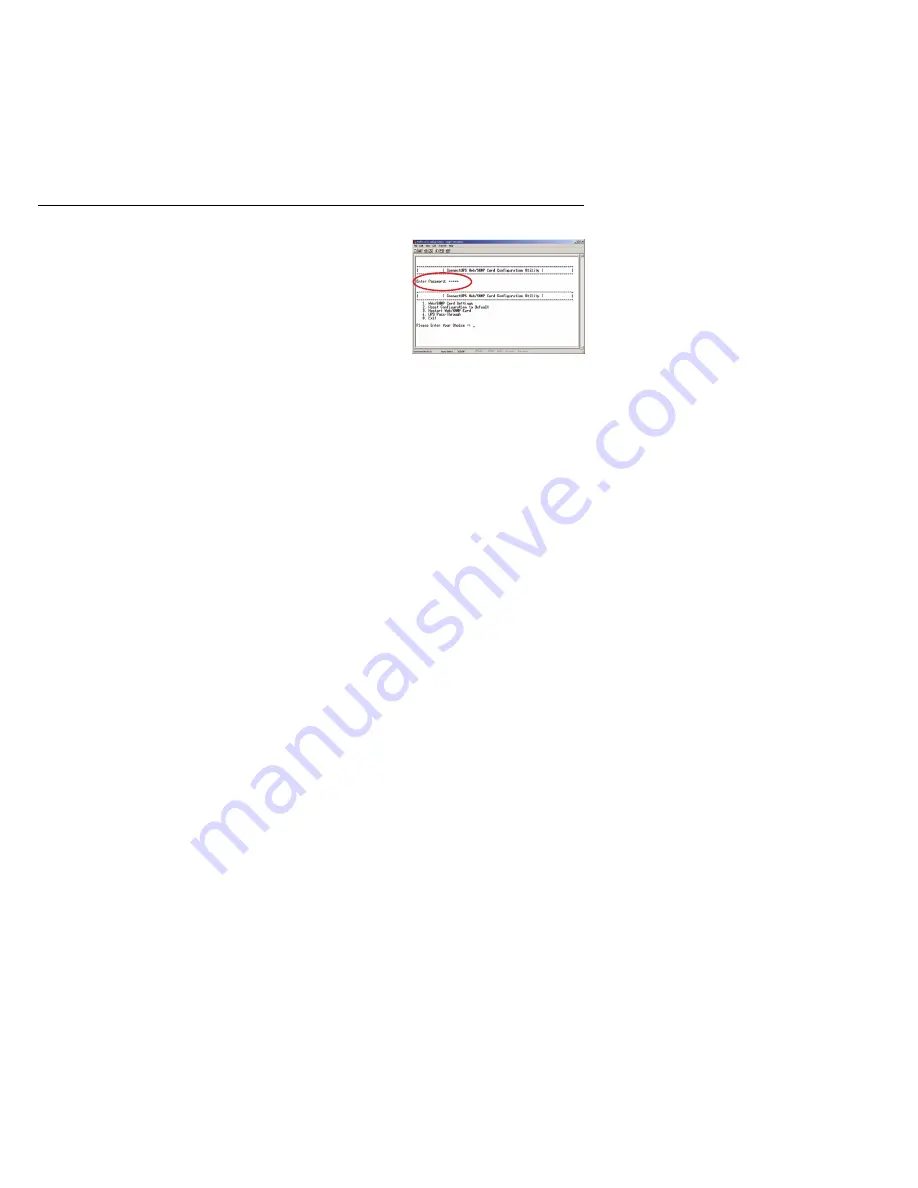
After a few seconds, press Enter. The Password prompt
appears (see Figure 11).

If the Password prompt does not appear, press Enter again.
If it still does not appear, check the following conditions:

S

Verify the serial line is set to 9600 baud, No parity, 8 data
bits, 1 stop bit, and no flow control.

S

If the serial line settings are correct, check the cabling to
verify all connections are secure.

S

Verify that your terminal program is on the correct
communication port for the serial connection.

S

Verify that the adapter has power (one or more LEDs on
the adapter are illuminated). The UPS should be turned
on.

8.

Type your

password

(the default is

admin

) and press Enter.

The Main Menu screen appears.

Содержание Powerware 9305 UPS

Страница 1: ...onnectUPSt Web SNMP Adapter S Male DB 9 to RJ 45 Serial Cable with Detachable DC Power Cable S Female DB 9 to RJ 45 Serial Cable labeled PC S External Power Supply with Detachable Power Cord S Softwar...

Страница 2: ...nistrator must set up the DHCP server to provide a static address each time the adapter makes a DHCP request Provide the network administrator with the adapter s MAC address on the bottom of the adapt...

Страница 3: ...ronment set DIP switch 2 to the 1 on position 2 Open or remove the UPS front cover and locate the female 9 pin RS 232 port labeled X100 See Figure 2 3 If the X100 port is available use the supplied un...

Страница 4: ...ected receptacle 5 Replace the UPS front cover 6 Connect an active Ethernet cable supplied to the network connector on the ConnectUPS E 7 To configure the adapter locally using the supplied serial cab...

Страница 5: ...DIP switch 2 to the 1 on position 2 Remove the UPS front cover and locate the female 9 pin RS 232 port see Figure 6 3 If the female port is available use the supplied unlabeled serial cable to connect...

Страница 6: ...8 Replace the UPS front cover 9 Connect an active Ethernet cable supplied to the network connector on the ConnectUPS E 10 To configure the adapter locally using the supplied serial cable continue to...

Страница 7: ...UPS port To connect the adapter to the computer and start the configuration 1 Plug the RJ 45 end of the supplied serial cable labeled PC into the PC port on the adapter Verify that you have used the p...

Страница 8: ...owing conditions S Verify the serial line is set to 9600 baud No parity 8 data bits 1 stop bit and no flow control S If the serial line settings are correct check the cabling to verify all connections...

Страница 9: ...o set the Gateway Address and Network Mask 6 Change any other options as needed for your particular configuration by typing the corresponding number shown in the menu Each Configuration Menu setting i...

Страница 10: ...guides for instructions Use the following procedure to install NetWatch software after you have installed and configured the adapter 1 Insert the Software Suite CD into the computer s CD ROM drive Th...

Страница 11: ...ect Next 12 Verify the configuration settings are correct and select Finish see Figure 22 13 A pop up message indicates that communication with the adapter is established see Figure 23 Select Clear to...

Страница 12: ...BERS UNITED STATES 1 800 356 5737 or 919 870 3149 CANADA 1 800 461 9166 ext 260 www powerware com ALL OTHER COUNTRIES Call your local sales representative 2006 Eaton Corporation All Rights Reserved 16...

Отзывы: