4
Instruction Booklet
IB 52-01-TE
Effective October 2010
Instructions for the Eaton Type CM52
Network Protectors 800 to 4500 Amperes
EATON COrPOrATION www.eaton.com
4 IB -52-01-TE
Effective 11/05/08 (super cedes 11/19/03) IB 52-01-TE
4
the block , while all customer connections can be
made on the front portion of the blocks. There is
a wire designation strip that id entifi es the wi re
number to its port. This terminal block only
requires that the wire be stripped approximately
¼”, inserted into the wire clamp area and the top
recessed screw tightened to ensure a secure joint.
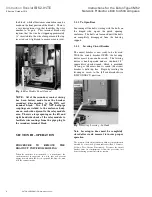
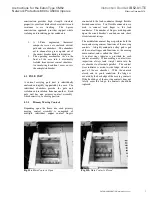
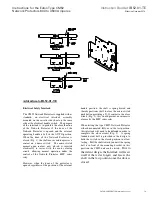
Fig. 6
Relay Module Panel Opened
NOTE: All of the secondary conta ct wi ring
has been factory made from the breaker
secondary disconnecting to the DIN rail
terminal block. Two 1.00” NPT half-pipe
couplings are welded to the enclosure body,
one on each side, adjacent to the relay module
area. There is a large opening on the left and
right hand side sheets of the relay module to
facilitate wire routings from the pipe plug to
the secondary terminal block
.
S ECTION III – OPERATION
PROCEDURE
TO
REMOVE
THE
DRAWOUT UNIT FROM HOUSING
When the enclosure is not attached to a transformer, the
enclosure m ust be supported in a way that will prevent
tipping forward when the door is open and the draw out unit
is on the extension rails.
3.1.1 To Open Door
Loosening all the bolts, starting with the bolts on
the hinged side, opens the quick opening
enclosure. The bolts are loosen ed until the bolts
are completely disengag ed from the housing
support.
3.1.2
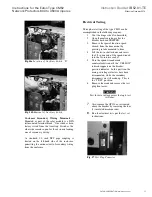
Levering Circuit Breaker
The circuit break er is now ready to be lev ered.
With the circuit break er OPEN, the lev ering
device access door can be raised. The levering
device is hand operated under a stand ard 3/8”
square drive speed wren ch, which is provided.
As long as the access door is raised, the circuit
break er is held trip free. Begin by rotating the
levering-in s crew to the full count erclo ckwise
(DISCONNECT) position.
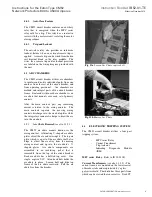
Fig. 7
Inserting Levering –In Crank
Note: Levering-in door must be co mpletely
closed after cran k removal to insure proper
operation.
The position of the circuit breaker within its com partm ent is
dictated by color-coded position indicators (Red = Connect,
Yellow = Test, Green = Disconnect). To rem ove the circuit
breaker from its com partm ent, follow the procedure j ust
described using a counterclockwise m otion.

