


16
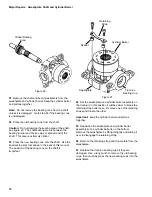
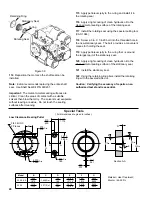
Bolt (12)
Mounting Flange
Bearing Cup
Dowel
Pin
Gasket
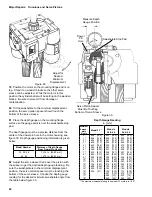
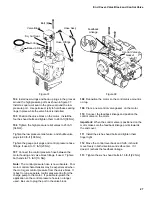
Figure 17
40 Reposition the motor so the control valve mount is
on top. Be careful; do not let the cylinder barrel slide
out of the motor.
41 Remove the twelve hex head bolts that hold the
mounting flange to the motor.
42 Remove the mounting flange, tapping it with a
plastic hammer will help to break it loose.
43 Remove the mounting flange gasket.
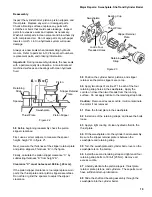
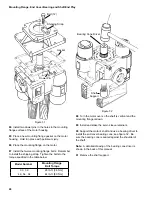
Note: Do not remove the bearing cup from the mounting
flange unless it is damaged. Go to step 46 if the bearing
cup is undamaged.
44 Use an internal bearing puller or a long punch to
remove the old bearing cup. Be careful; do not damage
the mounting flange.
45 Press the new bearing cup into the mounting flange.
Be sure that it is pressed all the way to the bottom of the
recess.
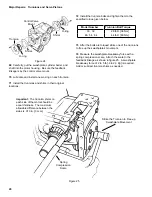
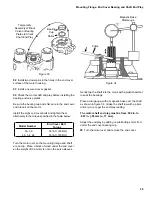
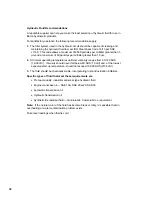
Case Drain
Hole
Servo Pistons
Pin
Retaining Rings
Figure 18
46 Remove the inside retaining ring from each of the
pins that connect the servo piston links to the
swashplate. Slide the pins out through the case drain
holes and remove the servo pistons, see figure 18.
Note: Disassembly of the servo pistons is not required
unless they are damaged or the motor’s minimum
displacement is being changed.
Major Repairs: Mounting Flange, Servo Pistons and Trunnions
Содержание 1 Series
Страница 31: ...31 Notes...


