55
11 - GENERAL MAINTENANCE AND CLEANING
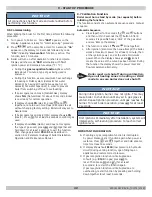
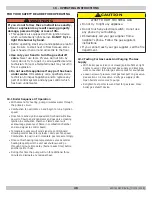
11.11 Safety Flue Thermostat -
DO NOT
disable this safety
device.
Safety Flue Thermostat found on the flue inside the boiler,
interrupts flow of gas to the burner if the temperature
overheats.
After verifying the cause of the trip, press
for about 2
seconds.
11.12 Flue Pressure Switch-
DO NOT
disable this safety
device.
This device, positioned inside the sealed chamber, interrupts flow of
gas to the burner if flue pressure exceeds 1.6 in w.c. (4 mbar).
Verify if vent is blocked before resetting the boiler.
NOTICE
When servicing the appliance, check the condition and
position of flame sensing electrode and replace it if
necessary.
11.13 Replacement Parts
Perform Automatic Calibration procedure described as follows
if one or more of the following components are replaced.
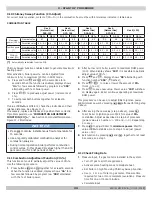
Check and adjust CO2% value as indicated in the Combustion
Table.
Components replaced:
• Primary heat exchanger
• Fan
• Gas valve
• Gas nozzle
• Burner
• Flame sensing electrode
11.10 User Information
Advise and demonstrated to User the following important
information:
A. How to light and turn off boiler. How to operate
system controls.
B. Importance of annual servicing of boiler to ensure safe
and efficient operation.
C. Servicing or replacement of parts shall be carried out
by a qualified personnel.
D.
Ensure boiler controls and room thermostat, if fitted,
are set to User's requirements.
E. Tell User about sealed system pressure.
F. Tell User if display is active and boiler has not
operated for 24 hours for heating or hot water, the
pump will automatically operate for 5 minutes.
G.
Explain to User an internal frost thermostat is fitted in
boiler, and electrical supply to boiler must be left on
for thermostat to operate.
H. Show User position of pressure relief valve discharge
pipe.
I. Leave this Installation, Operation and Maintenance
Manual with User for use on future calls.
11.14 Automatic Calibration Function
Before performing this function verify there are no heat
demands in progress.
During this function ensure there is maximum heat exchange
to the system in Heating or DHW mode (DHW request) to
avoid boiler shutting off due to overheating.
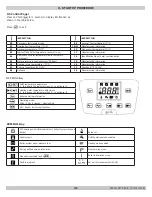
Press
and
together and hold for about 6 seconds.
When display indicates "
On
" press
within 3 seconds after
pressing previous buttons.
NOTICE
Important:
If Calibration function does not complete
the function, press
button to exit and decrease
Maximum fan speed (parameter P71) before performing
function again.
NOTICE
Important:
If display indicates "
303
" Automatic
Calibration function has not been activated. Disconnect
boiler from main power supply for few seconds and
repeat procedure.
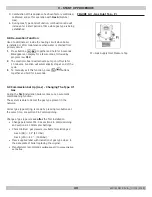
1.
When function is enabled, and
will flash on the
display.
2.
After ignition sequence, which can also take place
after few attempts, boiler performs three operations.
Each operation lasts about 1 minute:
• maximum power
• ignition power
• minimum power
3.
Before moving to the following phase, from maximum
power to ignition power and then to minimum power.
and appear on the display.
4.
During this phase, power level reached by boiler and
delivery temperature alternate on the display.
5.
When , and
flash together on the display,
calibration function has terminated.
6.
Press
to exit the function. Display will show
ESC
.
240011947 REV B, [03/31/2018]
Содержание DCB-125
Страница 2: ...DCC 205 ...
Страница 4: ...DCB 165 ...
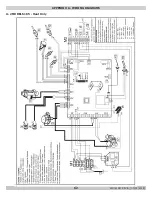
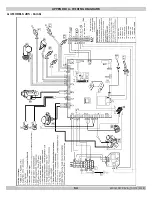
Страница 65: ...61 APPENDIX A WIRING DIAGRAMS A 1 MODELS 125 Heat Only 240011947 REV B 03 31 2018 ...
Страница 66: ...62 APPENDIX A WIRING DIAGRAMS A 2 MODELS 165 Heat Only 240011947 REV B 03 31 2018 ...
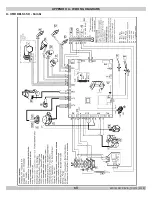
Страница 67: ...63 APPENDIX A WIRING DIAGRAMS A 3 MODELS 150 Combi 240011947 REV B 03 31 2018 ...
Страница 68: ...64 APPENDIX A WIRING DIAGRAMS A 4 MODELS 205 Combi 240011947 REV B 03 31 2018 ...
Страница 69: ...65 NOTES 240011947 REV B 03 31 2018 ...
Страница 70: ...66 NOTES 240011947 REV B 03 31 2018 ...
Страница 81: ...9 125 WITH ZONE CIRCULATOR PUMPS 125 with Zone Circulator Pumps PN 240011430 REV G 03 31 18 ...
Страница 84: ...12 125 WITH ZONE VALVES PIPING DIAGRAM 125 with Zone Valves PN 240011430 REV G 03 31 18 ...
Страница 87: ...15 165 WITH ZONE CIRCULATOR PUMPS PIPING DIAGRAM 165 with Zone Circulator Pumps PN 240011430 REV G 03 31 18 ...
Страница 90: ...18 165 with Zone Valves 165 WITH ZONE VALVES PIPING DIAGRAM PN 240011430 REV G 03 31 18 ...
Страница 94: ...22 150 205 WITH ZONE PUMPS WIRING DIAGRAM 150 205 With Zone Pumps PN 240011430 REV G 03 31 18 ...
Страница 95: ...23 150 205 with Zone Valves 150 205 WITH ZONE VALVES PIPING DIAGRAM PN 240011430 REV G 03 31 18 ...
Страница 96: ...24 150 205 WITH ZONE VALVES WIRING DIAGRAM 150 205 With Zone Valves PN 240011430 REV G 03 31 18 ...
Страница 102: ...30 MODEL 125 Heat Only 125 HEAT ONLY WIRING DIAGRAM PN 240011430 REV G 03 31 18 ...
Страница 103: ...31 MODEL 165 Heat Only 165 HEAT ONLY WIRING DIAGRAM PN 240011430 REV G 03 31 18 ...
Страница 104: ...32 MODEL 150 Combi 150 COMBI WIRING DIAGRAM PN 240011430 REV G 03 31 18 ...
Страница 105: ...33 MODEL 205 Combi 205 COMBI WIRING DIAGRAM PN 240011430 REV G 03 31 18 ...
Страница 110: ...38 Low Water Cutoff Detail LOW WATER CUTOFF NO NO YES PN 240011430 REV G 03 31 18 ...
Страница 111: ...39 NOTES PN 240011430 REV G 03 31 18 ...
Страница 112: ......
Страница 115: ......
Страница 116: ......

