Version 4/5/6/7
DTDAUTO VIETNAM Co., Ltd – EDITED 29/10/2020
www.dtdauto.com
71
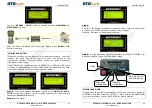
Step 8:
The screen displays function table. Press
“^/v”
button to select
“
CORRECT ODO VALUE
” menu then press
“Select/ OK”
button
Step 9:
The screen displays meter value that you need change. Press
“^/v”
button to change ODO value and then press
“Select/ OK”
button.
Version 4/5/6/7
DTDAUTO VIETNAM Co., Ltd – EDITED 29/10/2020
www.dtdauto.com
72
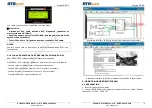
If the screen displays as below:
You need check the solder connection between auxiliary circuit board
(ODO
BOARD)
and IC, IC plugs and solder pin position of IC.
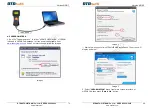
Step 10:
If odometer adjustment is successful, the screen will display as
below:
You remove solder wirings, reinstall dashboard on motorcycle and check
new ODO value.
NOTE:
- If you do not have motorcycle to check adjusted ODO value then you
look up power pin diagram of odometer in MOTODATA software and
supply power to odometer to check ODO value.
- If adjustment value is not incorrect such as expected then check
motorcycle model and to do back from
Step 5
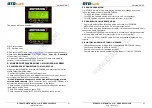
3.15.2.2 Write ODO original data
- When you check odometer, if you see clockwise do not change or meter
do not display numeric value then original data of meter can be fail, you
need use “
Write original data
” function to repair data in odometer
- Repeat from step 1 to step 8 of “
3.16.2.1 Adjust Odometer”
item then
select “
Write origin data
” function and press
“
Select/ OK
” button.


