background image

Intr

oduction

12

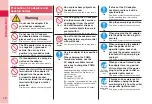
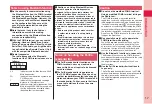
Precautions for adapters and 
desktop holder

  Warning

Do not use the adapter if its 
cord has been damaged.

Fire, burns or electric shock may result. 

Do not use the AC adapter 
and desktop holder in steamy 
places such as a bathroom.

Fire, burns or electric shock may result.

The DC adapter is for use only 
in a negative (-) grounded 
vehicle. Do not use it in a 
positive (+) grounded vehicle.

Fire, burns or electric shock may result.

If a thunderstorm is nearby, do 
not touch the adapter.

Otherwise, you may receive an electric 
shock.

Never short-circuit the charging 
terminal when the adapter is 
plugged into the power outlet 
or cigarette lighter socket. 
Also, never touch the charging 
terminal with fingers or other 
bare skin.

Fire, burns or electric shock may result.

Do not place heavy objects on 
the adapter cord.

Fire, burns or electric shock may result. 

When plugging the AC adapter 
into the power outlet, or when 
unplugging it from the outlet, 
do not allow metal straps or 
other metal objects to come in 
contact with it.

Fire, burns or electric shock may result.

Do not touch the adapter cord, 
desktop holder, or power outlet 
with wet hands.

Fire, burns or electric shock may result. 
 

Use the adapter at the specified 
V AC. 
When charging the FOMA 
terminal overseas, use the 
AC adapter available for use 
overseas to charge the FOMA 
terminal.

Supplying the wrong voltage to the AC 
adapter may result in a fire, burns or 
electric shocks. 
AC adapter: 100 V AC 
DC adapter: 12/24 V DC 
[For negative (-) grounded vehicles only] 
AC adapter available for use overseas: 
100 V to 240 V AC 
[Connect only to household AC outlet]

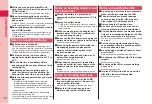
If a fuse of the DC adapter 
has blown, replace it with a 
specified fuse.

Fire, burns or electric shock may result. 
For the specified fuse, refer to each 
instruction manual.

Keep the power plugs dust-free.

Fire, burns or electric shock may result. 
 

When plugging the AC adapter 
into the power outlet, plug it in 
securely.

Fire, burns or electric shock may result.

When unplugging the adapter 

from the power outlet or 

cigarette lighter socket, do 

not yank the adapter cord, but 

take hold of the power plug to 

unplug it.

Fire, burns or electric shock may result.

When you do not intend to use 
the adapter for a long period 
of time, disconnect the power 
plug from the power outlet or 
cigarette lighter socket.

Fire, burns or electric shock may result.

If liquids such as water get in 

the adapter, unplug the power 

cord immediately from the outlet 

or cigarette lighter socket.

Fire, burns or electric shock may result. 

Don’t

Don’t

Don’t

Don’t

Don’t

Don’t

Don’t

Not wet

hands

Do

Do

Do

Do

Do

Pull the

power plug

out

Pull the

power plug

out

Содержание P-06b

Страница 1: ...P 06B INSTRUCTION MANUAL 10 7...

Страница 2: ...e following and download detailed information about all the functions and their operating procedures In Japanese only http www nttdocomo co jp support trouble manual download index html Note that the...

Страница 3: ...ing Sites Add Bookmark Screen Memo etc i Channel 66 Map GPS 66 Using Auto GPS Search P 63 Camera 69 Shoot Still Images Moving Pictures etc 1Seg 72 Watch 1Seg etc Music 76 Music Video Channel MUSIC Pla...

Страница 4: ...actual original one The user hereby agrees that the user shall be solely responsible for the result of the use of SSL TLS Neither DOCOMO nor the certifiers as listed herein make any representation an...

Страница 5: ...er is available in Japanese only Camera P 69 Using the high image quality camera with its 13 200 000 pixels you can shoot the scenes you want to straight away since it takes so little time for auto fo...

Страница 6: ...harging oCommand navigation key For operating functions and menus cCamera key 1Seg key ii mode key i ppli key hPower End key For turning on off the power or ending a call Numeric keys For entering pho...

Страница 7: ...r better communication Photo light Infrared data port For using infrared communication and the infrared remote control Speaker Charging terminal 1Seg antenna For receiving 1Seg broadcasting Engage you...

Страница 8: ...degrees and close it by pulling it toward you To return to the Normal Style open the display panel and then rotate it counterclockwise by 180 degrees Styles Do not knock the display panel against the...

Страница 9: ...Caution This symbol indicates that incorrect handling poses a risk of causing injury or damage to the product or property The following symbols show specific directions Don t Denotes things not to do...

Страница 10: ...esult Do not allow electrically conductive foreign objects such as metal pieces or pencil leads to come into contact with the FOMA terminal s charging terminal or connector terminal Do not allow such...

Страница 11: ...rared device The infrared device may malfunction possible causing an accident Do not shine the photo light close to eyes Doing so can damage eyesight Also accidents such as injury might occur if someo...

Страница 12: ...rs possibly causing injury or other accidents Do not use the FOMA terminal if it has been damaged Fire burns injury or electric shock may result The surface of the display is coated by a film that pre...

Страница 13: ...t may result Warning Never use the FOMA terminal if it has damages such as deformities or scratches as a result of dropping it Otherwise the battery pack may ignite burst or overheat and its electroly...

Страница 14: ...fied V AC When charging the FOMA terminal overseas use the AC adapter available for use overseas to charge the FOMA terminal Supplying the wrong voltage to the AC adapter may result in a fire burns or...

Страница 15: ...coronary care units CCU Turn off the FOMA terminal in hospital wards If there is any electronic medical equipment near you turn off the FOMA terminal even when in a location such as a lobby Comply wi...

Страница 16: ...ration key surface Acrylic urethane Corner area of display panel Elastomer resin Display panel PET resin surface hard coating Battery compartment surface Polycarbonate Battery terminal Resin part PPS...

Страница 17: ...tion Also if an external device is left connected to the connector terminal earphone microphone terminal the connector could be damaged or malfunction Carefully read each instruction manual attached t...

Страница 18: ...ation and dust There are no land line phones television sets or radios nearby While you are charging the adapter may become warm This is not a malfunction so you can keep on using Do not use the DC ad...

Страница 19: ...is product and another radio station occurs move immediately to another place or turn off power to avoid interference 3 For further details contact docomo Information Center on the back page of this m...

Страница 20: ...k cover nor open close the connector terminal cover Wash When the FOMA terminal gets dirty you can slowly swing and wash it in a bowl filled with fresh water or tap water at an ambient temperature or...

Страница 21: ...Hook your finger over the groove pull out the cover to direction A and turn it as direction B Closing the connector terminal cover Align the connector terminal cover in parallel with the FOMA termina...

Страница 22: ...back cover and the FOMA terminal Approx 2 mm Caution About the connector terminal cover inner cover and back cover Do not open or close them with gloves put on hands Fine dirt might adhere to the con...

Страница 23: ...A terminal against a clean dry cloth and wipe moisture off the clearance gap of the microphone earpiece speaker keys or hinges Do not directly wipe moisture out of joint gap using a cotton swab etc Re...

Страница 24: ...with a clean dry cloth and then charge When you charge the battery with the connector terminal cover open firmly close it after charging To prevent water from entering inside through the connector te...

Страница 25: ...the golden IC surface downward push the UIM slowly to the end while pressing surface Take care not to damage the IC portion When you remove the UIM Pull it out slowly while sliding Insert the UIM Wit...

Страница 26: ...A to fit 3 When charging is completed hold the desktop holder with fingers and lift up the head of FOMA terminal to remove When charging is completed hold the desktop holder with fingers and lift up 4...

Страница 27: ...y Code You can set your Terminal Security Code required for 2 Set Keypad Sound You can select whether to let a keypad sound play Set Keypad Sound You can select whether to let a keypad sound play 5 Se...

Страница 28: ...tc Refer to Mobile Phone User s Guide i mode FOMA version for how to check or change your mail address m display 1 Own number Switching to English Display m from the Stand by display Setting Text disp...

Страница 29: ...ist New i concier information exists A Bluetooth device is connected A microSD card is inserted Here are given descriptions of the main icons For descriptions of other icons appearing in the display y...

Страница 30: ...FOMA terminal The screen display will be switched by Motion Control at the following times When Picture Album has been started in the Viewer Style 1 When Full Browser has been started in the Viewer S...

Страница 31: ...ch you can scroll and select items with the Mo key Operations you can perform with the i key Operations you can perform with the c key Vo Moves the cursor to the right Scrolls forward page by page Hol...

Страница 32: ...s manual Simple Menu Use Mo to highlight a menu icon and press Oo Functions categorized by the menu items are displayed Repeat selecting items to call up the target function You can press r to return...

Страница 33: ...ses IC Card Lock 5 Sets Releases eco Mode 7 Shows the Font setting display 8 Switches View Blind on off a Activates Deactivates Public mode Drive mode s Activates Deactivates Manner Mode v Operations...

Страница 34: ...fully down on the touch panel with your fingers or fingernails or with a ballpoint pen pins or any other sharply pointed object You might not be able to operate the Touch Panel depending on the i ppli...

Страница 35: ...For moving the cursor or a highlighted display You can use the Long touch operation to select items on lists For continuously performing an operation You can use the Long touch operation to operate t...

Страница 36: ...perating To release 1 v in Viewer Style 2 Slide to the right Perform the sliding operation to within 10 seconds Display Lock is also released when you switch the FOMA terminal to Normal Style 1 Adjust...

Страница 37: ...yle selected the Customize Menu is displayed On the Customize Menu you can register short cut icon to 27 icons and activate any of their functions by touching the corresponding short cut icon Normal M...

Страница 38: ...et input mode Uppercase A B C a b c 2 Alphabet input mode Lowercase a b c A B C 2 Numeral input mode 2 Enter characters By repeatedly pressing a numeric key you can 2 Convert fix characters 1 Press No...

Страница 39: ...omes after a character such as and press Vo to move the cursor and enter the next character You can press Bo to select one of the prediction conversion candidates while you are inputting the character...

Страница 40: ...a folder 5 Adjusting Ring Volume Example Adjusting the ring volume for incoming voice calls m from the Stand by display Setting Sound Vib Manner Ring volume m 1 Select Phone To adjust ring volume for...

Страница 41: ...y display Setting Sound Vib Manner Manner mode setting Manner mode set Original 2 Set each item 3 Press c Using Original Even in Manner Mode the shutter tone and focus lock tone from the camera and th...

Страница 42: ...urns off to reduce battery consumption 1 m from the Stand by display Setting Backlight Illum Backlight 2 Select Lighting Select OFF 3 Enter the time seconds for Time to saver Lighting off Power Saver...

Страница 43: ...information and others m from the Stand by display Setting Screen Display Machi chara setting m 1 Select ON Select a folder Select ON 2 Highlight a Machi chara image and press c Highlight a Machi char...

Страница 44: ...dicator Select a color 4 The indicator lights in the set color when a call comes in Checking Missed Calls and New Mail by Tone and Call Charging Indicator With the FOMA terminal closed you can check f...

Страница 45: ...rity codes are known and used by a third party we at DOCOMO take no responsibility in any event for the resultant loss If you do not remember your respective security codes you need to bring an identi...

Страница 46: ...al Security Code 0000 at purchase This is a four to eight digit number for deleting all files or changing settings When the display for entering the Terminal Security Code appears enter your four to e...

Страница 47: ...o release Select OFF Select ON To release 3 Various Lock Functions A variety of lock functions is installed on your FOMA terminal such as preventing a third party from illegally using it or protecting...

Страница 48: ...our FOMA terminal or in other cases you can lock your personal data such as Phonebook entries and the IC Card function of Osaifu Keitai by contacting DOCOMO For details on Omakase Lock refer to Mobile...

Страница 49: ...of this function Business mopera anshin manager you can initialize data on your FOMA terminal memory within the handset microSD card UIM by your administrator s offer Inquiries DOCOMO enterprise orie...

Страница 50: ...ntains multiple phone numbers press No to select a desired phone number Select a Phonebook entry When an entry contains multiple phone numbers 4 Enter a part of the name Bo If you enter nothing and pr...

Страница 51: ...number When the area code city code begins with 0 enter it except for the 0 However include 0 when making a call to some countries or regions such as Italy 0 Stand by display 1 Press d Press c to make...

Страница 52: ...ss Bo to adjust the earpiece volume Press volume 2 Activate Record Message By activating Record Message you can record a caller s voice video message when you cannot answer the call When a call comes...

Страница 53: ...0 from the Stand by display 2 Press d Press To deactivate 2 Press and hold a for at least one second from the Stand by display appears on the Stand by display To deactivate Perform the same operation...

Страница 54: ...uired Free Caller ID Display Request Service Not required Free Dual Network Service Required Charged Service Application Monthly fee English Guidance Not required Free Multi Number Required Charged 2i...

Страница 55: ...1 Using Call Waiting Service m from the Stand by display TEL function Other network serv Call waiting Activate the service 1 Select Activate Select YES m 1 Using Call Forwarding Service m from the Sta...

Страница 56: ...g Areas and timing Emergency Location Report introduced vary depending on the preparation of respective emergency response agencies When you make a call at 110 119 118 from the FOMA terminal tell an o...

Страница 57: ...e DOCOMO International Services website Communication Service 3G GSM GPRS Voice call 1 Videophone call 1 SMS 2 i mode 3 i mode mail i Channel 3 4 i concier 5 i Widget 6 Packet communication by connect...

Страница 58: ...er From the Stand by display enter a phone number 1 Press d to make a call Press c to make a videophone call Press 2 Sending i mode Mail Once you subscribe to i mode you can exchange e mail messages o...

Страница 59: ...ash file l from the Stand by display Create new Deco Anime l 1 l 1 1 1 1 Select the text field Highlight a Decome Anime template and press c Select the text field 3 Edit characters and images c Edit c...

Страница 60: ...lect an i mode mail message 3 When you receive an i mode mail message appears on the Stand by display Press c while an i mode mail is displayed Press is displayed 1 Replying to i mode Mail Enter each...

Страница 61: ...r such as Business or Friend which has been created in advance Example Sorting mail messages which come from the address stored in the Phonebook into a folder Highlight a folder from Inbox Folder list...

Страница 62: ...en you are not contracted to use i mode Early Warning Area Mail Using SMS You can send text messages to the mobile phone number at the other end Enter each item Enter each item 2 Enter a phone number...

Страница 63: ...by display Press and hold second from the Stand by display 1 Select Phone The display for entering a name appears Enter a name and proceed When storing entries onto the Phonebook on the UIM Select UIM...

Страница 64: ...1 m Select Delete data m 2 Select Delete this Select Delete this 3 Select YES Select YES 4 Storing Phonebook Entries from Redial Received Call Records Press Vo Redial or Co Received Calls from the Sta...

Страница 65: ...display on the right Press Stand by display 1 Before using i mode Content of sites or websites is in general protected by copyrights law You can use data such as text and images for your entertainment...

Страница 66: ...ll Browser m 1 Displaying Websites Designed for PC You can browse Internet websites designed for PCs using the Full Browser function Note that you are charged a high communication fee for the massive...

Страница 67: ...ed Move the pointer Mo Select an item link Oo Return to previous page l Forward to next page i or appears while accessing by Full Browser Pointer Bookmark websites or i mode sites you frequently visit...

Страница 68: ...is a pay service which is available on a subscription basis You need to subscribe to i mode to apply for i Channel For details on i Channel refer to Mobile Phone User s Guide i mode FOMA version The i...

Страница 69: ...not charged a packet communication fee for checking your current location However a separate packet communication fee are charged in cases where for instance a map has been displayed from the location...

Страница 70: ...ht separately be charged a packet communication fee for sending your location information Note that depending how you use the FOMA terminal your FOMA terminal s power consumption will be increased as...

Страница 71: ...Focus function Xo a or v halfway Change camera mode i Photo light setting 8 Image stabilizer Auto Continuous setting 1 image Number of recordable image Shows the number of remaining recordable still...

Страница 72: ...e or imotion Movie m 1 Select Camera Select still image or a moving picture Select Camera a moving picture 2 You can detect a person s face on the still image you have shot and expand it or add correc...

Страница 73: ...shot 3 Press Oo You can save all the shot images by pressing c Press 4 Shooting Still Images Using Omakase Choice m from the Finder display for Digicam Mode AutoShutter m Digicam Mode 1 Select Group...

Страница 74: ...laces far away from radio towers that transmit broadcasting waves Mountain ringed regions or behind buildings In tunnels underground or recesses of buildings To improve reception conditions fully exte...

Страница 75: ...t this function with the 1Seg antenna extended when you are in a terrestrial digital TV broadcasting service area m from the Stand by display CAMERA TV MUSIC 1Seg Channel setting Auto channel setting...

Страница 76: ...card Displayed while you are watching a 1Seg program Operation Mode Video Mode Data Broadcasting Mode Airwave Reception Level estimate Strong Weak appears out of the broadcasting area Sound Volume Vid...

Страница 77: ...arts m from the Stand by display CAMERA TV MUSIC 1Seg m 1 Press c Press 3 Enter each item Enter each item 4 Press c Press 5 Select TV timer list or Timer recording list Select TV timer list or Timer r...

Страница 78: ...Channel subscription You cannot set or download programs during international roaming Take procedures to halt the distribution of programs before going abroad Then after homecoming resume the receptio...

Страница 79: ...the third party s intellectual property rights or other rights such as copyright Playing Music Files MUSIC Player enables you to play Chaku uta Full music files you have downloaded from sites or to pl...

Страница 80: ...erminal more conveniently You can automatically update the stock price information or weather information and enjoy games without accessing network Your press of the single i Widget key Zo enables you...

Страница 81: ...List Mobile Phone Maker P SQUARE Deadlines for re download services Google Google Map for Mobile the end of July 2013 REVERSI the end of March 2014 Hyper Sichuan the end of March 2014 The services su...

Страница 82: ...use i mode packet flat rate service Two types of i motion movie files streaming type and normal download type are available Categories Description Streaming type cannot be saved Plays data while recei...

Страница 83: ...terminal at our hand for repair remaining data files on it You are asked as a rule to delete them by yourself As to the support such as reissue restoration temporal storage and transfer of data consul...

Страница 84: ...one User s Guide i mode FOMA version i concier is a pay service which is available on a subscription basis You need to subscribe to i mode to apply for i concier If you have not subscribed to Data Sec...

Страница 85: ...t New Select Schedule You can store a new schedule event m 2 Enter each item Enter each item 3 Press c Press 4 Convenient Tools m from the Stand by display Tool Alarm m 1 Highlight an alarm and press...

Страница 86: ...e when you scan QR code QR code is one of the 2 dimensional codes that denotes data in the vertical and horizontal directions NTT NTT DOCOMO INC is displayed when you scan the QR code with the FOMA te...

Страница 87: ...nal m from the Stand by display Tool Bluetooth Register New Devices m 1 Select OK Select OK 2 Select Wireless Earphone Set 02 Select YES When you register a Bluetooth device other than Wireless Earpho...

Страница 88: ...rement is carried out Your pace might not be correctly measured depending on the usage conditions m from the Stand by display Tool Pedometer The measurement records of your pace are displayed You can...

Страница 89: ...ory capacity and manufacturers of microSD cards access the following sites in Japanese only Note that the microSD cards other than published in the sites might not correctly work From i mode to P SQUA...

Страница 90: ...l content on the microSD card m from the Stand by display Tool microSD Refer microSD data m microSD format m 1 Enter your Terminal Security Code Select YES Enter your Terminal Security Code 2 A microS...

Страница 91: ...and press m Select Copy to microSD Select Copy this Highlight a still image to be copied and press 2 Copying Data to the FOMA Terminal Example Copying a still image m from the Stand by display Data bo...

Страница 92: ...estoring the backup data onto your FOMA terminal they are collectively restored Backing up data from the FOMA terminal onto the microSD card is collectively applied to all data so data not created in...

Страница 93: ...Face the f mark of the receiving end terminal which shows the Stand by display to the f mark of the sending end terminal Face the terminal which shows the Stand by 1 Select YES Select YES 2 Connectin...

Страница 94: ...igarette lighter socket Make sure the adapter and the FOMA terminal are connected correctly See page 24 When you use an AC adapter option make sure its connector is firmly connected to the FOMA termin...

Страница 95: ...he lock for Keypad dial in Original Lock is released See page 46 Make sure Dial Lock is deactivated See page 45 Make sure Self Mode is deactivated See page 46 Cannot talk does not disappear even if yo...

Страница 96: ...er than those specified by DOCOMO is charged even within the warranty period Repairs may not be carried out in the following cases When exposure to water is found at our repair counter Example When th...

Страница 97: ...en you access it from overseas you are charged a fee QR code for accessing the site The information such as about function settings and Total Calls Duration etc might be reset depending on the trouble...

Страница 98: ...lly charge the battery before updating software programs It may take time to update download or rewrite software programs You cannot make receive calls use communication functions and other functions...

Страница 99: ...me you want When update is necessary Update is needed is displayed And you can 2 Start Software Update from Menu m from the Stand by display Setting Other setting Software Update m 1 Enter your Termin...

Страница 100: ...market for last three years since their release Update pattern data First of all update the pattern data to make it the latest m from the Stand by display Setting Lock Security Scanning function Upda...

Страница 101: ...phone Microphone 01 Stereo Earphone Set 01 Earphone Microphone with Switch P001 P002 4 Flat plug Earphone Microphone with Switch P01 P02 5 Flat plug Stereo Earphone Set P01 5 Earphone Plug Adapter P00...

Страница 102: ...Receive option Mail setting Receive setting Display setting Signature setting Phrases Store word Mail box lock Set check mail message Address Spam Mail Set Auto save setting SMS setting Area Mail sett...

Страница 103: ...ppli call settings iappli volume Preferred tone aBacklight aPower saver aVibrator Check settings CAMERA TV MUSIC Camera Digicam mode Photo mode Movie mode View photos View movies 1Seg Activate 1Seg Pr...

Страница 104: ...vices Bluetooth settings Voice announce Dictionary Enter word Reference history Tool Phrases Store word Common phrases Store word Download dictionary Contact DOCOMO TEL function Phonebook Search phone...

Страница 105: ...et ring time Check setting Setting Check messages Message notification Delete icon Activate notice call Deactivate notice call Notice call status Setting for videophone TEL function Other network serv...

Страница 106: ...sub clock Clock display Auto power ON Auto power OFF Lock Security Lock Keypad lock Secret mode Secret data only mode Call rejection set Change security code PIN setting Scanning function Battery leve...

Страница 107: ...NW search 3G GSM setting Network search setting PLMN setting Display operator name Display area status Overseas setting Inquiries overseas Bar incoming when roam Missed Call Notice Roaming guidance In...

Страница 108: ...ls Recording Number of recordable still images 1 Approx 2 400 max default Number of still images for continuous shooting For Digicam Mode in Continuous setting 3M 6 2M Wide 8 2M 8 Stand by 8 For Conti...

Страница 109: ...conditions of Image size Sub QCIF 128 x 96 File size setting Mail restriction L Image quality Normal Movie type set Normal 4 Maximum recording duration per shot that can be saved to the microSD card 2...

Страница 110: ...w icnirp de MIC http www tele soumu go jp e sys ele index htm TELEC http www telec or jp ENG Index_e htm NTT DOCOMO http www nttdocomo co jp english product sar Panasonic Mobile Communications Co Ltd...

Страница 111: ...ransmitting at its highest certified power level in all tested frequency bands Although the SAR is determined at the highest certified power level the actual SAR level of the phone while operating can...

Страница 112: ...en using the phone in close proximity to personal medical devices such as pacemakers and hearing aids Pacemakers Pacemaker manufacturers recommend that a minimum separation of 15 cm be maintained betw...

Страница 113: ...istered trademark or trademark of Microsoft Corporation in the United States and or other countries Powered by JBlend Copyright 2002 2009 Aplix Corporation All rights reserved JBlend and JBlend relate...

Страница 114: ...ystems Japanese version in this manual are as shown below Windows 7 is the abbreviation of Microsoft Windows 7 Starter Home Basic Home Premium Professional Enterprise and Ultimate Windows Vista is the...

Страница 115: ...36 Pictograms 36 Smiley 36 Symbols 36 Character size 41 Charging 24 Charging terminal 5 Check mail message 59 Command navigation key 29 Connector terminal 4 Control key 33 Copyrights 111 Customize men...

Страница 116: ...ll 48 Making a videophone call 48 Manner mode 39 Map application 67 Map GPS 66 Menu icon 30 Microphone 4 microSD card 87 Back up restore 90 Copy 89 Format 88 Inserting removing 87 Motion control setti...

Страница 117: ...n Scanning function 98 Select language 26 Select ring tone 38 Self mode 46 Services available for FOMA terminal 54 Simple menu 30 Site access 63 Slide lever 33 SMS 60 Compose 60 Receive 61 Software up...

Страница 118: ...turn off the power Where use is prohibited Be sure to turn off the power to your FOMA terminal in airplanes in hospitals and around priority seat in a train etc In the following cases be certain to se...

Страница 119: ...2 6600 to enter press and hold the 0 key for at least one second available 24 hours a day From DOCOMO mobile phones International call access code for the country you stay at 81 3 6718 1414 toll free...

Страница 120: ...OMO Connection Manager 14 Starting DOCOMO Connection Manager 17 Setting Dial up Network 18 Making Dial up Connection 32 AT Command 36 AT Command List 37 Manual for PC Connection About Manual for PC Co...

Страница 121: ...epending on the network congestion state and the communication environment The communication speed might be lowered when you connect the FOMA terminal to an access point which does not support HIGH SP...

Страница 122: ...gs on your personal computer For details refer to the DOCOMO website To carry out the communication using the FOMA terminal in Japan the following conditions are required The personal computer to be u...

Страница 123: ...are are required besides the FOMA terminal and personal computer FOMA USB Cable with Charge Function 01 02 option or FOMA USB Cable option Provided P 06B CD ROM For USB connection Operating Environmen...

Страница 124: ...m the provided CD ROM or download it from the DOCOMO website and install Connect a personal computer wirelessly to the FOMA terminal using Bluetooth communication P 10 Connect a personal computer to t...

Страница 125: ...without inserting a connector forcibly Use a dedicated FOMA USB Cable with Charge Function 01 02 The USB cable for personal computers cannot be used because the shape of the connector differs Symbol a...

Страница 126: ...computer before installing the FOMA communication configuration file driver 1 Start Windows then set the provided P 06B CD ROM into the personal computer 2 Click Data link software Setup software If...

Страница 127: ...use the device The device driver software was installed correctly appears for a few seconds from the indicator on the task bar Confirm that the FOMA communication configuration file driver is installe...

Страница 128: ...ation file driver names are displayed under COM LPT Port COM LPT Modem and Universal serial bus controller The COM port number varies depending on your personal computer The following drivers are inst...

Страница 129: ...A P06B USB and click Change and delete 4 Click OK 5 Click Yes to restart Windows The uninstallation is then completed If you click No restart Windows manually Uninstall FOMA Communication Configuratio...

Страница 130: ...y Enter the same Bluetooth pass key for both the FOMA terminal and personal computer 5 The personal computer is registered and a wireless connection starts When the connection is completed blue blinks...

Страница 131: ...ontinue For Windows XP Click the Hardware tab Click Device manager 3 Click each device then confirm the modem name or COM port number The modem name or COM port number is displayed under COM LPT Port...

Страница 132: ...ton Charge counter When Using Volume Charging Data Communication including i mode packet flat rate service etc Note that a communication fee might become expensive when you transfer a large amount of...

Страница 133: ...t option 2 Select the Connection tab and select Not to dial 3 Click OK Information Use of connection software other than DOCOMO Connection Manager You do not simultaneously need following software pro...

Страница 134: ...er 2 Click Internet connection If this display appears during installation of DOCOMO Connection Manager close the display 3 Click Install of Operation in CD ROM FOMA How to set data communication of F...

Страница 135: ...tions and click Next 6 Confirm the licensing contract contents If you agree with the contents select Agree with the licensing contract contents and click Next 7 Confirm the installation destination fo...

Страница 136: ...16 8 Click Install Installation starts 9 Click Finish Installation is completed...

Страница 137: ...ils refer to pdf DOCOMO Connection Manager operation manual by PDF format Starting DOCOMO Connection Manager When you disconnect the communication line You cannot disconnect the communication line onl...

Страница 138: ...use a software program which supports Windows 7 or Windows Vista for setting up the connection Follow the settings of the software program used Packet communication setting flow using AT commands Sett...

Страница 139: ...ears enter City code Area code then click OK 4 Open the Modem tab confirm the COM port number in the Access point field of FOMA P06B then click OK When connecting wirelessly using Bluetooth communicat...

Страница 140: ...art 1Open Control panel 2 From Printer and the other hardware in Control panel open Phone and modem options 3 If the Address information display appears enter City code Area code then click OK 4 Open...

Страница 141: ...s point number for dial up network setting see page 27 1 Connect the FOMA USB Cable with Charge Function 01 02 to the FOMA terminal 2 Turn the power to the FOMA terminal on then connect the FOMA USB C...

Страница 142: ...ay 3 Uncheck Use country region code and city code 4 Click OK Then go to step 7 6 The properties of the COM port number appear on the display then click OK This display appears when you select a COM p...

Страница 143: ...a U or mopera the access point name APN must be set to the number from cid5 to cid10 specified by the provider or network administrator Default cid contents Phone number for connecting to an access po...

Страница 144: ...Caller ID Notified Not Notified Information When using DOCOMO Internet access service mopera U or mopera you need to set your caller ID to be notified If the entered AT command is not displayed enter...

Страница 145: ...ed two or more modems 3 Enter any name in the Connection name field Here SAMPLE is entered as an example 4 Enter an access point number in the Phone number for dial up field When connecting to mopera...

Страница 146: ...or Modem the name of the in use Bluetooth linked standard modem or Bluetooth modem provided by a Bluetooth device maker When Use dial information is checked uncheck it The COM port number allocated t...

Страница 147: ...nter an access point number in the Phone number for dial up field When connecting to mopera U enter 99 3 as the access point number See page 23 for access point numbers other than mopera U 6 Enter the...

Страница 148: ...odem provided by a Bluetooth device maker When Use dial information is checked uncheck it The COM port number allocated to FOMA P06B or the in use Bluetooth linked standard modem or Bluetooth modem pr...

Страница 149: ...Next 6 If the Select a device display appears check FOMA P06B only then click Next When connecting wirelessly using Bluetooth communication put a check mark for only the in use Bluetooth linked stand...

Страница 150: ...vice provider or network administrator in the User name Password and Confirm the password fields Then click Next When connecting to mopera U or mopera you can leave the user name and password fields b...

Страница 151: ...hen Use dial information is checked uncheck it The COM port number allocated to FOMA P06B or the in use Bluetooth linked standard modem or Bluetooth modem provided by a Bluetooth device maker varies d...

Страница 152: ...contents and click Dial When connecting to mopera U or mopera you can leave the user name and password fields blank 4 The display appears to indicate the connecting state In this period the system pe...

Страница 153: ...connecting to mopera U or mopera you can leave the user name and password fields blank 4 The display appears to indicate the connecting state In this period the system performs logon processing to co...

Страница 154: ...1 Click the dial up icon on the task tray 2 Select the access point with which the connection is to be terminated and click Disconnect For Windows Vista Select Connect or disconnect and click Disconne...

Страница 155: ...he packet communication Perform the operations on page 17 page 32 or page 34 When you cannot connect to network If this error occurs Confirm those Your personal computer cannot recognize P 06B Confirm...

Страница 156: ...tion When you make a call from an external device or make an AT command call the call is made from Number A in A Mode or Dual Mode of 2in1 and the call is made from Number B in B Mode of 2in1 Entry Fo...

Страница 157: ...Can be omitted AT DANTE AT M Shows the number of antenna bars 0 to 3 0 Antenna shows the out of the service area 1 Zero antenna bars or a single antenna bar 2 Two antenna bars 3 Three antenna bars AT...

Страница 158: ...T CBST 116 1 0 OK AT CDIP n M AT F W Sets whether to display Received sub address on your personal computer when you receive a call n 0 Does not display Received sub address when you receive a call de...

Страница 159: ...ording to CLIR service n 1 Does not notify the other party of your caller ID n 2 Notifies the other party of your caller ID default Result CLIR n m m 0 CLIR is not launched always notify m 1 CLIR is l...

Страница 160: ...AT CPAS CPAS 0 OK AT CPIN n m M AT Enters the UIM password PIN1 or PIN2 When the UIM is in a state waiting for the entry of PIN1 or PIN2 code n PIN1 PIN2 When the UIM is in a state waiting for the en...

Страница 161: ...K AT GMM M Displays the product name FOMA P 06B of the FOMA terminal AT GMM FOMA P06B OK AT GMR M Displays the version of the FOMA terminal AT GMR Ver1 00 OK AT IFC n m M F W Selects the flow control...

Страница 162: ...nquires the set value ATS3 13 OK ATS3 013 OK ATS4 n M F Sets the line feed LF character n 10 Default n 10 only specifiable ATS4 Inquires the set value ATS4 10 OK ATS4 010 OK ATS5 n M F Sets the back s...

Страница 163: ...DCONT Lists the specifiable values CGDCONT Displays the current setting Command execution example AT CGDCONT 5 PPP abc OK The command used to register an APN name abc cid 5 This command which is a set...

Страница 164: ...that accepts 2048 kbps for upload and 7232 kbps for download cid 3 AT CGEQMIN 3 2048 7232 OK 3 Command that accepts 2048 kbps for upload and all baud rates for download cid 4 AT CGEQMIN 4 2048 OK 4 Co...

Страница 165: ...APN was found or an invalid APN was specified 30 The line was disconnected from the network 33 You have not applied for the service option you requested 36 The line was normally disconnected Result C...

Страница 166: ...se only AT V0 2 The displayed maximum band rate is the one reported from the wireless base station and does not guarantee the actual communication speed Numeric notation Character notation Connection...

Страница 167: ...Kuten Code List P 06B...

Страница 168: ...020 219 021 160 220 022 161 221 023 162 222 024 163 223 164 224 026 225 027 164 226 028 165 029 166 226 167 227 031 168 228 032 169 229 033 170 230 034 231 035 170 232 036 171 037 172 232 038 173 233...

Страница 169: ...427 307 372 428 308 373 429 309 430 310 373 431 311 374 432 312 375 433 313 376 434 314 377 435 315 378 436 379 315 380 436 316 381 437 317 382 438 318 383 439 319 384 440 320 385 386 440 320 441 321...

Страница 170: ...1 559 637 482 560 638 483 561 639 484 562 640 485 563 641 486 564 642 487 565 643 488 566 644 489 567 645 490 568 646 491 569 647 492 570 648 493 571 649 494 572 650 495 573 651 496 574 652 497 575 65...

Страница 171: ...713 791 714 792 715 793 716 794 717 795 718 796 719 797 720 798 721 799 722 800 723 801 724 802 725 803 726 804 727 805 728 806 729 807 730 808 731 809 732 810 733 811 734 812 735 813 736 814 737 815...

Отзывы: