background image

Chapter 2

Page 18

Parts of the System

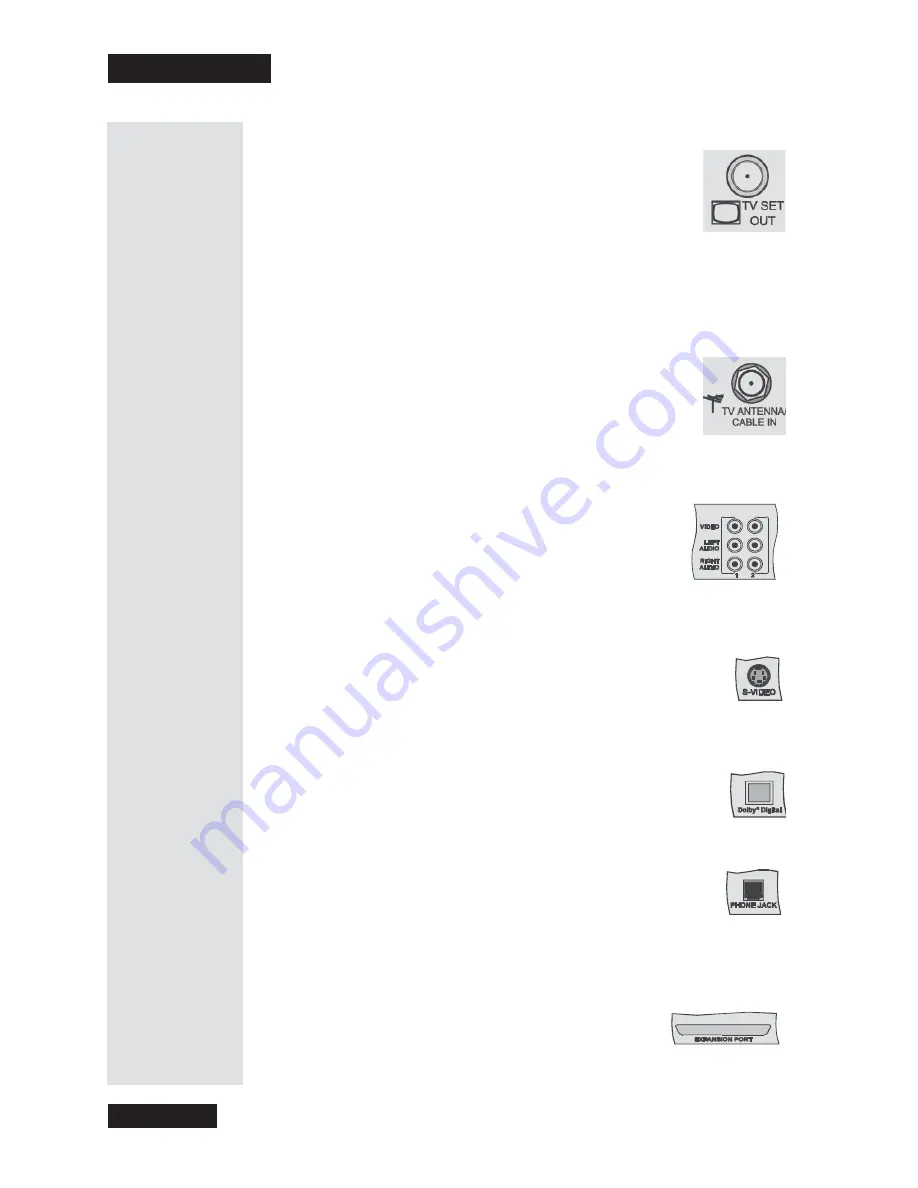
TV Set Out

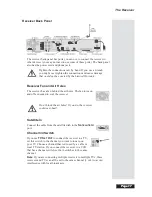
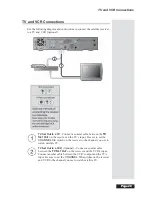
This connection provides good picture quality and good mono
sound quality (even if you have a TV or other devices that
provide stereo sound).

If you use

TV S

ET

O

UT

to watch satellite channels, you must

keep the TV(s) tuned to the same channel (either channel 3 or
4) as you selected on the Channel 3/4 Switch of the satellite
receiver.

The

TV S

ET

O

UT

can be switched between satellite programming and the

signal on the

TV A

NTENNA

/C

ABLE

I

N

connection using the

TV/VIDEO

button on the remote control.

TV Antenna/Cable In

Use the

TV A

NTENNA

/C

ABLE

I

N

to connect a broadcast TV

antenna or cable TV box to the receiver. The

TV A

NTENNA

/

C

ABLE

I

N

connection is only available through the

TV S

ET

O

UT

as described above.

Phono (RCA) Audio/Video Outputs

These outputs provide high-quality picture and stereo
sound.

If the TV has only one input for this type of audio,
connect it to the receiver’s

R

IGHT

A

UDIO

output.

If you use these outputs to connect the receiver to other devices, be sure
to follow the instructions in the devices’ user manuals.

Super Video (S-Video) Output

The receiver provides S-Video, which is the highest quality video
available. If you use this output for video, you

must

still connect

the audio with the

P

HONO

(RCA) A

UDIO

O

UTPUTS

or the

D

OLBY

®

D

IGITAL

output.

Dolby

®

Digital Output

The receiver provides Dolby

®

Digital encoded output and linear

Pulse Code Modulation (PCM) for an audio amplifier/decoder
that can process this kind of output.

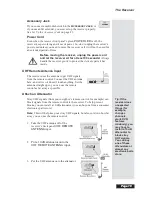
Phone Jack

Connect a phone cable with a standard RJ-11 phone plug to the
receiver here, and then connect the cable to an active phone
jack.

Note

: You

must

keep the receiver connected to a phone line at

all

times to

buy Pay Per View programs or use exciting interactive features.

Expansion Port

This port is reserved for future use.

Содержание Platinum DishPVR 501

Страница 1: ...ATTENTION Be sure to review the Read Me First information on the first page ...

Страница 2: ...perform operations in a non routine manner This product like almost any other high tech product is subject to bugs and hence EchoStar CANNOT AND DOES NOT GUARANTEE OR WARRANT THAT ALL FEATURES SUCH AS PARENTAL CONTROL WILL WORK AS INTENDED UNDER ALL CIRCUMSTANCES EchoStar endeavors to improve such conditions and will periodically download improvements EQUIPMENT AND SOFTWARE COVERED BY THIS USER S ...

Страница 3: ...tions 29 Chapter 3 Using the System 31 Change Channels 31 Use the Program Guide 31 Use the Program Banner 34 Use the Browse Banner 34 Buy a Pay Per View Program 36 Use Themes 37 Use Favorites Lists 38 Use the Search Feature 40 Use Locks 42 Use Event Timers 48 Use Caller ID 58 Use Dolby Digital Sound 59 Use the DishDVR Features 60 Control Other Devices with the Remote 68 Upgrade the Receiver Softwa...

Страница 4: ...le 101 Connecting Each Receiver to a Phone Line 102 Chapter 5 Reference 105 Use the Troubleshooting Tables 105 Test the System 119 Device Codes 120 Appendix A 125 Appendix B 127 Limited Warranty 127 What the Warranty Covers 127 What the Warranty Does Not Cover 127 Residential Customer Agreement 130 Staying Legal 136 FCC Compliance 137 Radio Interference 138 Index 139 ...

Страница 5: ...safety If the provided plug does not fit into your outlet consult an electrician for replacement of the obsolete outlet 10 Protect the power cord from being walked on or pinched particularly at plugs convenience receptacles and the point where they exit from the apparatus 11 Use only attachments accessories specified by the manufacturer 12 Unplug this apparatus during lightning storms or when unus...

Страница 6: ...ny kind into the receiver through openings as the objects may touch dangerous voltage points or short out parts This could cause fire or electrical shock Make sure that the outdoor parts of the antenna system are grounded in accordance with local state federal and National Electrical Code NEC requirements Do not locate the antenna near overhead light or power circuits or where it can fall into suc...

Страница 7: ... just the same IMPORTANT INFORMATION ABOUT THIS RECEIVER Always handle the satellite receiver carefully Avoid excessive shock and vibration at all times as this can damage the hard drive If you have the receiver turned on and need to move it be sure to unplug the receiver and let it sit for at least 30 seconds before moving it Do not install the receiver in any area where the temperature can be le...

Страница 8: ...come familiar with product operation and features To learn about the parts of the system see Parts of the System on page 15 To learn how to use the system see Chapter 3 How to Use the System on page 31 To troubleshoot the system see Chapter 5 Reference on page 105 Tune to the DISH Network info channels or visit our Web site at www dishnetwork com for info For more help call the Customer Service Ce...

Страница 9: ...t System Information screen displayed on your TV 3 Call 1 800 333 DISH 3474 to tell us you ve installed the system and want to get services We ll explain what program packages you can buy You ll need to verify the information on the Important System Information screen 4 We ll turn your services on via the satellite signal This process usually takes just a few minutes When we finish you ll be able ...

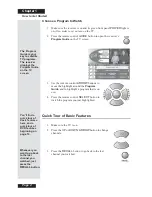
Страница 10: ...that is on now 4 Press the remote control SELECT button to watch the program you just highlighted Quick Tour of Basic Features 1 Make sure the TV is on 2 Press the UP or DOWN ARROW button to change channels 3 Press the RECALL button to go back to the last channel you watched The Program Guide is your key to satellite TV programs The receiver displays the Program Guide on the TV screen You ll find ...

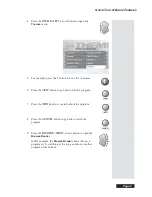
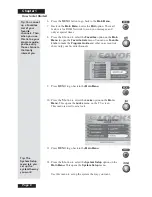
Страница 11: ...6 Press the VIEW button to go back to watch a program 7 Press the INFO button to see info about the program 8 Press the CANCEL button to go back to watch the program 9 Press the BROWSE RIGHT arrow button to open the Browse Banner In this example the Browse Banner shows info on a program we re watching at the top and info on another program at the bottom ...

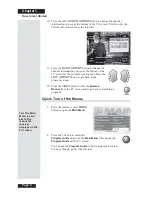
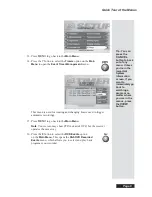
Страница 12: ... the LEFT ARROW button to got back to the program on now 12 Press the VIEW button to clear the Browse Banner from the TV screen and to go back to watching a program Quick Tour of the Menus 1 Press the remote control MENU button to open the Main Menu 2 Press the 1 button to select the Program Guide option on the Main Menu This opens the Program Guide on the TV screen You can use the Program Guide t...

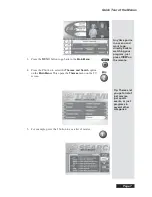
Страница 13: ...ion on the Main Menu This opens the Themes menu on the TV screen 5 For example press the 1 button to see a list of movies Any time you re in a menu and want to go directly back to watching your program just press VIEW on the remote Tip Themes let you get a list of just movies just sports events or just programs in several other categories ...

Страница 14: ...channels 9 Press MENU to go back to the Main Menu 10 Press the 5 button to select the Locks option on the Main Menu This opens the Locks menu on the TV screen This menu is used to set a lock 11 Press MENU to go back to the Main Menu 12 Press the 6 button to select the System Setup option on the Main Menu This opens the System Setup menu Use this menu to set up the system the way you want Tip You c...

Страница 15: ...ain Menu Note Your screen may show PVR instead of DVR but the receiver operates the same way 16 Press the 8 button to select the DVR Events option on the Main Menu This opens the DishDVR Recorded Events menu which allows you to select and play back programs you recorded Tip You can press the CANCEL button to back out of any menu Unless you re in the Important System Information screen if you want ...

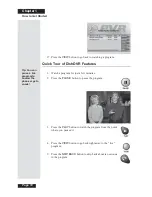
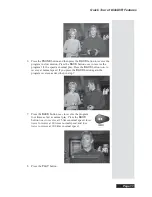
Страница 16: ...ust a few minutes 2 Press the PAUSE button to pause the program 3 Press the PLAY button to watch the program from the point where you paused it 4 Press the VIEW button to go back right away to the live program 5 Press the SKIP BACK button to skip back about ten seconds in the program Tip You can pause a live program to answer the phone or get a snack ...

Страница 17: ...ay Press the BACK button twice to reverse at normal speed If you press the BACK button again the program reverses as described in step 7 7 Press the BACK button once to reverse the program four times as fast as normal play Press the BACK button twice to reverse at 15 times normal speed three times to reverse at 60 times normal speed and four times to reverse at 300 times normal speed 8 Press the P...

Страница 18: ...mal play Press the FWD button twice to forward at 1 4 as fast as normal play Press the FWD button three times to play the program at normal speed If you press the FWD button again the program advances as described in step 11 11 Press the FWD FORWARD button once to forward the program four times as fast as normal play Press the FWD button twice to forward at 15 times normal speed three times to for...

Страница 19: ...art in the next few minutes Note Start watching the program when it starts Watch the program for a few minutes 18 Press the BACK button to reverse the program Note Let the program reverse all the way to its start 19 Press the RECORD button The receiver stores a recording of all of the program broadcast so far and keeps on recording the program You can record all of the program even though you didn...

Страница 20: ...t an event you re recording 22 Press the remote control SELECT button to select the event you highlighted This opens a menu of info about that event 23 Press VIEW to return to your live programming Conclusion This is the end of the quick tours Continue on to the next chapter Parts of the System for a detailed description of your DishDVR receiver ...

Страница 21: ... to control the receiver For more information on the remote control buttons see Remote Control on page 20 of this User Guide Info Button Press the INFO button to see information about a program you watch or a program you highlight in a menu The information may include one or more of these signs for a program you can t buy for a blacked out program for a pay per view program for a program with an e...

Страница 22: ...nformation menu Power Button Press the POWER button to turn the receiver on or off Power Light The POWER LED lights up when you turn the receiver on and turns off when you turn it off Note Even when the POWER light is off the receiver continues to work and requires power Don t unplug the receiver unless you need to move it Recording Light The RECORDING LED lights up whenever you are recording a pr...

Страница 23: ...he fan turns on and off as needed to cool the receiver Don t block the air holes If you do the receiver could over heat Satellite In Connect the cable from the satellite dish to the SATELLITE IN port Channel 3 4 Switch If you use TV SET OUT to connect the receiver to a TV set this switch to the channel you want to tune to on your TV Choose a channel that isn t used by a cable or local TV station I...

Страница 24: ... high quality picture and stereo sound If the TV has only one input for this type of audio connect it to the receiver s RIGHT AUDIO output If you use these outputs to connect the receiver to other devices be sure to follow the instructions in the devices user manuals Super Video S Video Output The receiver provides S Video which is the highest quality video available If you use this output for vid...

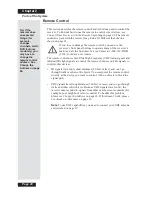
Страница 25: ...t the UHF antenna here and set it so it doesn t touch anything Set the antenna straight up so you can use the remote control as far away as possible Attach an Attenuator Stray UHF signals from your neighbor s remote control for example can block signals from the remote control to the receiver To help prevent blocks you can install a 10 dB attenuator you can buy one from a consumer electronics part...

Страница 26: ...IR signals to control other devices IR signals travel only short distances 40 feet or less and can t go through walls or other solid objects You must point the remote control directly at the device you want to control with no objects to block the signal path UHF signals travel long distances 100 feet or more and can go through walls and other solid objects Because UHF signals travel so far the rec...

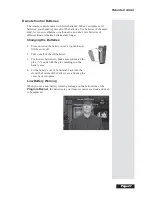
Страница 27: ... the Batteries 1 Press down on the battery cover s top latch and lift the cover off 2 Take out all of the old batteries 3 Put the new batteries in Make sure you match the plus ends with the plus markings on the battery case 4 Fit the battery cover s bottom tab back into the slot at the bottom of the battery case and snap the cover back into place Low Battery Warning When you see a low battery warn...

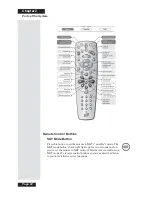
Страница 28: ...his button to set the remote to SAT satellite mode The SAT mode button s back light lights up for two seconds to show you ve set the remote to SAT mode While the remote control is in SAT mode the remote control buttons operate as described below to control satellite receiver functions ...

Страница 29: ...Guide a Themes list a Favorite List an Event Timers list or a list of channels Mute Button Press this button to turn the TV sound off or on To use this button you must set up the remote to control your TV See Set Up the Remote to Control Other Devices for instructions Volume Button Press this button to change the TV volume To use this button you must set up the remote to control your TV See Set Up...

Страница 30: ...l Button Press this button to go back to the last receiver channel you watched Press it again to switch between the last two receiver channels you watched Info Button Press the INFO button for more information about the show you are watching Press the INFO button for more information about a program you have highlighted in the Program Guide Browse Banner Themes or Recorded Events list If a menu ha...

Страница 31: ...this button to back space while using the Search function of your receiver Zero Button Press this button to move one character forward while using the Search function of your receiver Pound Button Press this button to display the Search screen Also you use this button in several procedures described in this User s Guide Dish Button Press this button to use the Dish Home Interactive TV applications...

Страница 32: ...up and then let go of the SAT button 5 Use the number buttons to enter any number from 1 to 16 but not the one you wrote in step 3 Write down the number you enter 6 Press the POUND button If you entered the address correctly the SAT mode button flashes three times 7 Press the RECORD button 8 Make sure the Remote Address you see on the Important System Information menu now is the same as the one yo...

Страница 33: ...ion you highlight Note If a menu option has a number you can press the remote control s number to select that option If you do this you don t have to highlight the option first For example to select the Program Guide option on the Main Menu just press the remote control 1 button Make a Choice in a List The menus have two types of lists like these examples A single choice list lets you make only on...

Страница 34: ...EW button before you do the last step of the procedure To go back to watch a program press the VIEW button To go back to the previous menu press the CANCEL button Note If you don t do anything in a menu for several minutes the menu times out This throws away any change you made and displays the last channel you watched Tip Any time you re in a menu and want to immediately go back to watching your ...

Страница 35: ...T OUT on the receiver an the TV s input Be sure to set the CHANNEL 3 4 switch on the receiver to the channel you use to watch satellite TV TV Set Out to a VCR Optional Connect a coaxial cable between the TV SET OUT on the receiver and the VCR s input Connect another cable between the VCR s output and the TV s input Be sure to set the CHANNEL 3 4 switches on the receiver and VCR to the channel you ...

Страница 36: ...Chapter 2 Page 30 Parts of the System Notes ...

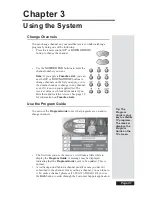
Страница 37: ... you hide them and lock the receiver See page 38 for information on Favorites Lists Use the Program Guide You can use the Program Guide to see what programs are on and to change channels The first time you use the receiver it will take a little while to display the Program Guide A message may be displayed indicating that the Program Guide needs to be updated This is normal A red background behind ...

Страница 38: ... so the Program Guide doesn t show them Please see Hide or Show All Adult Channels on page 47 You will find any of the following symbols in the Program Guide DD in the programming titles means a program has Dolby Digital sound for a program you can t buy for a blacked out program for a pay per view program for a program with an event timer for a locked program Display the Last Channel You Watched ...

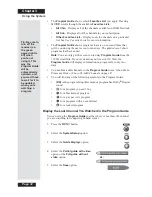
Страница 39: ...e option Select a Program in the Program Guide 1 Press GUIDE to open the Program Guide 2 Move around the Program Guide to highlight a program using the following ways Use the NUMBER PAD buttons to enter the channel number you want This will move the Program Guide to show the channel you enter and some others Use the ARROW buttons to move the highlight around the Program Guide Jump through the Prog...

Страница 40: ...er Event Timers on page 48 5 Press the CANCEL or VIEW button to close the Program Guide Use the Program Banner You can use the Program Banner to find out more about a program you watch while you watch it The receiver displays the Program Banner for a few seconds at the top of the TV screen every time you change the channel or press the VIEW button Note When you see a low battery warning message on...

Страница 41: ...ng Press the UP or DOWN ARROW button to change the channel information you see at the bottom of the TV screen or use the number buttons to enter a channel number The Browse Banner shows information about the program on now on that channel at the bottom of the TV screen Press the RIGHT ARROW button to see information about the next program on the channel you chose If you do this press the LEFT ARRO...

Страница 42: ...Have Purchased 1 Select a pay per view program in the Program Guide Pay per view programs are marked PPV in the Program Guide 2 To buy the pay per view program select the Yes option If you don t want to buy the pay per view program select the No or Cancel option 3 A menu displays asking you to confirm your order Select the Yes option to confirm the older and we will bill you for it Select the No o...

Страница 43: ... lock the receiver Themes lists will not show programs on adult channels Note Programs colored in red are those that are not in your subscription 3 Move through the list of programs using the UP and DOWN ARROW buttons or a page at a time using the PAGE UP and PAGE DOWN buttons on the remote control 3 Select the Purchase Info option This opens a list of shows you ve bought both the ones you ve watc...

Страница 44: ...o choose channels in the list press the remote control UP or DOWN ARROW button To choose a channel whether or not it is on the Favorites List you apply use the number buttons to enter the channel number The All Chan list includes all the channels You can t make any changes to the All Chan list The All Sub list includes all the channels you buy You can t make any changes to the All Sub list unless ...

Страница 45: ...here we selected USA 102 LIFE 108 and HGTV 112 You can select the Clear option to remove all the channels from the channels list 6 To delete a channel select the channel again The check mark next to the channel goes away 7 Select the Save option to save your changes Change a Favorites List s Name 1 Open the Favorites Lists menu 2 Select the list whose name you want to change A check mark shows up ...

Страница 46: ...ollowing If the Program Guide is open press the GUIDE button repeatedly until the list you want appears The Program Guide shows which list you apply Note Unless you add channels to at least one custom list you can apply only the All Chan list or the All Sub list Use the Search Feature The Search feature allows you to search the Program Guide for programs or program information 1 Press the SEARCH b...

Страница 47: ...are searching for Rudy Press three times for an R Press twice for a U Press once for a D Press three times for a Y Note Enter up to 14 characters letters and spaces for your search 5 When you have entered the name scroll down to choose between two options Search Event Titles Only Select this option when you are sure the word s you entered are part of the event title Search All Event Info Select th...

Страница 48: ...l Identification Number on page 48 for more information You can set locks and lock the receiver so only someone who knows the password can get to locked channels or programs You must do two things to use locks 1 Set up the locks you want see the next few pages 2 Lock the receiver This is how you apply the locks you set up that is how you make them work See Lock or Unlock the Receiver on page 47 Op...

Страница 49: ...ion such as your name your address your telephone number the receiver serial number see Order Your Program Packages on page 3 and your Personal Identification Number PIN if you use one see page 48 Rating Code Locks Rating code locks use the codes the original program providers assign to the programs The actual content of the programs may be different from the assigned ratings Note No rating system...

Страница 50: ...t the Locks menu 2 Select the Ratings Locks option 3 Select the rating for the youngest viewers you want to protect This also selects ratings for programs for more mature viewers In the example here if you lock PG 13 rated programs you also lock all programs with the R NC 17 and NR AO ratings 4 Select the expanded rating code s if you want to lock these ratings too For example here we selected Lan...

Страница 51: ...to save your changes 5 You must lock the receiver to apply the lock you just set See Lock or Unlock the Receiver on page 47 Lock or Unlock the Receiver Front Panel Buttons Note You can lock the receiver buttons and hide the remote to limit how people use the receiver Note Even if you lock the receiver front panel buttons the POWER button will continue to work 1 Press MENU and then select the Locks...

Страница 52: ...iew Programs Note This locks all pay per view channels You can lock one or more channel s with channel locks or rating code locks To lock all pay per view programs 1 Press MENU and then select the Locks menu 2 Select the Lock PPV option 3 You must lock the receiver to apply the lock you just set Please see Lock or Unlock the Receiver on page 47 To unlock all pay per view programs 1 Press MENU and ...

Страница 53: ...ver displays a message that tells you to enter the password 3 Use the number buttons to enter the password The receiver displays stars as you enter the digits of the password When you enter the last digit of the password the receiver highlights the OK option Press the SELECT button 4 The receiver displays a message that tells you to enter the password again Do so and then select the OK option agai...

Страница 54: ...IN to make any changes to your account to buy services or to get information You can call the Customer Service Center at 1 800 333 DISH 3474 at any time to set up a PIN If you forget your PIN you must call the Customer Service Center We may ask for more information to make sure it s okay for you to make changes to your account Use Event Timers Many satellite TV programs and films are copyrighted I...

Страница 55: ...t begins Reminder Reminds you a program is about to start VCR Reminds you a program is about to start tunes the receiver to the program when it begins starts a VCR to record the program Event Timer Frequencies Once Works for a one time program If the program time changes this timer works at the new time The receiver deletes this timer right after the timer works Note A Once timer keys on a program...

Страница 56: ...nt Timer 1 Highlight but don t select a future program in the Browse Banner in the Program Guide or in a Themes list Note If you select a future program you open a menu where you can set an automatic event timer This is almost as fast as Quick Record 2 Press the RECORD button 3 This opens a menu where you can set an event timer 4 If you want to start the timer one minute early select the Start 1 m...

Страница 57: ...here we selected the Once option 4 Only for a Once one time DVR Event Timer you can select the Protect Recording check box If you do this a check mark shows up in the box Note When you protect a recorded program the receiver will ask you before it records over that program 5 Select the Create option to set the event timer You ll see a clock picture on the program in the Program Guide and also when...

Страница 58: ...find the start and end times you want to set You can t set a manual timer for a pay per view program You must set the end time after the start time and set the end time at least one minute later than the start time Here s what to do 1 Press the MENU button 2 Select the Timers option This opens the Event Timer Management menu 3 Select the Create option This opens the Create a Manual Event Timer men...

Страница 59: ... Manual Timer menu 9 Use the number buttons to enter the Start Time make sure you select AM or PM and the End Time make sure you select AM or PM Note The menu displays zeroes for you in numbers like 07 10 Use the number buttons to enter the Date 11 Select the Create Timer option 12 Either To set another event timer select the Create option again Or If you don t want to set another event timer pres...

Страница 60: ...e a manual timer to an automatic timer Here s what to do 1 Press the MENU button 2 Select the Timers option This opens the Event Timer Management menu 3 Select the event timer you want to edit A check mark shows up in the box next to the event timer For example here we selected a DVR event timer 4 Select the Edit option This opens the Edit a Manual Event Timer menu 5 You can change the Timer Type ...

Страница 61: ...t Time make sure you select AM or PM and the End Time make sure you select AM or PM Note The menu displays zeroes for you in numbers like 0925 9 Use the number buttons to enter the Date 10 Select the Create Timer option 11 Either To edit another event timer highlight the timer and select the Edit option again Or If you don t want to edit another event timer press the CANCEL button Delete an Event ...

Страница 62: ...or more programs and just one of them is locked you must enter the password to play back any of them For example if you set an event timer to record a block of three programs and one of them is an adult movie you must enter the password to watch any of the three programs Power Off and Event Timers If the receiver is off when a DVR Event Timer Auto Tune Event Timer or VCR Event Timer works the rece...

Страница 63: ...the VCR maybe you can use an IR extender you connect to the receiver ACCESSORY JACK An IR extender is a cable that carries the infrared signal from the receiver to the IR sensor on the VCR You can buy extenders from the Customer Service Center You must set up the receiver to send the right signals out via the ACCESSORY JACK Please see Set Up the Accessory Jack on page 81 Here s what to do The rece...

Страница 64: ...you entered 12 Set the VCR Event Timer s you want Remember you must leave the VCR turned on with a blank tape inserted ready to record Use Caller ID Caller ID displays on your TV the names of people as they call you if you subscribe to Caller ID from your local phone company Enable Caller ID 1 Make sure you have an active phone line connected to the DishDVR receiver 2 Make sure your system is prop...

Страница 65: ...n Use Dolby Digital Sound Dolby Digital lets you use Dolby Surround sound in an audio video system The receiver has a Dolby Digital output although not all programs have Dolby Digital sound The receiver provides Dolby Digital and Linear PCM regular mono or stereo sound for a sound system or audio amplifier decoder that can process such audio 1 Connect an amplifier decoder that can process Dolby Di...

Страница 66: ...tellite TV programs and films are copyrighted In some cases copyright law may apply to private in home recording The DishDVR features let you decide how to watch TV You can pause reverse or skip back through a program Then you can go back to watch fast forward or skip ahead through the programed can record and play back programs with full digital audio and video quality without a VCR Auto Recordin...

Страница 67: ... on screen pause timer shows how long you ve paused the program If you ve paused the program more than once the pause timer shows the total time you ve paused If you pause after you reverse or forward the pause timer shows how far you re behind the live program Press the BACK button once to reverse the program four times as fast as normal play Press the BACK button twice to reverse at 15 times nor...

Страница 68: ...head about 30 seconds in the program Press this button again to skip ahead again Press the PAUSE button and then press SKIP AHEAD to advance the recording one frame at time Note Of course you can t forward into the part of a live program that hasn t been broadcast yet Press the VIEW button to catch up with the program as it s showing now Use On Demand Recording Turn the receiver on and tune it to ...

Страница 69: ...s menu To see all event timers including DishDVR timers use the Event Timer Management menu The DishDVR Recorded Events menu shows you A list of recorded events that includes the one you re recording now if any Note You can sort events either by date or the name of the event Approximately how much time you can still record We call this the time left Note The receiver needs more room to record prog...

Страница 70: ... back Press this button again to go on with the play back Press the BACK button once to reverse the program four times as fast as normal play Press the BACK button twice to reverse at 15 times normal speed three times to reverse at 60 times normal speed and four times to reverse at 300 times normal speed Press the PAUSE button and then press the BACK button to reverse the program in slow motion Pr...

Страница 71: ...gain Press the PAUSE button and then press the SKIP AHEAD button to advance the recording one frame at a time Press the STOP button to stop play back Play Back a Recorded Event and Record Another Event 1 Set up the receiver to make an on demand recording Note You can press the RECORD button or you can use any kind of event timer except a VCR event timer 2 Press the DVR button This opens the DVR Re...

Страница 72: ...l On Demand Recording On demand recording works only when you set it up The receiver must have enough room to record When you make a one time DishDVR recording you can set the receiver to ask you before it records over what you record This is how you protect a recorded event If the receiver needs room to record a new event it ll record over the oldest unprotected recorded event s to make room If t...

Страница 73: ... Connect the receiver s back panel audio video outputs to the VCR s audio video inputs 2 Put a rewound tape into the VCR 3 Turn the VCR on 4 Press the remote control DVR button This opens the DishDVR Recorded Events menu 5 Select an event on the DishDVR Recorded Events menu This opens an information menu for that event 6 Start the VCR to record onto the tape 7 On the event s information menu selec...

Страница 74: ...show you ve set the remote to that mode Limited Mode You can program your remote control in limited mode to keep from accidentally changing the channel on your TV or VCR When you use the remote to control your TV in limited mode you will only be able to use the POWER MUTE and VOLUME buttons Also when you use the remote to control your VCR in limited mode you will only be able to use the POWER and ...

Страница 75: ... programmed in AUX mode If you re not programming in AUX mode skip to step 5 5 Enter one of the three digit device codes from the table using the number buttons The three digit device code should be for the brand name of your device that you found in step 2 6 If you want to program limited mode press 1 If not skip to step 7 See Limited Mode for more information 7 Press the POUND button If you ente...

Страница 76: ... skip to step 4 4 Press the blank POWER button This puts your remote in the scan mode 5 Press the UP or DOWN ARROW button repeatedly until the device turns off As you press the UP or DOWN ARROW button the remote is trying each code in the memory to see if it can turn off your device When the device turns off you have found a code that might work Note The mode button for the device will flash rapid...

Страница 77: ...our code The mode button flashes the number for each digit of the device code with a pause between the groups of flashes A quick flash is for zero For example if the code is 570 the mode button flashes five times pauses flashes seven times pauses and flashes once quickly 3 For AUX mode only The first group of flashes tells you what the AUX mode controls A quick flash zero before the three digit co...

Страница 78: ...ote to TV mode The TV mode button lights for two seconds to show you ve set the remote to TV mode Make sure you keep the remote in TV mode to use the buttons described here Note You can set up the remote to control a second TV in AUX mode the same way it controls the first TV in TV mode See Set Up the Remote to Control Devices beginning on page 68 TV Video Button If the TV has video input options ...

Страница 79: ...ol a VCR or DVD player Some of the buttons described here may not control your VCR or DVD player See the user s manual that came with your VCR or DVD player for information about the features VCR Mode Button You must first set up the remote to control the VCR See Set Up the Remote to Control Devices beginning on page 68 Then you must press the VCR mode button to set the remote to VCR mode The VCR ...

Страница 80: ...f you are using the remote control in Limited Mode the TV will not change channels Recall Button Press this button to go back to the last VCR channel you used Press it again to switch between the last two VCR channels you used VCR Buttons Press the BACK button to rewind a videotape Press the PAUSE button to pause a videotape Press this button or the PLAY button to go back to play the tape Press th...

Страница 81: ...he remote to control the cable TV box Please see Set Up the Remote to Control Devices beginning on page 68 Then you must press the AUX mode button to set the remote to AUX mode The AUX mode button lights for two seconds to show you ve set the remote to AUX mode Make sure you keep the remote in AUX mode to use the buttons described here TV Video Button Use this button to switch the cable box betwee...

Страница 82: ... a tuner or amplifier Some of the buttons described here may not control your tuner or amplifier Please see the user s manual that came with your tuner or amplifier for more information AUX Mode Button You must first set up the remote to control the device See Set Up the Remote to Control Devices beginning on page 68 Then you must press the AUX mode button to set the remote to AUX mode The AUX mod...

Страница 83: ...ch Between TV and AUX Device Volume Control When you set up the remote to control a TV the mute and volume buttons control the TV volume However if you want to use the AUX mode to control a tuner or amplifier and the device has a volume setting you can set up the remote to control the device s volume instead of the TV volume To set the remote to control the device s volume 1 Press and hold the AUX...

Страница 84: ...et the remote back to control the TV volume 1 Press and hold the TV mode button for three seconds and then let go of it The TV mode button will blink 2 Press the POUND button 3 Press the plus side of the VOLUME button 4 Press the 0 number button 5 Press the POUND button The TV mode button flashes three times 6 Press the SAT mode button 7 Press the plus and minus sides of the VOLUME button The TV s...

Страница 85: ...ront panel POWER light will blink Don t disturb or unplug the receiver while the new software is downloading Note The software upgrade may take up to about half an hour Set Up the Receiver to Tell You About Upgrades You can set up the receiver to tell you when you can get a software upgrade it ll ask you to let it get the software Unless you set up the receiver to ask you automatically download ne...

Страница 86: ... 3 Select the Installation option 4 Select the Factory Defaults option Factory Defaults refers to the receiver s original settings 5 Select the Yes option to confirm the reset Change Program Languages You can choose a language other than English for some programs Some programs like movies show at the start if you can choose another language Note You can choose another language for a program but no...

Страница 87: ...e Set Up the Accessory Jack If you connect a multi dish switch to the ACCESSORY JACK or if you use an IR extender you must set up the receiver for these options 1 Press the MENU button 2 Select the System Setup option 3 Select the Accessory Jack option 4 Select the IR Extender option to use an IR extender Select the Switchbox multi dish switch option if you connect a multi dish switch to the ACCES...

Страница 88: ...Chapter 3 Page 82 Using the System Notes ...

Страница 89: ... a DISH 500 Antenna The first step in installing your dish antenna is to assemble the satellite dish mount it and point it in the general direction of a satellite To do this follow these instructions Finding the Satellites You need to find the satellites in the sky To do this you need to know the azimuth angle the south southeast or southwest direction to the satellites and the elevation angle the...

Страница 90: ... the receiver already displays this menu 5 If you Point Dish Signal screen looks like the one on the left continue to step 6 If your Point Dish Signal screen looks like the one on the right select Peak Angles 6 Enter your ZIP code in the ZIP Code field 7 Select the Dish 500 option 8 The menu displays the azimuth elevation and skew angles Write down these numbers in the blanks provided in the margi...

Страница 91: ...ve or be bumped out of adjustment Keep in mind that physical and environmental conditions can block your satellite dish s ability to receive a clear satellite signal The conditions to be aware of are Eaves and overhangs on your building or house wind plant growth and deterioration of the mounting surface Never mount to a tree 3 Align the top part of the mast so that it is absolutely vertical as sh...

Страница 92: ...the red mark with the required angle on the skew scale which you wrote down on 84 Tighten the skew bolts securely to keep the dish from rotating Once the skew is set do not try to fine tune this angle when aiming the dish 6 Set the elevation by tilting the dish mounting bracket to align the red edge with the required angle from page 84 on the elevation scale Tighten the elevation bolts but do not ...

Страница 93: ...ting cables such as RG 59 Also be sure that any outdoor connections are made using waterproof F connectors Tighten all of the coaxial cable connection only by hand If you use a wrench you may over tighten the connections and damage your equipment Such damage is not covered by the Limited Warranty 7 Thread the RG 6 coaxial cable through the mast support arm and the Y bracket This cable should be lo...

Страница 94: ...then Point Dish Signal press MENU and then press 6 1 1 on the remote 13 Select Check Switch The Check Switch screen will open 14 Select Check or Test The receiver shows you a message that it is checking the switches Go to step 15 15 When the check switch procedure finishes you will see an installation summary screen similar to the one below In the Satellite line you will see Conn In the Device lin...

Страница 95: ...not find the signal turn the dish back to the first azimuth angle Then loosen both elevation bolts just enough so you can tilt the dish Tilt the dish elevation up by two degrees and then tighten both bolts Now turn the dish back and forth again If you still can t find the signal tilt the dish up again very slightly and turn the dish back and forth until you find the signal 18 Once the signal stren...

Страница 96: ...nd start over from step 16 If 119 is shown under Dish Input 2 move the dish approximately 9 to the east and restart the procedure at step 12 21 Look at the Point Dish Signal menu If you have good signal strength with the check mark in 119 West move the check mark to 110 West If you have good signal strength on 110 West go to step 22 If you do not have good signal strength with the check mark in 11...

Страница 97: ... DishPro logo You must install your DISH antenna system with either all DishPro LNBFs and switches or all Legacy LNBFs and switches If you mix the two the system will not work Note You can have as much as 200 feet of cable between the DishPro LNBF and the DishPro receiver However you must use only RG 6 coaxial cables rated for 950 to 2150 MHz Some cables may say Swept tested for 2150 MHz If you ha...

Страница 98: ...n 6 Mount the dish antenna following the mounting instructions that came with it 7 Connect an RG 6 cable from the DishPro SAT IN connection on the receiver directly to the DishPro LNBF on the Dish 300 Make sure there are no multi dish switches between the LNBF and the DishPro receiver 8 Select Check Switch from the Point Dish Signal menu When the Check Switch screen opens select Check 9 When Check...

Страница 99: ...opens select Check or Test When the procedure completes you will see the Installation Summary screen again This time you should see confirmation for all satellites your dishes are pointed at and Satellite reception verified You should also see that the switch es in your system has been correctly identified Refer to the DishPro wiring diagrams for examples of installation summary screens 14 Press C...

Страница 100: ...hPro Receivers This diagram leaves out grounding to be clear Make sure you ground the system per the National Electrical Code NEC and all local electrical codes When you set up your system following this diagram and run Check Switch the Installation Summary screen should look similar to the one shown below ...

Страница 101: ...aves out grounding to be clear Make sure you ground the system per the National Electrical Code NEC and all local electrical codes When you set up your system following this diagram and run Check Switch the Installation Summary screen should look similar to the one shown below To four DishPro receivers ...

Страница 102: ... leaves out grounding to be clear Make sure you ground the system per the National Electrical Code NEC and all local electrical codes When you set up your system following this diagram and run Check Switch the Installation Summary screen should look similar to the one shown below Two DP34s for Eight DishPro Receivers Three DP34s for Twelve DishPro Receivers ...

Страница 103: ...ground the system per the National Electrical Code NEC and all local electrical codes When you set up your system following this diagram and run Check Switch the Installation Summary screen should look similar to the one shown below DishPro LNBFs Another DISH Network Satellite DISH 300 110 West and 119 West DISH 500 To DishPro Receiver Tuner Inputs One DP34 for four DishPro receivers ...

Страница 104: ...rical codes When you set up your system following this diagram and run Check Switch the Installation Summary screen should look similar to the one shown below When using a DishPro compliant splitter to split the signal from a DishPro single LNBF the receiver whose DP21 switch is connected to the passing side of the splitter must be plugged into a live power outlet at all times If not the DishPro s...

Страница 105: ... you set up your system following this diagram and run Check Switch the Installation Summary screen should look similar to the one shown below When using a DishPro compliant splitter to split the signal from a DishPro single LNBF the receiver whose DP21 switch is connected to the passing side of the splitter must be plugged into a live power outlet at all times If not the DishPro single LNBF will ...

Страница 106: ...o Single LNBF and One DP21 Switch This diagram leaves out grounding to be clear Make sure you ground the system per the National Electrical Code NEC and all local electrical codes Note This setup supports only one receiver from three satellite locations and the other receiver from only two satellite locations ...

Страница 107: ... building make sure that there are no wires or pipes in the area of the holes If you are not comfortable doing this contact a professional in your area Make sure that you follow all safety instructions and building codes 3 Locate each receiver inside the building against or near an outside wall Then drill a hole through the outer wall to pass a cable inside the building If a receiver is located in...

Страница 108: ... obtain a filter from your DSL provider You must also set up each receiver for your telephone system touchtone or rotary pulse and set a telephone number prefix if you need a prefix to make an outside call 1 Display the Installation and Setup menu press MENU then 6 1 4 2 Select the Telephone System option to display the Telephone System Setup menu 3 Select the Touch Tone or the Rotary Pulse option...

Страница 109: ...fix for example dial 9 to get an outside line select the Prefix Code option The receiver displays the same number of boxes highlighting the first box where you must enter the digits Use the Number Pad to enter the prefix code As you enter each number the highlight moves to the next box 6 Move the highlight to the Save option Press the SELECT button to save the settings ...

Страница 110: ...Page 104 Chapter 4 Installation Instructions Notes ...

Страница 111: ...hen let go of the button The TV screen will go blank for a few seconds display a message that the receiver is acquiring the satellite signal and then the picture will return 3 Tune to the DISH Network info channels or see our www dishnetwork com Web site for tips 4 Use the troubleshooting tables starting on the next page In any troubleshooting table here s what to do a Look under What s Happening ...

Страница 112: ...t If you want to be able to watch all of a program you re auto recording don t change the channel You can only auto record for about one hour You find the receiver didn t on demand record a program Maybe you didn t press the remote control RECORD button while you watched the program or set an Event Timer to record it Maybe the receiver ran out of room to on demand record the program You may have h...

Страница 113: ...use Quick Record highlight a future program but don t press the SELECT button Instead press the RECORD button Note You can use the Create an Event Timer menu if you want because it s almost as fast as Quick Record You try to set an event timer and the receiver displays amessage that the program is locked You must enter the password before you can set an event timer for a locked program First enter...

Страница 114: ...dit or delete one of the overlapping event timers You set a Once event timer but the timer doesn t work at the time you expect The program time changed A Once event timer always works at the program s actual time You stop an event timer for one showing of a program that comes on each day or each week but the timer works for the next showing When you stop a repeated event timer this applies only to...

Страница 115: ...r Frequency list on this menu Remember with Quick Record you can set only a Once one time only timer You edit an automatic event timer The timer doesn t start or doesn t end with a program s start and stop times When you edit an automatic event timer you change it to a manual event timer A manual timer starts and stops at the times you set not the start and stop times of any program If you want an...

Страница 116: ...Favorite List The receiver displays an Error message You can t apply an empty list Choose another list to apply or add at least one channel to the empty list A Favorite List doesn t show channels you know you added to it If you hide adult channels and lock the receiver no Favorite List shows adult channels Unlock the receiver for the list to show adult channels What s Happening What s Wrong What Y...

Страница 117: ...er right hand corner When you first open the Program Guide or when you change the channel there may be a brief delay before a picture shows up You try to display future programs in the Program Guide or Browse Banner but find you can t The Program Guide and Browse Banner can display programs that ll come on for some time into the future but not forever Check the Program Guide again later By then it...

Страница 118: ...r what to do If this doesn t work call the Customer Service Center for help 005 Maybe we haven t yet linked the receiver with the Smart Card via the satellite signal If you ve called the Customer Service Center to order your program packages wait a few minutes to see if the message goes away If it doesn t goes away call the Customer Service center Try resetting the receiver using the front panel P...

Страница 119: ...er to order your program packages do so Make sure all the cables are in place and their connections are tight Make sure the satellite dish has a clear line of sight to the satellite Check whether branches or leaves have grown into the line of sight Make sure the Signal Strength bar in the Point Dish Signal menu is green and displays the word Locked 025 026 Maybe the receiver briefly lost the satel...

Страница 120: ...es or other devices between the receiver and the phone jack 093 094 Maybe you reset the receiver to the factory defaults which means the settings it had when we shipped it from the factory If you want to reset the receiver to its factory default settings select the Yes option If you don t select the No option 303 You set up the receiver to get an upgrade of the latest software via the satellite si...

Страница 121: ...pening What s Wrong What You Can Do You have connected a phone line to the receiver but when it tries to dial out it fails Maybe you have a Digital Subscriber Phone Line DSL Install a DSL filter between the receiver and the telephone wall jack Make sure no other device in the phone line is blocking the signal between the receiver and the phone jack While you re making a phone call you hear clicks ...

Страница 122: ...s on and there s a picture on the TV screen but the picture has sparkles or is grainy has a herringbone pattern lacks color or vertical hold or wobbles or looks washed out or fuzzy Maybe the TV set isn t working right If you connect the receiver to the TV with only the TV ANTENNA CABLE IN and TV SET OUT ports maybe there s a strong local broadcast on the same channel or on a channel next to the on...

Страница 123: ...he remote control is missing batteries maybe you put the batteries in the remote the wrong way or maybe the batteries are weak or dead Maybe you didn t set the remote to the mode for the device you want to control Maybe you didn t set up the remote to control the device Maybe UHF signals from a neighbor s remote are blocking signals from your remote Remember the remote control uses IR signals to c...

Страница 124: ...Maybe you didn t connect the audio cables the right way Check the volume level on the TV or audio device Turn off the mute or turn up the volume Check the audio connectors and cables from the receiver to the TV or the sound system Check the TV speakers or the sound system You hear a foreign language with a program Maybe you set the receiver to select a foreign language See Change Program Languages...

Страница 125: ... until the test is done If the phone connection is okay the receiver displays a message that says so If the receiver displays a message that it needs to make a toll free call to the Customer Service Center select the Dial Out option The receiver displays a message that asks you to wait until it finishes the call When the receiver finishes the call select the Cancel option If you didn t connect the...

Страница 126: ...anada 695 711 Grand 695 Grandiente 711 Grundig 547 Hallmark 695 Harmon Kardon 561 Hinari 534 Hitachi 523 526 548 549 550 551 552 553 554 555 585 597 626 702 718 Infinity 566 TELEVISION CODES JBL 566 JC Penney 503 505 506 516 526 531 543 596 701 714 Jenson 556 573 JVC 557 558 559 560 Kawasho 548 561 712 Kenwood 506 573 712 Kloss 522 561 610 698 KTV 526 539 540 541 691 696 712 Lloyds 695 Lloytron 52...

Страница 127: ...u 695 Sharp 526 585 591 605 606 607 608 628 629 Siemens 591 Signature 518 Silver 573 Solavox 612 Sony 500 578 609 619 622 690 Soundesign 525 536 541 691 695 Spectricon 520 620 Squareview 694 SSS 505 541 573 691 712 Supra 523 Supre Macy 522 Sylvania 506 525 536 564 565 566 568 573 575 600 610 611 712 Symphonic 632 692 694 Tandy 605 613 Tatung 509 698 Technics 508 Techwood 523 573 Teknika 504 505 51...

Страница 128: ... 573 NEC 530 531 532 562 592 594 599 600 601 602 603 604 Olympic 553 Optonica 585 Orion 506 507 Panasonic 521 522 523 524 526 553 554 598 614 628 633 Pentax 537 592 Perdio 588 Philco 553 554 611 Philips 553 554 565 585 Pioneer 553 562 573 574 575 576 600 Portland 546 593 Proscan 553 605 Pulsar 533 Quartz 581 Quasar 553 554 577 578 Radio Shack 607 608 609 610 RCA 525 526 527 528 529 537 553 591 605...

Страница 129: ...Kenwood 676 691 728 Luxman 681 686 LXI 665 Magnavox 705 Marantz 708 Memorex 675 692 NAD 669 696 Nakamichi 671 694 NEC 716 Onkyo 660 662 678 689 699 700 Optimus 664 697 Panasonic 652 707 Pioneer 658 661 667 668 675 679 688 692 702 Proton 654 705 Quasar 652 707 RCA 655 704 729 Realistic 665 666 Scott 659 701 Sharp 712 713 714 715 Sherwood 670 695 Sony 673 680 687 693 730 731 Symphonic 666 Teac 684 T...

Страница 130: ...Page 124 Chapter 5 Reference Notes ...

Страница 131: ...er connections in your system See Running Coaxial Cabling Note If you are installing a DishPro receiver into a system with DishPro LNBFs and or switches you can have as much as 200 feet of cable between the LNBF and the receiver However you must use only RG 6 coaxial cables rated for 950 to 2150 MHz Some cables may say Swept tested for 2150 MHz If you have any doubt about this ask your Dish retail...

Страница 132: ...check and retighten by hand the cable connections between your receiver LNBFs and switches in your system Then press Retest or Test to rerun Check Switch again 7 Select OK or Cancel to return to the Point Dish Signal screen Then select Cancel to exit the Point Dish Signal screen 8 An Attention screen will open This screen asks if the mounting and positioning of your dish is complete with a Locked ...

Страница 133: ...he remaining part of the original warranty period Note Parts means items included in this package which may include the satellite dish assembly receiver LNBF remote control or dish mounting hardware It does not include other parts purchased separately What the Warranty Does Not Cover This warranty does not cover replacement of lost or damaged Smart Cards This warranty does not cover installation o...

Страница 134: ...er model number ready Display the Important System Information menu to find these numbers 2 A Customer Service Representative will assist you 3 If the Representative determines you should return any equipment you will be directed to call a Return Authorization representative Before shipping any equipment you must talk to a Return Authorization representative and must obtain a Return Authorization ...

Страница 135: ...ount or credit card will be charged the market price of the replacement Post Receipt Exchange Program You may choose to ship the equipment to us at your cost To provide faster service upon receipt of your equipment you will be shipped a replacement Your original equipment will not be available for return The equipment you return will be checked to verify whether it is covered under this warranty I...

Страница 136: ...ing toll free number and email address 1 800 333 DISH feedback echostar com or you may write to DISH Network Customer Service Center P O Box 33577 Northglenn CO 80233 and for general knowledge try our website at www dishnetwork com Dish Network is a trademark of EchoStar Satellite Corporation 1 THE DISH NETWORK SERVICE A Services Defined DISH Network offers a wide variety of video and audio progra...

Страница 137: ...ewing of the Services in a commercial establishment or any other area open to the public we may terminate the Services and in addition to all other applicable fees you agree to pay us the difference between the price actually paid for the Services and the full commercial rate for such Services regardless of whether we have or had the commercial rights to such Services The payment of that amount an...

Страница 138: ... other charges to your account B You agree to pay us in full monthly by the payment due date for the Services and for any other charges due us including any fees set forth in this Section 2 Payment of your bill after the due date will result in you paying us a Late Payment Fee Other fees and charges may also be assessed If partial payments are made they will be applied first to the oldest outstand...

Страница 139: ...orrections Failure to timely notify us of a dispute shall constitute acceptance of the bill Undisputed portions of the billing statement must be paid before the next billing statement is issued to avoid an administrative fee for late payment All payments for Services must be made directly by you to us DISH Network shall have no obligation to provide Services for which payment is made by you to a t...

Страница 140: ...unauthorized modification to the Smart Card is strictly prohibited and may result in and subject you to legal action You agree to return the Smart Card to us upon request B Smart Cards are nontransferable Your Smart Card will only work in the DISH Network receiver to which it was assigned by DISH Network If you report to the Customer Service Center that your Smart Card was lost damaged defective o...

Страница 141: ... charge you for any repairs that are necessitated by any damage to or misuse of the Equipment 6 TRANSFER OF ACCOUNT SERVICES OR EQUIPMENT DISH Network may sell assign or transfer your account to a third party without notice to you You may not assign or transfer your Services without our written consent which will not be unreasonably withheld We may however refuse to allow you to assign or transfer...

Страница 142: ...ations of the state and local area where Service is provided These terms and conditions are subject to amendment modification or termination if required by such regulations or laws If any provision in this Agreement is declared to be illegal or in conflict with any law or regulation that provision may be deleted or modified without affecting the validity of the other provisions D Other This docume...

Страница 143: ...to be connected to a compatible modular jack that is also compliant See installation instructions for details Connection to party line service is subject to state tariffs Contact the state public utility commission public service commission or corporation commission for information If your home has specially wired alarm equipment connected to the telephone line ensure the installation of this equi...

Страница 144: ...tion against harmful interference in a residential installation This equipment generates uses and can radiate radio frequency energy and if not installed and used in accordance with the instructions may cause harmful interference to radio communications However there is no guarantee that interference will not occur in a particular installation If this equipment does cause harmful interference to r...

Страница 145: ...imer 54 Event Timer Frequencies 49 Event Timer Types 49 How Many Event Timers You Can Set 56 Manual Event Timers 48 Pay Per View Programs Locked Programs and Blacked Out Programs 56 Power Off and Event Timers 56 Quick Record 50 Set a Manual Event Timer 52 Set an Automatic Event Timer 51 Start One Minute Early Check Box 50 When an Event Timer Works 50 When Event Timers Overlap 53 F Fan Receiver 17 ...

Страница 146: ...ntrol a VCR 56 Front Panel 15 Front Panel Buttons 15 Lock or Unlock the Receiver 47 Menus 27 Radio Interference 138 Reset the Receiver 80 Set Up the Accessory Jack 81 Telephone Communication 137 Receiver Back Panel 17 Receiver Front Panel 15 Receiver Menus 27 Cancel a Procedure 28 Make a Choice in a Menu 27 Open or Close a Menu 27 Remote Control 20 Address Change the 26 Attenuator Install an 19 Ba...

Страница 147: ...nology that is protected by U S patents and other intellectual property rights Use of this copyright protection technology must be authorized by Macrovision and is intended for home and other limited pay per view uses only unless otherwise authorized by Macrovision Reverse engineering or disassembly is prohibited Purchase Location Name Purchase Location Telephone Number Receiver Serial Number Rece...

Страница 148: ......
Отзывы: