10
Chapter 1
Choose Your Setup
Getting Started
Choose Your Setup
10
Choose Your Setup
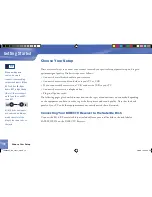
There are several ways to connect your receiver to match your particular equipment setup and to gain
optimum signal quality. The basic steps are as follows:
• Connect the satellite dish cable to your receiver.
• Connect the receiver audio and video to your TV or VCR.
• If you connected the receiver to a VCR, connect the VCR to your TV.
• Connect the receiver to a telephone line.
• Plug in all power cords.
The following pages give detailed instructions on the types of connections you can make, depending
on the equipment you have, in order to get the best picture and sound quality. Note that the back
panels of your TV and other equipment may not exactly match those illustrated.
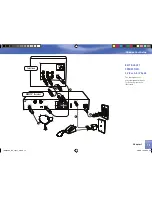
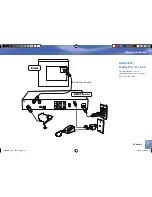
Connecting Your DIRECTV Receiver to the Satellite Dish
Connect the RG-6 RF coaxial cable (not included) from your satellite dish to the jack labeled
SATELLITE IN on the DIRECTV Receiver.
When working with
cables, be sure to
connect corresponding
outputs and inputs (Video
OuT to Video IN, Right
Audio OuT to Right Audio
IN, etc.). Never connect
an IN to an IN or an OuT
to an OuT.
All A/V jacks and inputs
are color coded. Always
match the color of the
plug to the same color of
the jack.
OUT
IN
TIP
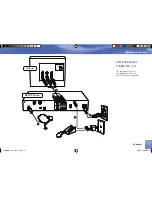
Connecting Your DIRECTV Receiver to your TV or VCR
Depending on the connections on the back of your TV or VCR, you have the following options:
• S-Video & A/V Audio Connection (Best Quality)
• A/V Connection (Better Quality)
• RF Coaxial Connection (Good Quality)
These connections are described on the following pages.
NOTE: To obtain optimum picture quality, make sure the receiver is connected directly to the TV. Connecting the
receiver to the TV through a VCR or DVD recorder is known to yield less than optimum picture quality, particularly
when viewing copy-protected programming.
Note
16855980_L12_Jan27_2.indb 10
2/6/08 12:48:25 PM
Содержание L12
Страница 1: ...DIRECTV RECEIVER USER GUIDE Model L12 16855980_L12_Jan27_2 indb 1 2 6 08 12 47 16 PM ...
Страница 8: ...16855980_L12_Jan27_2 indb 8 2 6 08 12 47 53 PM ...
Страница 9: ...ix 16855980_L12_Jan27_2 indb 9 2 6 08 12 47 54 PM ...
Страница 12: ...xii 16855980_L12_Jan27_2 indb 12 2 6 08 12 48 02 PM ...
Страница 76: ...Notes 64 16855980_L12_Jan27_2 indb 64 2 6 08 12 50 30 PM ...
Страница 77: ...Notes 65 65 16855980_L12_Jan27_2 indb 65 2 6 08 12 50 31 PM ...
Страница 78: ...Notes 66 66 16855980_L12_Jan27_2 indb 66 2 6 08 12 50 33 PM ...
Страница 79: ...Notes 67 16855980_L12_Jan27_2 indb 67 2 6 08 12 50 35 PM ...
Страница 80: ...Notes 68 68 16855980_L12_Jan27_2 indb 68 2 6 08 12 50 37 PM ...
Страница 81: ...Notes 69 16855980_L12_Jan27_2 indb 69 2 6 08 12 50 39 PM ...
Страница 84: ...TOCOM 16855980 Printed in USA 16855980_L12_Jan27_2 indb 72 2 6 08 12 50 53 PM ...

