23
H.264 Video Surveillance System Setup Guide
SECTION 4: DVR SETUP
7. Click the
q
icon at the right end of the
FRAME RATE
line. From the dropdown list, select a number between 1 and 30
(frames per second). The higher the frame rate (30 fps), the smoother the video motion. However, higher frame rates consume
storage space faster.
8. Click the
q
icon at the right end of the
PACKTIME
line. From the dropdown list, select either 15, 30, 45, or 60 (minutes).
Packtime is the time length of video file segments that are off-loaded (backed up).
9. Click the
q
icon at the right end of the
RECORD MODE
line. From the dropdown list, select either ALWAYS or SCHEDULE.
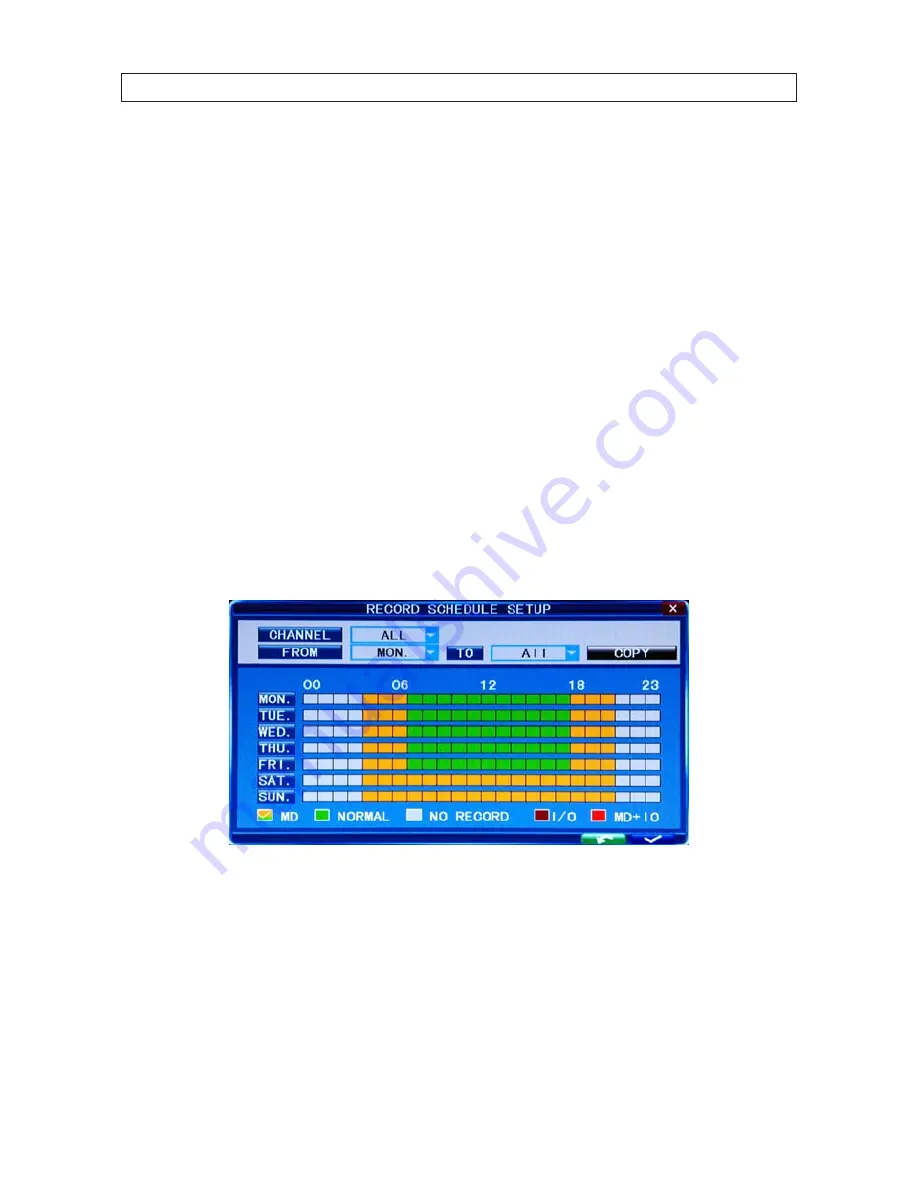
ALWAYS causes the DVR to record continuously. Selecting SCHEDULE allows you to open a window to configure the DVR to
record by the hour of the day and day of the week, either by motion sensing, continuous recording, or not recording. See
Scheduled recording below.
10. If you are configuring the camera channels differently, repeat this procedure for the other camera channels.
Scheduled recording
If the RECORD MODE -SCHEDULE is selected:
11. Click the
>
> icon on the
RECORD
tab to open the RECORD SCHEDULE SETUP window.
12. Click the
q
icon at the right end of the
CHANNEL
line. From the dropdown list, select the channel number to apply the
recording schedule to, or select ALL to apply the schedule to all cameras.
13. At the bottom of the window, click either the MD (motion detection) or NORMAL (continuous recording) checkbox, then click a
box in the time array to apply that method of recording to that timeslot.
Содержание PDCXX50IR
Страница 6: ...vi www SecurityCamerasDirect com ...


