


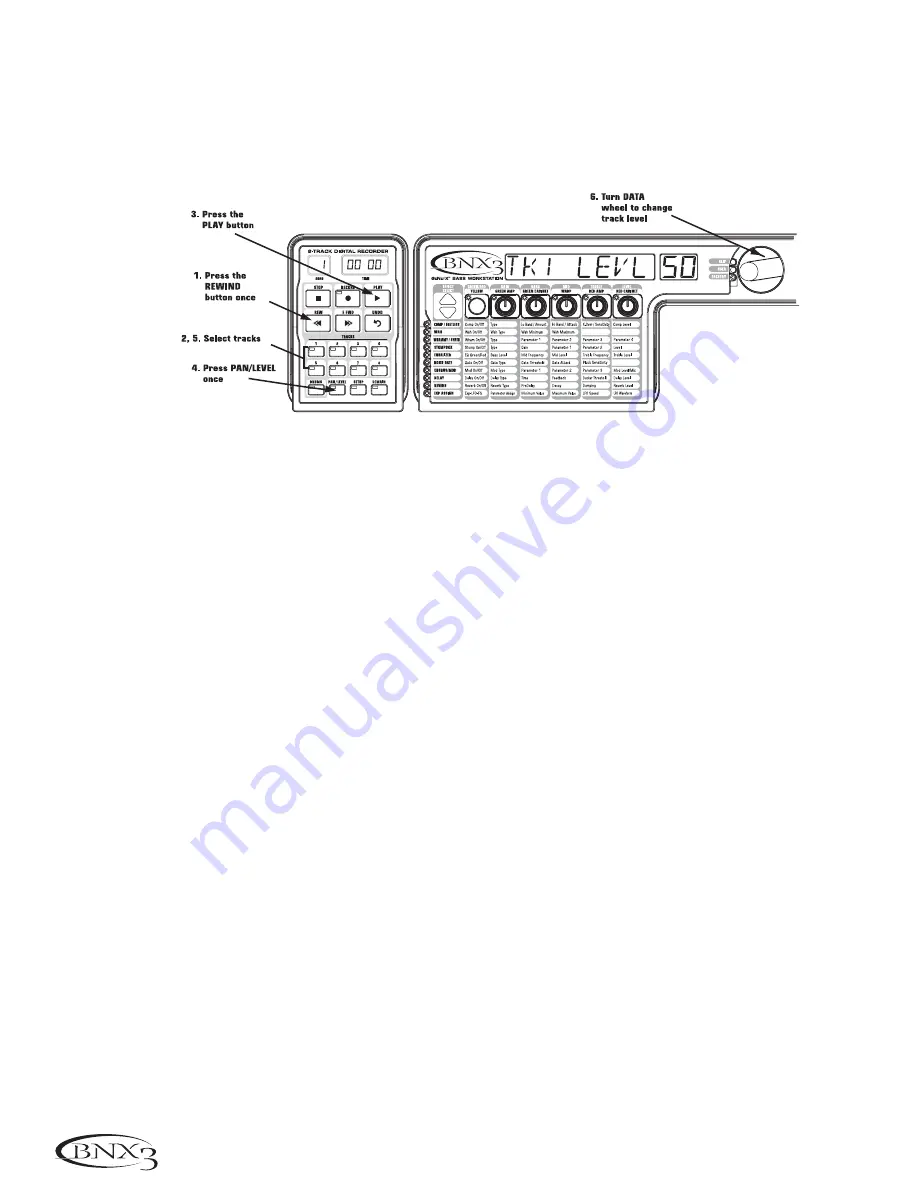
4.To adjust the playback level of the tracks, press the
LEVEL / PAN
button once. It lights green.
5. Press any track button that is playing back. It flashes green. The main display reads
tkx levl 50
(X = track number).
6.Turn the
DATA WHEEL
to adjust this track’s playback level.
7. Select other tracks and adjust their playback level by repeating steps 5 and 6.
8. Press the
LEVEL / PAN
button twice to exit.
Setting each track’s pan:
1. Press the
LEVEL / PAN
button twice. It lights green and the main display reads
tkx cntr 0
(X=track number).
2.Turn the
DATA WHEEL
to the left to pan the track to the left in the stereo field (
tkx left
).
Turn the
DATA WHEEL
to the right to pan the track to the right (
tkx rght
).
3. Select other tracks and adjust their pan position by pressing the track button and repeating step 2.
4. Press the
LEVEL / PAN
button again to exit.
Recording Multiple Tracks
After a track has been recorded, you may want to record other tracks that play along with it. Previously
recorded track(s) should already be in play mode and are ready for monitoring while you record your
new track. To record a new track with a previously recorded track, follow these steps:
1. Press the
RECORD
button. The next available track for recording automatically lights red, indicating it
is armed to record, and the recorder begins recording on this track from the beginning of the song.
The TIME display begins counting off the recording time. If Autostop is turned on, the recorder will
automatically stop when the longest track playing back is finished. If Autostop is turned off, go to step
2.
2.When recording is complete, press the
STOP
button.
Changing Track Status
Each recorded track can be in 1 of 4 states; playback, record, merge, or off. Tracks with recorded material
can be turned on for playback (TRACK button is lit green), armed for recording (TRACK button is
flashing red), armed for merging other recorded tracks to it (TRACK button is flashing yellow) or turned
off (button is not lit). If a track does not have material recorded on it, it can only be enabled for
recording, merge, or turned off. To change the status of a track, do the following:
1. Press any
TRACK
button repeatedly until it lights green, flashes red, or flashes yellow.
If the button lights green, there is recorded material present. If the RECORD or PLAY button is pressed
the material is played back. If the button light flashes red, and the RECORD button is pressed (the
button light is a solid red) the track is recorded on. If the light flashes yellow, it merges armed tracks for
playback, including recorded material already present on this track.
52
Recorder
Содержание GeNetX BNX3
Страница 1: ...GENETX BASS WORKSTATION TM USER S GUIDE...


