


OPERATOR’S MANUAL
Seed Manager SE
11001-1359A-200810
54 / ALARMS
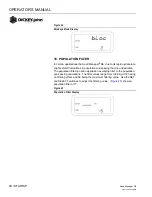
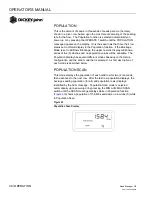
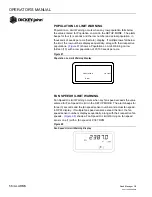
ALL ROWS FAILED
All Rows Failed alarm occurs at the end of each row when the implement is
lifted from the ground. The alarm sounds continuously for three (3)
seconds, the ROWS and FAILED messages appear, and the row numbers
display sequentially. After the alarm silences, the console reverts to the
previous Operate Mode function.
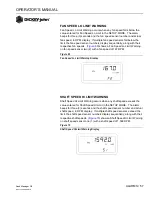
ROWS FAILED
Rows Failed alarm occurs when two (2) seeds per second or less are
detected. The alarm sounds continuously and the row number of the failed
sensor appears with the messages ROW and FAILED. If multiple rows fail,
the numbers of the failed rows are sequentially displayed at the rate of one
per second. This alarm can be acknowledged by pressing the ALARM
switch. This will silence the audible alarm, but the display will remain until
the condition ceases or the user enters the SETUP MODE Row Status and
turns the faulty rows to the OFF status. After the audible alarm is
acknowledged, the only functions that are available are in the SETUP
MODE (reference the SETUP MODE section for more information).
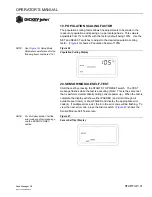
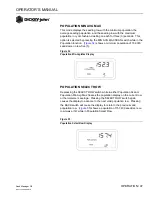
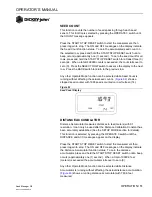
DISTANCE SENSOR FAILED
If seed flow is detected without a signal from the ground speed sensor and
the monitor is not in seed count function for a duration of thirty (30)
seconds, the alarm sounds continuously for five (5) seconds and the
console automatically enters a mode to manually enter a ground speed
value. A manual (simulated) ground speed value, in MPH (Km/h) appears
on the display along with the SETUP, SPEED, and FAILED messages.
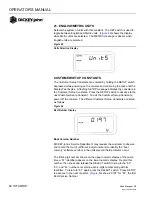
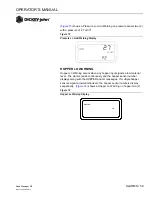
To continue in the Operate Mode without a functioning ground speed
sensor, a suitable manual ground speed value must be entered using the
SELECT and SET switches. (
Figure 65
) shows the above mentioned Setup
display with a manual ground speed of 5.3 MPH entered. Press the desired
Operate Mode switch to return to seeding.
NOTE: It is important to maintain
ground speed close to the
manually entered value to
ensure accurate monitoring.
The console will continue to use this manual ground speed until the console
is next powered off or the ground speed sensor signal begins to function
again. If the damaged ground speed sensor or cable cannot be repaired or
replaced before it is desired to continue seeding, the same alarm display
will reappear each time power is applied to the console with the manual
ground speed value last entered being retained. Again, operation can
continue by pressing the switch for the desired Operate Mode.
When the ground speed sensor has been properly repaired or replaced,
normal operation will automatically resume without having to deactivate the
manual ground speed. However, it is very important to remember to
immediately repeat the SETUP MODE Distance Calibration before
resuming operation if a different ground speed sensor has been installed.
Otherwise, the previously determined Distance Calibration Constant will be
Содержание seed manager
Страница 4: ...OPERATOR S MANUAL Seed Manager SE 11001 1359A 200810 2 SAFETY NOTICES...
Страница 6: ...OPERATOR S MANUAL Seed Manager SE 11001 1359A 200810 4 INTRODUCTION...
Страница 22: ...OPERATOR S MANUAL Seed Manager SE 11001 1359A 200810 20 INSTALLATION AND SETUP...
Страница 46: ...OPERATOR S MANUAL Seed Manager SE 11001 1359A 200810 44 STARTUP...
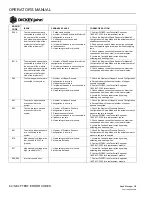
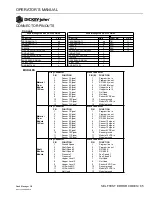
Страница 64: ...OPERATOR S MANUAL Seed Manager SE 11001 1359A 200810 62 SELF TEST ERROR CODES...
Страница 70: ...OPERATOR S MANUAL Seed Manager SE 11001 1359A 200810 68 SELF TEST ERROR CODES...


