background image

66

ENGLISH

Input Setup

Remote control operation 

buttons

Move the cursor 
(Up/Down/Left/Right)

Confirm the setting

Return to previous menu

Setting items

Setting details

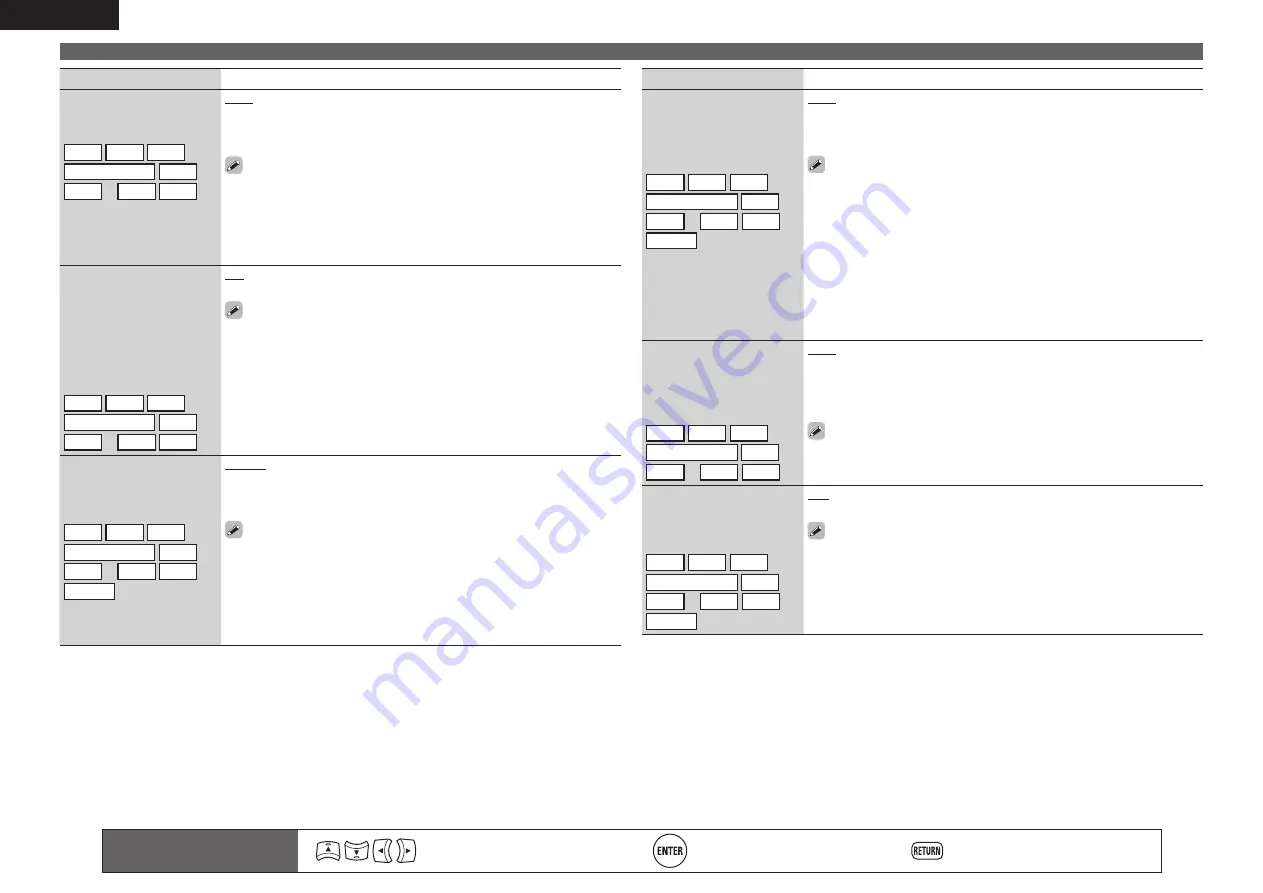
Resolution

Set the output resolution.
Resolution (Analog) :  
Analog Video
Resolution (HDMI) : HDMI

BD


DVD


TV

z

SAT/CBL


DVR


GAME

z


V.AUX


DOCK

NET/USB

Auto

  :  The  number  of  pixels  the  TV  connected  to  the  HDMI  output 

connector supports is detected automatically and the appropriate output 
resolution is set.

480p

 / 

576p

 / 

1080i

 / 

720p

 / 

1080p

 / 

1080p:24Hz

 : Set the output resolution.

• This  item  can  be  set  when  “i/p  Scaler”  is  set  to  anything  other  than 

“OFF”.

• When “i/p Scaler” is set to ”Analog & HDMI”, the resolution of both the 

analog video input signal and HDMI input signal can be set.

• To watch 1080p/24Hz pictures, use a TV that supports 1080p/24Hz video 

signals.

• When  set  to  “1080p/24Hz”,  you  can  enjoy  film-like  pictures  for  film 

sources (in 24 Hz). For video sources and mixed sources, we recommend 
setting the resolution to “1080p”.

• It is not possible to convert a 50 Hz signal into 1080p/24Hz. It is output 

at a resolution of 1080p/50Hz.

Progressive Mode

Set an appropriate 
progressive conversion 
mode for the source video 
signal.

BD


DVD


TV

z

SAT/CBL


DVR


GAME

z


V.AUX


DOCK

Auto

  :  The  video  signal  is  automatically  detected  and  the  appropriate 

mode is set.

Video1

 : Select mode suitable for video playback

Video2

  :  Select  mode  suitable  for  video  and  30-frame  film  material 

playback.

 This item can be set when “i/p Scaler” is set to anything other than 

“OFF”.

Aspect

Set the aspect ratio for the 
video signals output to the 
HDMI.

BD


DVD


TV

z

SAT/CBL


DVR


GAME

z


V.AUX


DOCK

NET/USB

Full 

: Output at 16:9 aspect ratio.

Normal

 : Output at 4:3 aspect ratio.

 “Aspect” can be set when “i/p Scaler” is set to anything other than 

“OFF”.


z

 “TV” or “GAME” can be set when “HDMI” (

v

page 65) or “Component” (

v

page 65) has been 

assigned.

Setting items

Setting details

Video Mode

Make settings for video 
processing.

BD


DVD


TV

z

SAT/CBL


DVR


GAME

z


V.AUX


DOCK

Auto

  :  Process  video  automatically  based  on  the  HDMI  content 

information.

Movie

 : Process video normally.

Game

 : Always process video appropriate for game content.

• If “Video Mode” is set to “Auto”, the mode is switched according to the 

input contents.

• If a source is played in both MAIN ZONE (audio and video) and ZONE2 

(audio only) modes in the same room, audio in MAIN ZONE and ZONE2 
modes may sound out of synchronization, but this is not malfunction. In 
this case, setting to “Game” mode may improve audio synchronization.

Video Convert

The input video signal is 
converted automatically 
in conjunction with the 
connected TV (

v

page 13 

“Converting input video 
signals for output (Video 
conversion function)”).

BD


DVD


TV

z

SAT/CBL


DVR


GAME

z


V.AUX


DOCK

ON

 : The input video signal is converted.

OFF

 : The input video signal is not converted.

• When a non-standard video signal from a game machine or some other 

source is input, the video conversion function might not operate. In this 
case set “Video Convert” to “OFF”.

• When “Video Convert” is set to “OFF”, the video conversion function 

does not work. In this case, connect this unit and TV with the same type 
of cable.

i/p Scaler

Convert the input source’s 
resolution to the resolution 
set at “Resolution”.

BD


DVD


TV

z

SAT/CBL


DVR


GAME

z


V.AUX


DOCK

NET/USB

Analog

 : Use i/p scaler function for analog video signal.

Analog & HDMI

 : Use i/p scaler function for analog and HDMI video signal.

HDMI

 : Use i/p scaler function for HDMI video signal.

OFF

 : Do not use i/p scaler function.

• “Analog & HDMI” and “HDMI” can be set for input sources for which an 

HDMI input connector is assigned.

• Which items can be set depend on the input source assigned to each 

input connector.

• This  function  is  not  effective  when  the  input  signal  is  x.v.Color,  3D, 

sYCC 601 color, Adobe RGB color, Adobe YCC 601 color or computer 
resolution.

Содержание AVR-3311

Страница 1: ...3 Basic version Version basique Versi n b sica v 12 Advanced version Version avanc e Versi n avanzada v 43 Information Part names and functions vpage 95 v 94 Informations Nomenclature et fonctions vp...

Страница 2: ...warnings 4 Follow all instructions 5 Do not use this apparatus near water 6 Clean only with dry cloth 7 Do not block any ventilation openings Install in accordance with the manufacturer s instructions...

Страница 3: ...evedete di non utilizzare l unit per un lungo periodo di tempo Non coprite i fori di ventilazione Non inserite corpi estranei all interno dell unit Assicuratevi che l unit non entri in contatto con in...

Страница 4: ...den folgenden Standards entspricht EN60065 EN55013 EN55020 EN61000 3 2 und EN61000 3 3 Following the provisions of low voltage directive 2006 95 EC and EMC directive 2004 108 EC the EC regulation 127...

Страница 5: ...cting a digital camcorder 18 Connecting a control dock for iPod 19 Connecting an iPod or USB memory device to the USB port 19 Connecting an antenna 20 Connecting a record player 20 Connecting a CD pla...

Страница 6: ...tion which reproduces TV sound with this unit via an HDMI cable used for connecting the unit and a TVz1 z z1 The TV should support the ARC function Internet radio music and photo streaming via network...

Страница 7: ...age 44 n n Before connecting the unit turn off the power to all devices n n For operation of the connected devices refer to the user manuals for each device Play back disc vpage 11 Enjoy Blu ray Disc...

Страница 8: ...age provides the speaker installation procedure for the 7 1 channel playback using surround back speakers as an example The default setting is 7 1 channel You can also perform 5 1 channel playback To...

Страница 9: ...tlet AC 230 V 50 Hz Power cord supplied HDMI cable sold separately HDMI cable sold separately Blu ray Disc player TV NOTE Do not plug in the power cord until all connections have been completed Do not...

Страница 10: ...unds Cell phones should be placed away from all audio electronics during the measurement process as Radio Frequency Interference RFI may cause measurement disruptions even if the cell phone is not in...

Страница 11: ...annel system with surround back speakers For the installing connecting and setup methods of speakers other than the 7 1 channel system with surround back speakers see page 44 Set up speakers Audyssey...

Страница 12: ...ion buttons Move the cursor Up Down Left Right Confirm the setting Return to previous menu STEP 2 Speaker Detection STEP 3 Measurement In STEP 2 you will perform measurements at the main listening pos...

Страница 13: ...SETUP AUDYSSEY AUTO SETUP ENTER Exit Turn Dynamic Volume on and exit Auto Setup Yes No MultEQ XT For details of Dynamic Volume settings see page 72 n n When turning Dynamic Volume on Use o to select Y...

Страница 14: ...connections Examples Error details Measures Caution No microphone or Speaker Retry Check cause of problem AUTO SETUP AUDYSSEY AUTO SETUP RETURN Cancel MultEQ XT The connected setup microphone is brok...

Страница 15: ...volume VOL d Volume up VOL f Volume down MUTE Muting 4 Set the listening mode Set the listening mode according to the playback contents cinema music etc or according to your liking vpage 40 Selecting...

Страница 16: ...25 DVD player vpage 15 17 vpage 25 Set top box Satellite tuner or cable TV vpage 15 17 Digital video recorder vpage 15 18 Game console vpage 15 Digital camcorder vpage 18 Control dock for iPod vpage...

Страница 17: ...als for MAIN ZONEH HDMI connector Component video connectors S Video connector Video connector Monitor HDMI connector Component video connectors Component video connectors Component video connectors S...

Страница 18: ...lor signal transfer is connected use a cable compatible High Speed HDMI cable or High Speed HDMI cable with Ethernet When the ARC function is used connect a device with a Standard HDMI cable with Ethe...

Страница 19: ...dio specifications of the connected device regarding permissible inputs Connecting to a device equipped with a DVI D connector When an HDMI DVI conversion cable sold separately is used the HDMI video...

Страница 20: ...rately Optical cable IN VIDEO AUDIO OPTICAL OUT VIDEO COMPONENT VIDEO Y PB PR IN TV Set this to change the digital input connector or component video input connector to which the input source is assig...

Страница 21: ...r or component video input connector to which the input source is assigned Input Assign vpage 64 in Set as Necessary Connecting a set top box Satellite tuner cable TV You can watch satellite or cable...

Страница 22: ...camcorder You can enjoy video and audio from a digital camcorder You can enjoy games by connecting a game machine via the V AUX input connector In this case select the input source to V AUX For instr...

Страница 23: ...by the iPhone noise may be output from this device Connecting an iPod or USB memory device to the USB port You can enjoy music stored on an iPod or USB memory device Cables used for connections To co...

Страница 24: ...a broadcast signal vpage 28 Listening to FM AM broadcasts fix the antenna with tape in a position where the noise level becomes minimal w e q FM outdoor antenna Direction of broadcasting station 75 co...

Страница 25: ...the channels provides an even greater sound presence Select the terminal to use and connect the device Cables used for connections Audio cable sold separately Audio cable White Red R L R L Audio cabl...

Страница 26: ...le CAT 5 or greater recommended Use only shielded STP or ScTP LAN cable which is available at retailer Some flat type Ethernet cables are easily affected by noise We recommend using a normal type cabl...

Страница 27: ...ioning units in addition to your audio and video devices External serial controller Perform the operation below beforehand q Turn on the power of this unit w Turn off the power of this unit from the e...

Страница 28: ...ect ENTER The currently selected input source is highlighted q w e q Input Source The name of the highlighted input source is displayed w Recently used sources The recently used input sources up to fi...

Страница 29: ...back audio only q Use a DENON control dock for iPod to play back DENON control dock for iPod usable on this unit ASD 1R ASD 11R n n Listening to music on an iPod 1 Prepare for playback q Connect the...

Страница 30: ...k starts n n Viewing photos and videos on an iPod in the Remote mode This unit can play back on a TV screen photos and data stored on an iPod equipped with a slide show or video function 1 Press and h...

Страница 31: ...is played 6 Use ui to select the item then press ENTER or p to select the file to be played 7 Press ENTER p or 1 Playback starts You can specify the duration of the on screen display to be displayed d...

Страница 32: ...eset automatically at Auto Preset vpage64 If AutoPreset isperformedafterperforming Manual Preset the Manual Preset settings will be overwritten 1 Tune in the broadcast station you want to preset 2 Pre...

Страница 33: ...tegory Traffic Information Radio Text ON SEARCH Mode A5 FM 90 10MHz Tuning CH 3 Press CH or CH The search for RDS stations begins automatically If no RDS stations are found with the above operation al...

Страница 34: ...DATA is displayed n n Tuner FM AM operation Operation buttons Function CH Preset channel selection MENU Amp menu uio p Cursor operation ENTER Enter setting SEARCH Direct frequency tuning RDS search RE...

Страница 35: ...44 1 48 88 2 96 kHz flac n n About Flickr Flickr is an online photograph sharing service that started in 2004 You can use the this unit to view photographs that have been made public by Flickr users Y...

Страница 36: ...le reproduction we recommend playback in RESTORER mode vvpage 73 The default setting is Mode3 You can specify the duration of the on screen display to be displayed default 30 sec at menu NET USB vvpag...

Страница 37: ...s SEARCH then press o previous page or p next page To cancel press ui or SEARCH twice z2 When the menu screen is displayed press SEARCH twice then press o p to select the first letter you want to sear...

Страница 38: ...Preset channel block selection MEMORY Favorites Preset memory registration TV POWER TV power on standby Default SONY TV INPUT Switch TV input Default SONY Repeat playback vpage 68 Repeat Random playba...

Страница 39: ...rch for photographs by keyword 5Press ui to select the file and then press ENTER or p The selected file is displayed NOTE Depending on the file format some photographs cannot be viewed n n Flickr oper...

Страница 40: ...brary 1 Use ui to select My Napster Library then press ENTER or p 2 Use ui to select the information or track then press ENTER To play back compressed audio with extended bass or treble reproduction w...

Страница 41: ...GNumbersH 0123456789 6Use ui to select menu and then press ENTER Popular Stations Play popular artists and tags in your area You Recent Stations Play your recent stations Your stations You can play tr...

Страница 42: ...e album art can be displayed while playing the file Slide show function Still picture JPEG files stored on USB memory devices can be played as slide shows The duration each picture is displayed can be...

Страница 43: ...mory device NOTE Note that DENON will accept no responsibility whatsoever for any problems arising with the data on a USB memory device when using this unit in conjunction with the USB memory device U...

Страница 44: ...g mode 2 channel Multi channel Surround Standard playback vpage 40 For 2 channel signal input Surround channel signals are created and played with surround playback For multichannel signal input The s...

Страница 45: ...GHT DOLBY D PL z DOLBY DIGITAL Plus DOLBY DIGITAL Plus DOLBY DIGITAL DOLBY DIGITAL Plus EX DOLBY D EX DOLBY DIGITAL Plus PLgx CINEMA DOLBY D PL x C DOLBY DIGITAL Plus PLgx MUSIC DOLBY D PL x M DOLBY D...

Страница 46: ...front left and right speakers and subwoofer If multichannel signals are input they are mixed down to 2 channel audio and are played 1 Playing the source vpage 25 39 2 Press D ST to select STEREO Ster...

Страница 47: ...vanced connection vpage 44 F Playback Advanced operation vpage 50 F Playback in ZONE2 ZONE3 Separate room vpage 57 F How to make detailed settings vpage 59 F Operating the connected devices by remote...

Страница 48: ...t speakers When using Dolby Pro Logic gz install front height speakers Install the surround back speakers in a position 60 to 90 cm higher than ear level z1 z2 45 Surround speaker 60 90 cm GViewed fro...

Страница 49: ...ront height speaker R SL Surround speaker L FWL Front wide speaker L SR Surround speaker R FWR Front wide speaker R SB Surround back speaker Connect For the method of connecting the 7 1 channel system...

Страница 50: ...nnection connect to the L side of the SURR BACK AMP ASSIGN terminal For speaker settings in this case see When 6 1ch Surround back speaker installed vpage 44 For 6 1 channel Surround back speaker play...

Страница 51: ...d to this unit The same signal is output from each subwoofer terminal Connect Bi Amp connection A bi amp connection is to connect separate amplifiers to the tweeter terminals and woofer terminals of s...

Страница 52: ...up speakers Audyssey Auto Setup vpage 6 of Simple version First install and connect the speakers to this unit Before Auto Setup measurement the settings shown below can be made Changing the amplifier...

Страница 53: ...kip unused ch s measurement for timesaving Amp Assign Channel Select Auto Setup Start AUTO SETUP AUDYSSEY AUTO SETUP ENTER Enter RETURN Cancel MultEQ XT 6 Use ui to select a channel Front Select for s...

Страница 54: ...pending on the connected TV or player Check the owner s manual of each device for details beforehand When PowerOffControl onthemenuissetto OFF vpage78 this unit is not set to standby even if the conne...

Страница 55: ...enter Subwoofer Surround L Surround R S Back L S Back R Fader 0 0dB 0 0dB 0 0dB 0 0dB 0 0dB 0 0dB 0 0dB 0 0dB CHANNEL LEVEL Select Front Rear 4 Use ui to select the speaker The speaker that can be set...

Страница 56: ...an record the audio or video from a different program source while listening to the currently played track 1 Press ZONE2 3 REC SELECT ZONE2 Source is shown on the display 2 Turn SOURCE SELECT until RE...

Страница 57: ...t Yes then press ENTER Power off Attendees component is displayed 3 Press o p to select Yes or No then press ENTER Yes The power of the attendees is turned off and the party mode is canceled No The pa...

Страница 58: ...r e Start playback r Operate Wireless LAN compatible router Mobile terminal device 1 Select the content you want to play from among the mobile terminal devices 2 From the mobile terminal device select...

Страница 59: ...enu vGExample 2H r Click to change the Web control screen setting vGExample 3H t Click when you operate a small screen such as a PDA screen etc vGExample 4H 5 Operate GExample 1H Main zone control scr...

Страница 60: ...nge setup menu operations and zone name on the PDA menu screen GExample 5H Net Audio operating screen ZONE CONTROL NET AUDIO USB MAIN ZONE DENON AVR 3311 Favorites Internet Radio Media Server Flickr O...

Страница 61: ...reo L R ZONE3 w q w q L R ZONE2 and ZONE3 ZONE2 3 MONO Output signal Monaural ZONE2 w q ZONE3 w q w Zone playback by audio output PRE OUT n n Audio connections ZONE2 ZONE3 The audio signals of this un...

Страница 62: ...is set to 10dB 71 Turn MASTER VOLUME after pressing ZONE2 3 REC SELECT on the main unit to adjust the sound volume Turning off the sound temporarily Press MUTE The sound is reduced to the level set a...

Страница 63: ...med 10 4 Manual Setup Make detailed speaker settings Speaker Setup HDMI Setup Audio Setup Network Setup Zone Setup Option Setup MANUAL SETUP Speaker Setup Sets the speaker size and distance the channe...

Страница 64: ...ault HDMI1 HDMI2 None HDMI3 HDMI4 HDMI5 HDMI6 HDMI None Coax1 Opt1 Coax2 Opt2 None None DIGITAL None 1 RCA None 2 RCA None None None COMP INPUT SETUP INPUT ASSIGN e Press ENTER q Input Assign BD HDMI1...

Страница 65: ...l ENTER 0 9 Enter Input Insert CH Delete CH Keyboard SEARCH q w q Character input section w Guide for operation buttons Using the number buttons 1 Display the screen for inputting characters vpage 59...

Страница 66: ...NUAL SETUP NETWORK SETUP OTHER FRIENDLY NAME EDIT RETURN Cancel ENTER Input Select a A Normal SHIFT SEARCH a n 0 _ b o 1 d q 3 e r 4 l y m z g t 6 f s 5 h u 7 i v 8 k x j w 9 c p 2 Clear Space 0 1 Ins...

Страница 67: ...A4 FM 108 00MHz A5 FM 90 10MHz A6 AM 90 10MHz A7 AM 90 10MHz A8 AM 90 10MHz A INPUT SETUP PRESET NAME Change memory blocks RETURN Return 1 7 BD DVD TV SAT CBL DVR GAME V AUX Change HDMI input connecto...

Страница 68: ...o previous menu Auto Preset Use the auto preset function to program radio stations Setting items Setting details Start Start the auto preset process TUNER If an FM station cannot be preset automatical...

Страница 69: ...ut Setup Remote control operation buttons Move the cursor Up Down Left Right Confirm the setting Return to previous menu Setting items Setting details Component Set this to change the component video...

Страница 70: ...MI vpage 65 or Component vpage 65 has been assigned Setting items Setting details Video Mode Make settings for video processing BD DVD TV z SAT CBL DVR GAME z V AUX DOCK Auto Process video automatical...

Страница 71: ...S Decode and play only DTS input signals This item can be set for input sources for which HDMI or Digital is assigned at Input Assign vpage 64 Normally set this mode to Auto Set PCM and DTS when input...

Страница 72: ...ll picture image Interval Set the playback time per image NET USB 5sec 60sec Audio Video Adjust The sound being played in the surround mode can be adjusted to your liking The items parameters that can...

Страница 73: ...ifferent sources we recommend setting to the values below Dolby Digital sources 0dB DTS movie sources 0dB DTS music sources 10dB C Image Assign center channel signal to front left and right channels f...

Страница 74: ...back signals by decoding the signals in the Dolby Pro Logic gx Cinema mode PLgx M Generate and play the surround back signals by decoding the signals in the Dolby Pro Logic gx Music mode OFF Do not p...

Страница 75: ...ted illuminates After running Audyssey Auto Setup if the Speaker Configuration Distance Channel Level and Crossover Frequency have changed without increasing the number of speakers measured only illum...

Страница 76: ...wide expansion OFF Do not set Audyssey DSX This can also be set by pressing A DSX on the remote control unit or press AUDYSSEY DSX on the main unit The indicator illuminates on the display Audyssey D...

Страница 77: ...minating signal components that are hard for the human ear to hear The RESTORER function generates the signals eliminated upon compression restoring the sound to conditions near those of the original...

Страница 78: ...se set if necessary Menu operation 1 Press ZONE SELECT to switch the zone mode to MAIN The MAIN indicator lights 2 Press AMP to set the remote control unit to amplifier operation mode 3 Press MENU The...

Страница 79: ...ally set to Large When Front is set to Small Center Surround S Back F Height and F Wide can not be set to Large Center Set the presence and size of the center speaker Large Use a large speaker that ca...

Страница 80: ...Wide R Select the speaker z z When the Speaker Config S Back setting vpage 75 is set to 1spkr S Back is displayed 0 00m 18 00m 0 0ft 60 0ft Set the distance Setting items Setting details Distance Con...

Страница 81: ...the front speakers to use for every surround mode NOTE This can be set when Amp Assign is set to Front B vpage 75 2CH DIRECT STEREO The front speakers used in the direct stereo and pure direct play m...

Страница 82: ...unit is automatically set to standby OFF This unit does not link with power to a TV Power Off Control can be set when HDMI Control is set to ON Audio Setup Default settings are underlined Make settin...

Страница 83: ...Flat settings can be made when Audyssey Auto Setup is performed Manual Set when not using the Manual equalizer Used Use Not Used Do not use Network Setup Default settings are underlined Make network...

Страница 84: ...e q On the menu select Network Connecting Detail and press ENTER w Use ui to set Proxy and press ENTER e Use o p to set Proxy to ON and press i The proxy server is enabled Setting items Setting detai...

Страница 85: ...sed with Add New Feature The notification message is displayed for about 20 seconds when the power is turned on Connect to broadband Internet vpage 22 when using this function ON Display upgrade messa...

Страница 86: ...etting details Volume Control Set the MAIN ZONE room where the unit is located volume setting Volume Display Set how volume is displayed Relative Display dB Min in the range 80 5 dB 18 dB Absolute Dis...

Страница 87: ...TUNER Always Show display continuously 30sec Show display for 30 seconds after operation 10sec Show display for 10 seconds after operation OFF Turn display off iPod Set the iPod screen display time w...

Страница 88: ...an also check approximately how long it will take to complete an update Start Execute the update process When updating starts the power indicator becomes red and the menu screen is shut down The amoun...

Страница 89: ...backup data for the parameters etc set for this unit The following backup data may be erased after an update or upgrade Internet radio preset channel Internet radio Recently Played data Username regis...

Страница 90: ...layed with Dolby Digital EX and DTS ES Matrix signals DISCRETE with DTS ES Discrete signals Dialogue normalization function This function is automatically activated when playing Dolby Digital sources...

Страница 91: ...d or USB memory device connected to the USB port PHONO TUNER Radio of this unit z z If a preset code is registered for this button the remote control unit of this unit can control another devices NOTE...

Страница 92: ...elect the device category 6 Pressing ui select the first character of the brand name Then press ENTER or p Blu ray CD CD Recorder CABLE CABLE PVR DVD DVD Recorder HD DVD IPTV STB PVR 1 A B C D E F G H...

Страница 93: ...ss QUICK SELECT 1 Go to step 13 If the device is not operating press QUICK SELECT 2 Go to step 14 Operating the main remote control unit 13The screen shown below is displayed and registration of the p...

Страница 94: ...y power some devices on standby n n Digital video recorder PVR video cassette recorder VCR operation Operation buttons Function ZONE DEVICE ON Power onz ZONE DEVICE OFF Power standbyz CH Switch channe...

Страница 95: ...operations NET USB direct play Menu operations Zone power on off It is not possible to operate devices other than the amplifier NOTE This unit cannot be used in the ZONE4 mode DIRECT PLAY button Playb...

Страница 96: ...device are played z4 The input source switches to NET USB and the files in Music on the media server are played z5 The input source switches to NET USB and the files in Favorites are played n n NET U...

Страница 97: ...e song as the one playing in the MAIN ZONE while in a different zone 1 Press ZONE SELECT and set to ZONE2 or ZONE3 The currently selected multi zone indicator illuminates 2 Press M ZONE CALL on the su...

Страница 98: ...Press USB The Z3 indicator flashes r To set to 4 Press ALL MUSIC FAVORITES The Z4 indicator flashes 3 While pressing MENU press ADVANCED SETUP with the tip of a pen The multi zone indicator turns off...

Страница 99: ...CE button 24 Q2TUNING PRESET button 29 Q3ZONE2 3 REC SELECT button 52 58 Q4iPod PLAY button 28 Part names and functions GWith the door openH W3 Q5 Q6 Q7 Q8 Q9 W2 W1 W0 W4 W8 E3 W6 W7 E1 E2 W9 E0 W5 Q5...

Страница 100: ...hat party mode has started as Organizer ATTENDEE This lights to indicate that party mode has started as Attendee Q1AUDYSSEY indicators Lighting is as follows depending on the setting of Dynamic EQ vpa...

Страница 101: ...OUT connectors 5 21 45 48 tSIGNAL GND terminal 20 ySpeaker terminals 5 45 48 uAC inlet AC IN 5 iHDMI connectors 15 oCOMPONENT VIDEO connectors 16 17 Q0Digital audio connectors 16 18 Q1ETHERNET connec...

Страница 102: ...ner system buttons 28 FM AM band switching button BAND Tuning mode button MODE Tuning up Tuning down buttons TUNING df Q2Audyssey buttons 71 72 MULTEQ XT button MULTEQ Dynamic EQ DYNAMIC VOLUME button...

Страница 103: ...RC 1146 RC 1148 w Load the two batteries properly as indicated by the marks in the battery compartment R6 AA RC 1146 RC 1148 R03 AAA e Put the rear cover back on Sub remote control unit RC 1148 q t r...

Страница 104: ...Audyssey MultEQ XT is a registered trademark of Audyssey Laboratories Audyssey Dynamic EQ is a registered trademark of Audyssey Laboratories Audyssey Dynamic Volume is a trademark of Audyssey Laborat...

Страница 105: ...D Dz2 D Sz8 S S DTS Express S D D D Dz2 D Sz8 S S MULTI CH STEREO S D D Dz14 Dz15 Dz16 D S S ROCK ARENA S D D Dz14 Dz15 Dz16 D S S S S JAZZ CLUB S D D Dz14 Dz15 Dz16 D S S S S MONO MOVIE S D D Dz14 D...

Страница 106: ...S S S S S S S S DOLBY TrueHD S S S S S S S S S DTS SURROUND S S S S S S S S S DTS 96 24 S S S S S S S S S DTS HD S S S S S S S S S DTS Express S S S S S S S S S MULTI CH STEREO S S S S S S S ROCK ARE...

Страница 107: ...5 F DTS HD PLgx CINEMA z2z3 S S S S S S S DTS HD PLgx MUSIC z1z3 S S S S S S S DTS HD PLgz z4 S S S S S S S DTS EXPRESS z5 F DTS HD NEO 6 z1z3 S S S S S S DTS NEO 6 CINEMA z5 S S S DTS NEO 6 MUSIC z5...

Страница 108: ...Lgz z4 S MULTI CH IN Dolby EX z3 S MULTI CH IN 7 1 z3 F D 7 1 Audyssey A DSX S DIRECT DIRECT S S S S S S S S S S S S S S S S S PURE DIRECT PURE DIRECT S S S S S S S S S S S S S S S S S DSP SIMULATION...

Страница 109: ...VIDEO A S VIDEO 31 OFF A A S S A A 32 OFF A S A A A COMPONENT A A COMPONENT z2 A 33 OFF A S A S A VIDEO A VIDEO 34 OFF A S S A A S VIDEO A S VIDEO 35 OFF A S S S A 36 OFF S A A A HDMI A A A z2 A 37 OF...

Страница 110: ...re used instead of Back Surround speakers Adding surround channels behind the listener has a very small impact compared to the increase in envelopment and soundstage width that the front wide channels...

Страница 111: ...ress is an audio format supporting low bit rates max 5 1 channels 24 to 256 kbps DTS HD This audio technology provides higher sound quality and enhanced functionality than the conventional DTS and is...

Страница 112: ...horized by Microsoft Corporation If you use an unauthorized application the file may not work properly X x v Color This function lets HDTVs display colors more accurately It enables display with natur...

Страница 113: ...s depending on the input signal or selected surround mode 5 45 48 6 75 75 DTS sound is not output Set Decode Mode on the menu to Auto or DTS 67 Dolby TrueHD DTS HD Dolby Digital Plus audio is not outp...

Страница 114: ...nection to a computer 30 31 30 Server is not found or it is not possible to connect to the server The computer s or router s firewall is activated Check the computer s or router s firewall settings Co...

Страница 115: ...ocessor is reset all the settings are reset to their default values DSP SIMULATION STANDARD ON STANDBY 1 Turn off the power using ON STANDBY 2 Press ON STANDBY while simultaneously pressing STANDARD a...

Страница 116: ...stortion factor 0 03 1 kHz 3 V n n Video section Standard video connectors Input output level and impedance 1 Vp p 75 Frequency response 5 Hz 10 MHz 1 3 dB Color component video connector Input output...

Страница 117: ...tuner 17 Set top box 15 17 Speaker 4 45 TV 5 15 16 USB memory device 19 Contrast 74 Crossover Frequency 77 C Width 69 v vD D Comp 69 Decode Mode 67 Deep Color 14 106 Delay Time 69 DENON original surr...

Страница 118: ...Operating AV equipment 87 Operating components 90 Registering Preset Codes 87 Remote ID Setup 84 Remote mode 25 27 Remote Preset Codes 83 Rename 67 Repeat 67 68 Resetting the microprocessor 111 Resol...

Страница 119: ...D M Holdings Inc Printed in China 5411 10430 108D www denon com...

Отзывы: