10.Settings
44
45
10.Settings
EN
100%
0
time(ms)
U
grid /
U
n
2
1
90 %
40 %
3
200
400
0%
85 %
110%
Fig. 11.3.:
FRT characteristic
10.2.5
Grid change and PIN process (via Web
Interface)
ETHERNET
ATTENTION
If the selected grid is changed, a completely
new commissioning process is started, see
Chapter 8 Commissioning
► Always first contact the Delta Support
Team
before
changing the selected
grid!
NOTE
► You always require a PIN in order to en
-
ter the grid selection mode. You require
a new PIN each time you wish to select
a new grid. You obtain a PIN from the
Delta Support Team on request.
You must provide a key in order to receive a PIN.
1. To display the key, navigate to
Configuration menu >
General > Country Grid Settings and press the but-
ton for a code request
.
The key consists of 11 numbers and letters.
2. The Delta Support Team will provide you with the four-
digit PIN.
3. When you have received the PIN navigate to the menu
Communication Settings and Install Settings
(on
the display interface) and press the
e
nter
button.
→ The first digit of the PIN flashes.
4. Use the
S
el
button to set the first digit and press the
e
nter
button to proceed to the next digit.
→ After entering the full PIN, press the
e
nter
button
to confirm the entered PIN.
→
The
Installation
menu is displayed.
5. Start the commissioning of the solar power inverter
10.2.6 Insulation Mode (on display interface)
The following diagram illustrates how the Insulation and
Resistance fine tuning on the display interface can be
accomplished. However, we recommend that you keep the
default setting where the insulation mode is enabled.
Insulation Mode
XXX
SEL
XXX :
Enable
Disable
+Grd
-Grd
Insulation Start
Insulation
Insulation
Enter
Resistance
XXX
ENT
XXX
Next / Enter
XXX
N / Y
ENT
SEL
SEL
ENT
ENT
XXX
Next / Enter
XXX
N / Y
ENT
SEL
SEL
ENT
SEL
XXX :
1150 Kohm
(Default)
500
Kohm(VDE0126
min.)
166 Kohm
The default settings of all countries :
Insulation Default Mode = Enable
Resistance Default Mode = 1150 KΩ
IEC62109-2:
Minimum Value R = VMAX PV/30 mA = 33K
VDE0126:
The array insulation resistance to ground shall be not less
than 1 k Ω/V with respect to the maximum dc input voltage
as specified by the manufacturer, with a minimum of 500
KΩ.
We suggest the resistance as below (In order to comply
with IEC62109-2 and VDE0126, but not to consider vari
-
ous country settings and the resistance error): 1150 KΩ
(Default), 500 KΩ (VDE0126 min.), 166 KΩ.
10.2.7
RS485 ID Setting (on display interface)
The following diagram illustrates how the RS485 ID can be
set on the display interface.
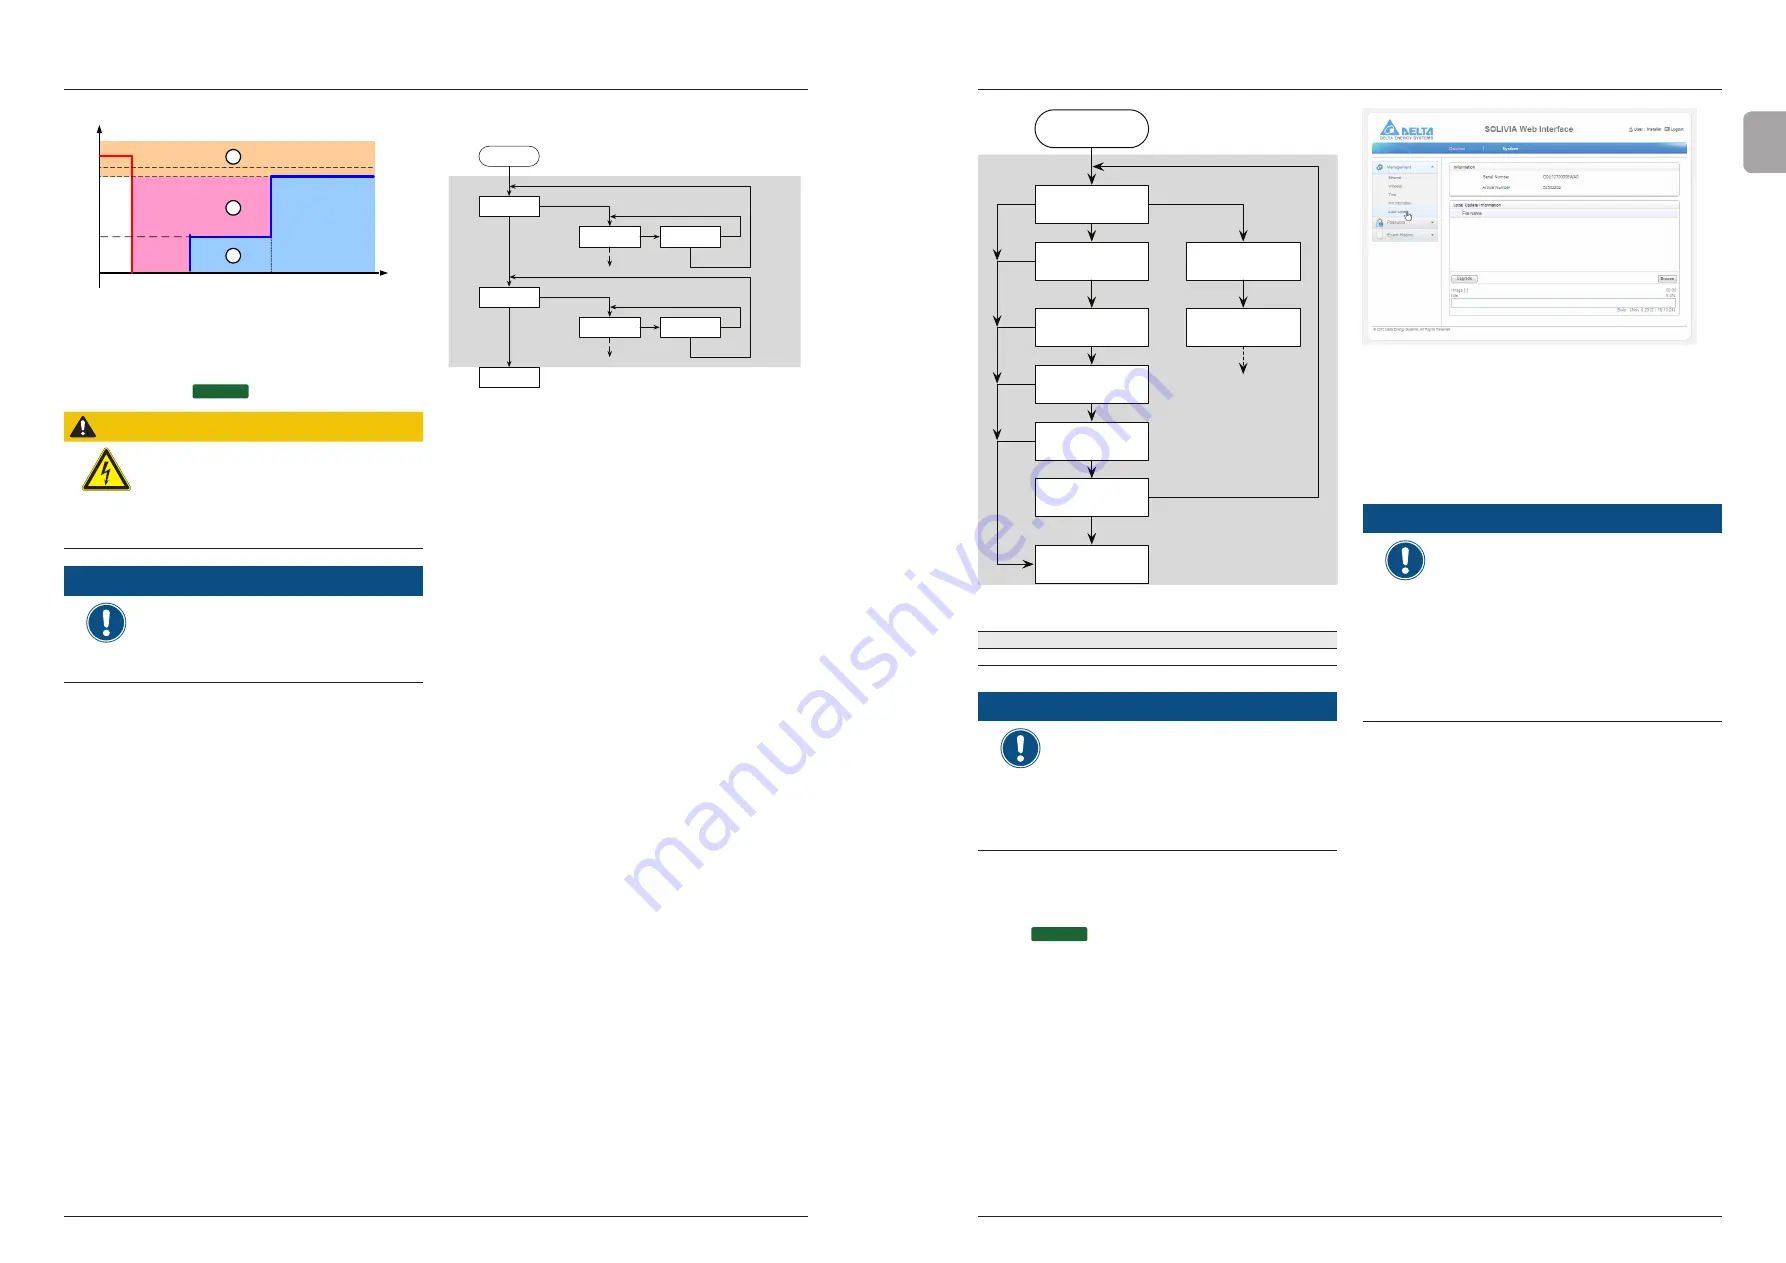
2. Click on the Browse button within the interface to select
the firmware file. The appropriate firmware can be
obtained from the Delta support team.
3. Press Upgrade button to initiate the firmware file.
þ
The firmware will be updated after the upload process.
NOTE
Communication Module to Support
Firmware Updates
► If you do not have the communication
module with integrated web server and
ethernet, then it will not be possible
to update the firmware in this manner.
It would be possible to purchase the
appropriate communications module
to allow the update of your firmware.
Please check with Delta support team
for more details on this accessory.
RS485 ID Setting
Start
RS485 ID
Setting
Setting ID
ID = 01 ?
Setting ID
ID = 02 ?
Setting ID
ID = 10 ?
SEL
SEL > 2 sec.
Setting ID
ID = 03 ?
Setting ID
ID = 20 ?
Hold SEL
SEL
Inverter
ID : XX
Setting ID
ID = xx ?
SEL
ENT
Setting ID
ID = 254 ?
SEL
Setting ID
Exit ?
SEL
ENT
ENT
ENT
ENT
ENT
ENT
SEL
Hold SEL
Configurable parameters
Display text
Designation
Description
ID
RS485 ID
1 .. 255
NOTE
Connecting multiple solar inverters via
RS485
► Select a different ID for each solar
power inverter.
► Set the termination switch to
On
on the
communications module at the last solar
power inverter in the row.
10.3 Firmware Update (via Web Interface)
ETHERNET
For inverters with the appropriate communication module
(RS485 / Ethernet or Ethernet / WiFi version), firmware can
be updated via the integrated web pages.
1. To initiate a firmware update, first find the appropriate
menu within the SOLIVIA web interface.
System Setting > Management > Local Update
The following window will appear:


