


100
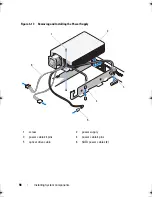
Installing System Components
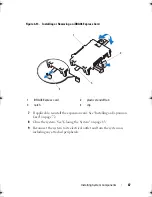
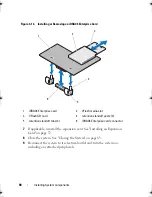
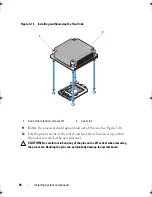
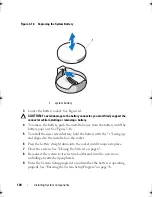
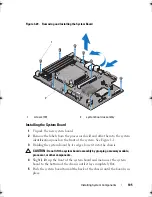
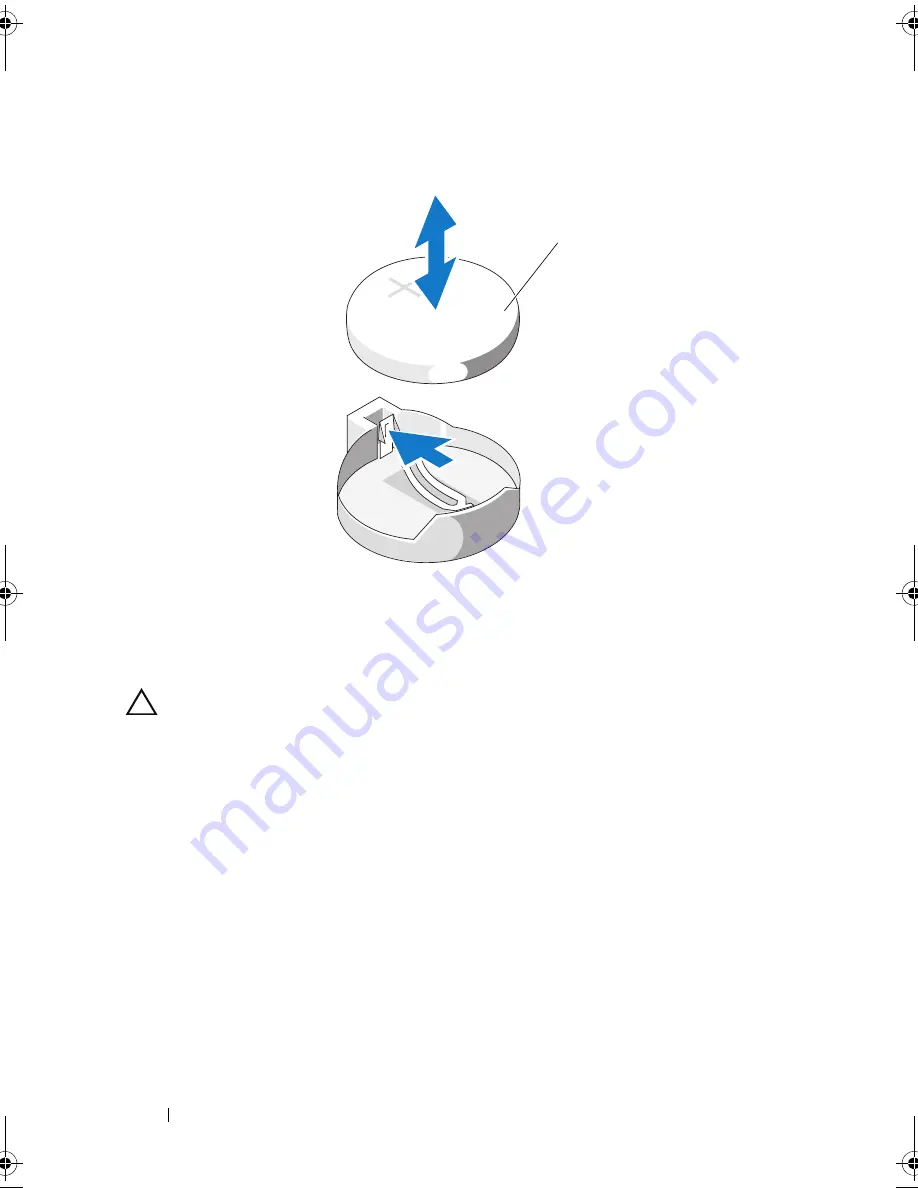
Figure 3-18.
Replacing the System Battery
3
Locate the battery socket. See Figure 6-1.
CAUTION:
To avoid damage to the battery connector, you must firmly support the
connector while installing or removing a battery.
4
To remove the battery, push the metal tab away from the battery until the
battery pops out. See Figure 3-18.
5
To install the new system battery, hold the battery with the "+" facing up,
and aligned to the metal tab on the socket.
6
Press the battery straight down into the socket until it snaps into place.
7
Close the system. See "Closing the System" on page 63.
8
Reconnect the system to its electrical outlet and turn the system on,
including any attached peripherals.
9
Enter the System Setup program to confirm that the battery is operating
properly. See "Entering the System Setup Program" on page 38.
1
system battery
1
book.book Page 100 Wednesday, August 12, 2009 4:51 PM
Содержание External OEMR R210
Страница 1: ...Dell PowerEdge R210 Systems Hardware Owner s Manual ...
Страница 9: ...Contents 11 7 Getting Help 133 Contacting Dell 133 Glossary 135 Index 145 ...
Страница 10: ...12 Contents ...
Страница 34: ...36 About Your System ...
Страница 56: ...58 Using the System Setup Program and UEFI Boot Manager ...
Страница 128: ...134 Getting Help ...
Страница 138: ...144 Glossary ...
Страница 143: ...Index 149 V VFlash media 93 video troubleshooting 110 W warning messages 34 wet system troubleshooting 112 ...
Страница 144: ...Index 150 ...