


Rooster™
Sensor200 USER MANUAL
Rooster™
Sensor200 USER MANUAL 62360MN000-A00
35 of 40
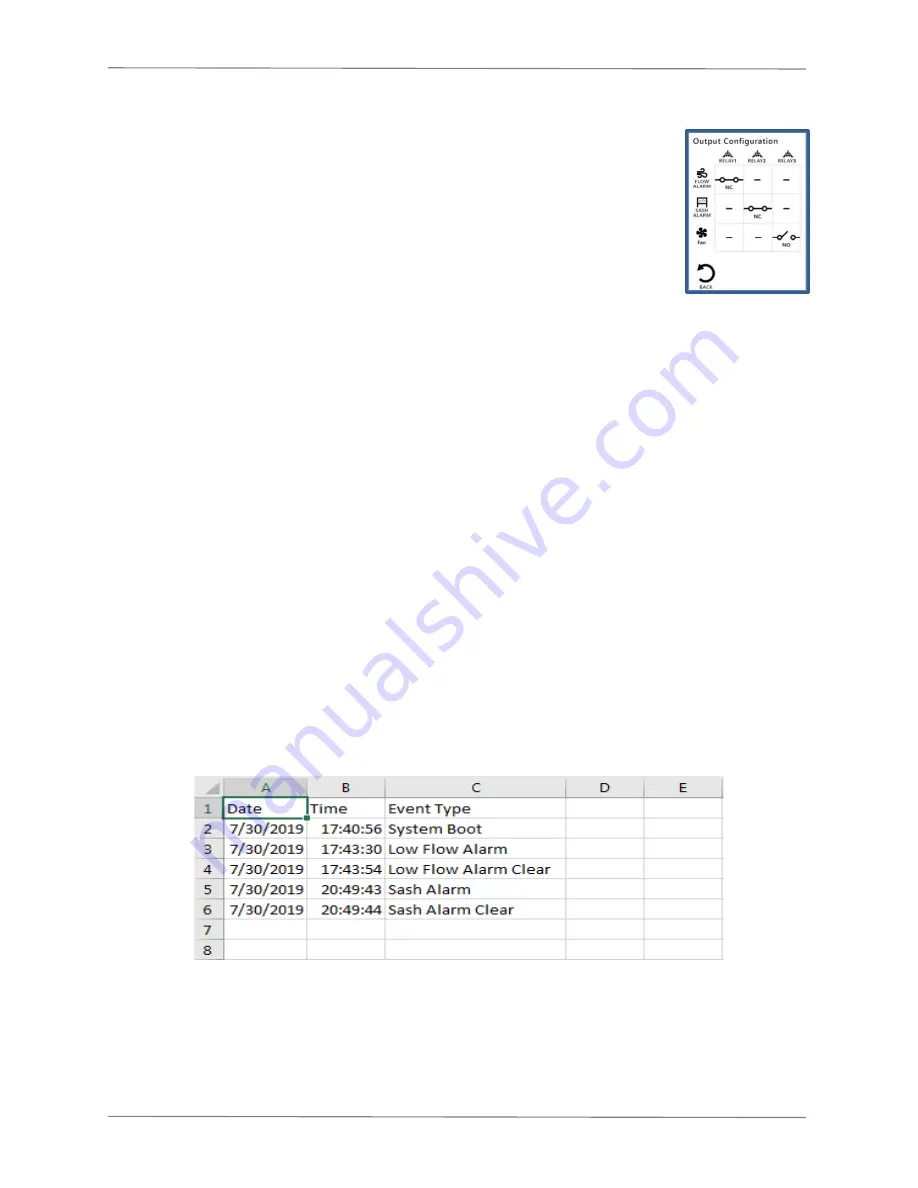
I/O Polarity
For advanced users, it may be helpful to toggle relay and input nodes from
normally open to normally closed. In the default state, a closed relay output
denotes an alarm. If the alarm state is required to be an open relay, then
toggle the output on the Sensor200.
For example: The Flow Alarm and Sash Alarm are configured by default to
alarm when the relay is closed. If these are toggled to Normally Closed, then
this logic is reversed.
Home>Settings>System>Advanced>I/O Configuration>Output Configuration
Import/Export
EEPROM
The user can save all current Rooster
TM
settings to a USB thumb drive for future use. Importing
the EEPROM configuration file to other Rooster
TM
Sensor200s in your facility ensures operational
consistency and saves valuable setup time. Plug a USB thumb drive into the Rooster
TM
and
navigate to the Import/Export menu to select the Import EEPROM or Export EEPROM function.
Home>Settings>System>Advanced>Import/Export
Event Log
The Rooster
TM
logs the date and time of alarms and alarm recovery as well as system boot time
to its internal SD card. Users can export the event log in .csv format to a USB thumb drive.
Simply plug a USB thumb driving into the Rooster
TM
and select Export Event Log from the
Advanced menu. Users also have a selection to delete the event log.
Home>Settings>System>Advanced>Import/Export
Figure 9 Event Log in .CSV Format
Users can also view the event log on screen by navigating to the Info screen and then pressing
“Event Log” to view.


